With a recent pulley injury, I’ve had a lot of free time NOT climbing. So, given how much I’ve been enjoying board climbing and how I’ve been obsessing over certain aspects of it (see some fun data modelling: TB2, Kilter, ClimbingBoardGPT), I started to think about building my own, which was partly motivated by someone talking about their own board at my climbing gym. The idea was to build a freestanding pseudo-adjustable wall that fits in my basement (pseudo-adjustable meaning: fixed, but if I REALLY wanted to, I could change the angle with a couple of minutes of drilling). I opted not to install T-nuts and just use custom-made screw-on holds. I also wanted to build it for essentially free, and to use up a bunch of wood that was lying around the house.
I’d be lying if I said I did lots of planning, but it worked out. The final board has:
- a 1 ft kickboard
- a main wall that is approximately 8 ft × 8 ft
- a hinged connection between the kickboard and the main board
- screw-in holds instead of T-nuts
- a fixed angle of approximately 49° overhanging from vertical. At first I wanted 50°, then changed my mind and aimed for 45°, and then messed up a bit. So I’m satisfied with what I got.
- the possibility to change the angle with a bit of work

Note: this is not a professional guide. Climbing and climbing walls involve risk, and I do not endorse this as a guide or walkthrough. This is a personal DIY project, and this is simply a reflection on my experience. Lastly, the way I present things is not the exact order in which I did them.
The Build
Here we discuss the build, roughly in the order that I did things. There were a bunch of 2x4s at the side of the house, so that’s what the frame is made out of. They are about 7 feet and 11 inches long (241.1 cm). It is usually recommended to use 2x6s for this kind of thing, but again, I’m just trying to see if I can make a board out of what I have.
The Kickboard
The kickboard’s job is to create a small vertical or near-vertical lower section before the main board begins. This gives the wall a more natural starting position and makes the first moves less awkward. The kickboard also serves as the base section where the main board attaches with hinges.
Here is the initial diagram.
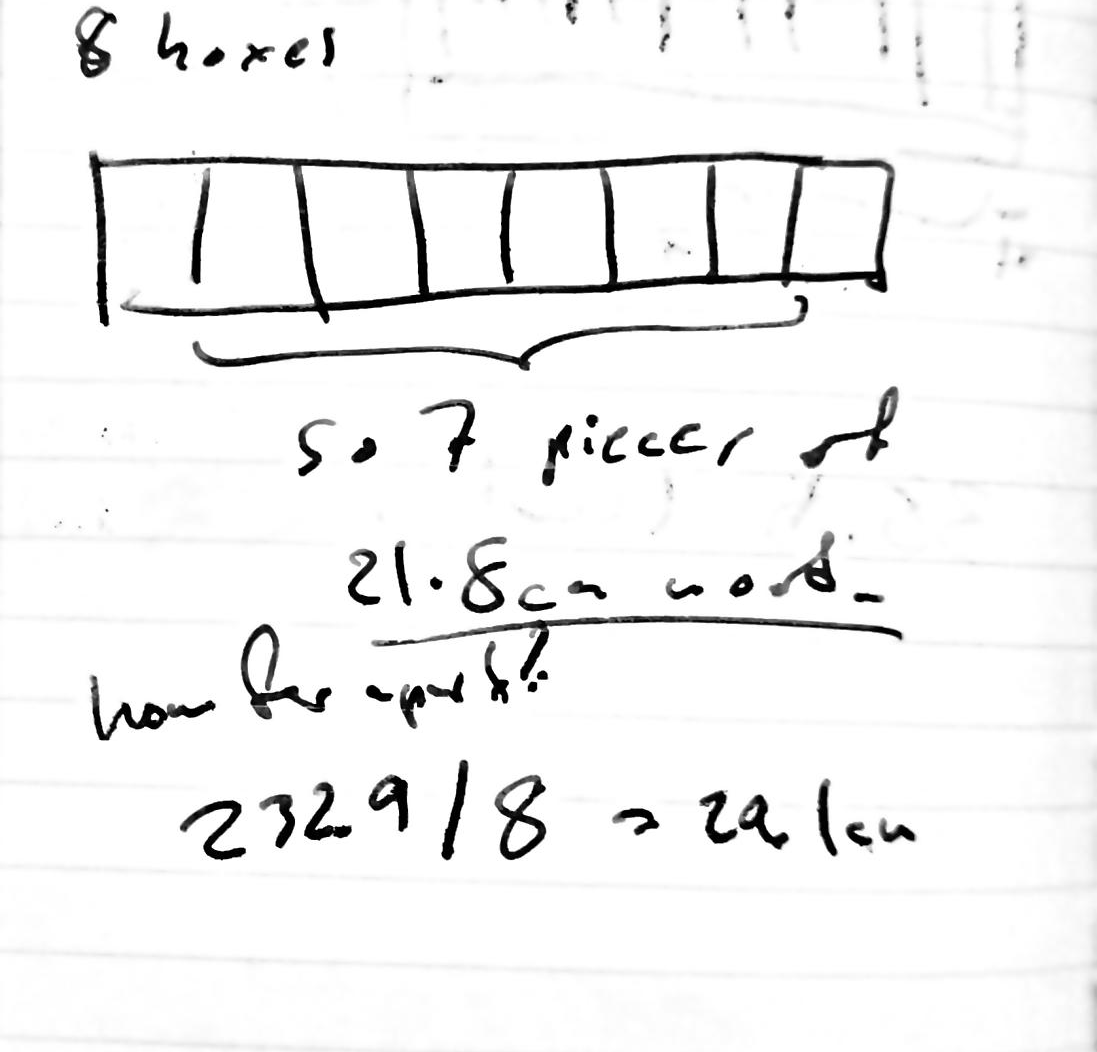
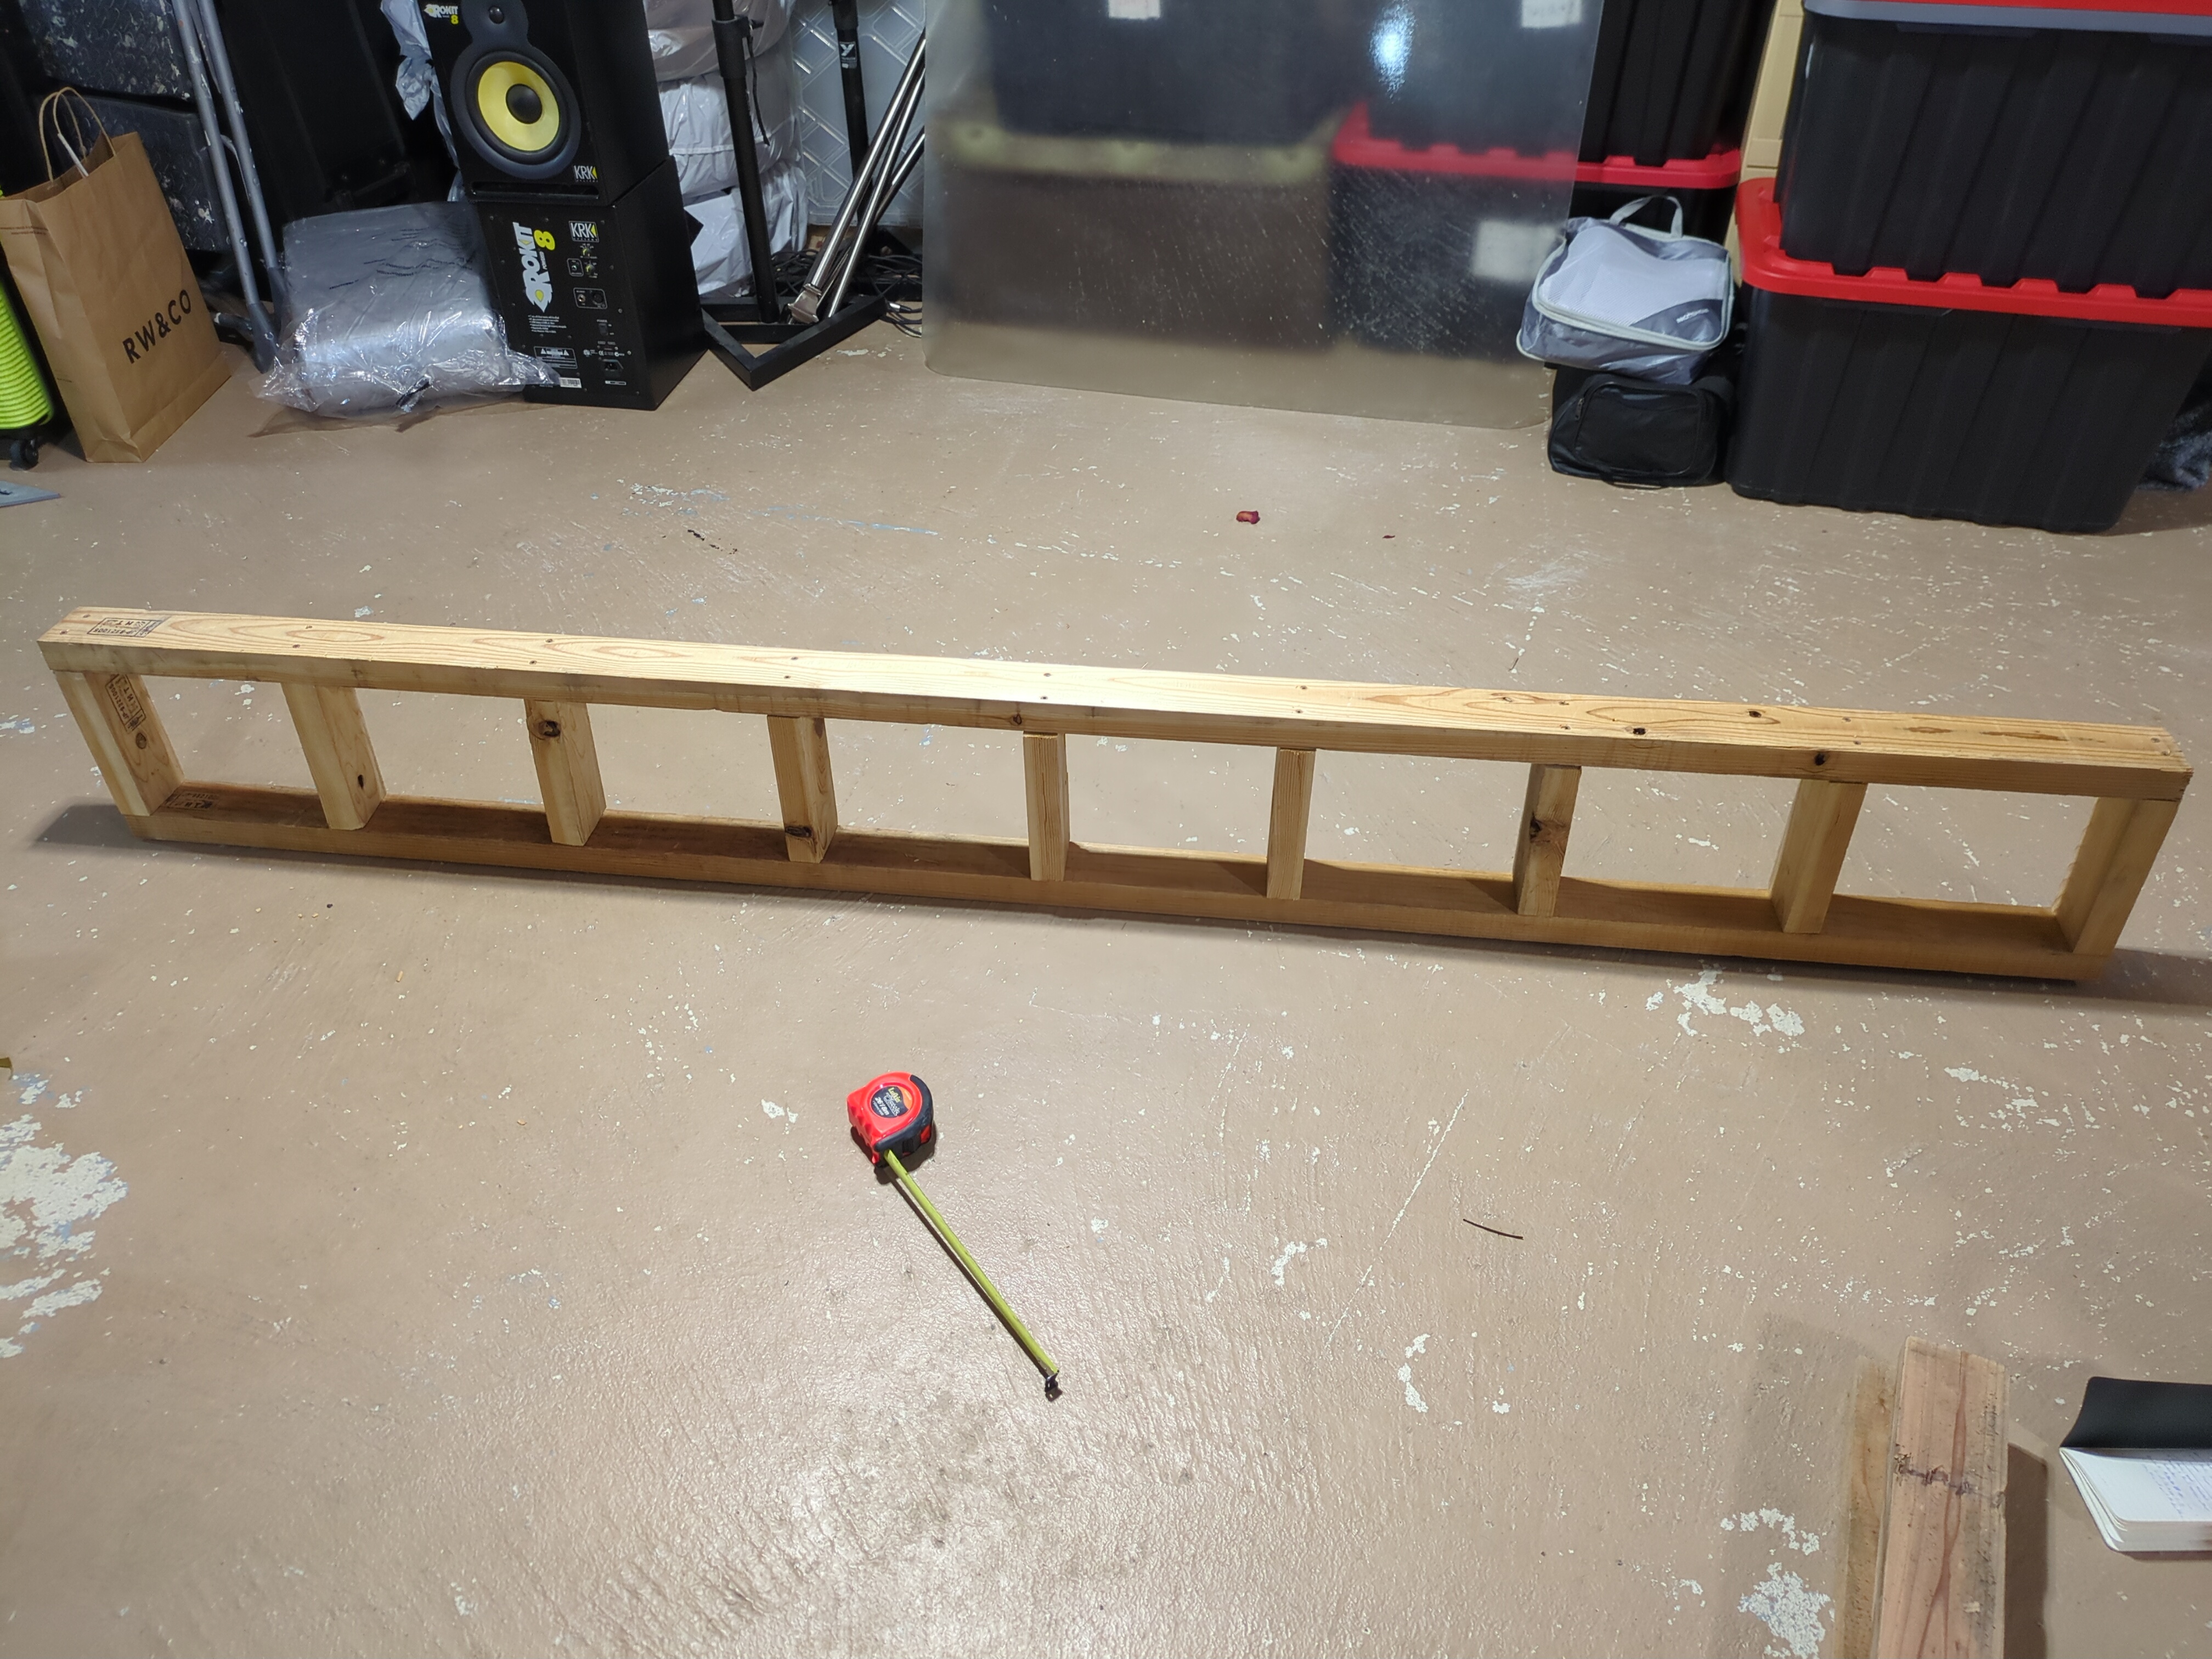
The kickboard is about 1 ft high (30 cm), with 7 cut pieces of wood in the middle to give it some structure (so 8 visual boxes).
For now, we attach some plywood. I was okay with not-so-great plywood here since the framing is so tight.
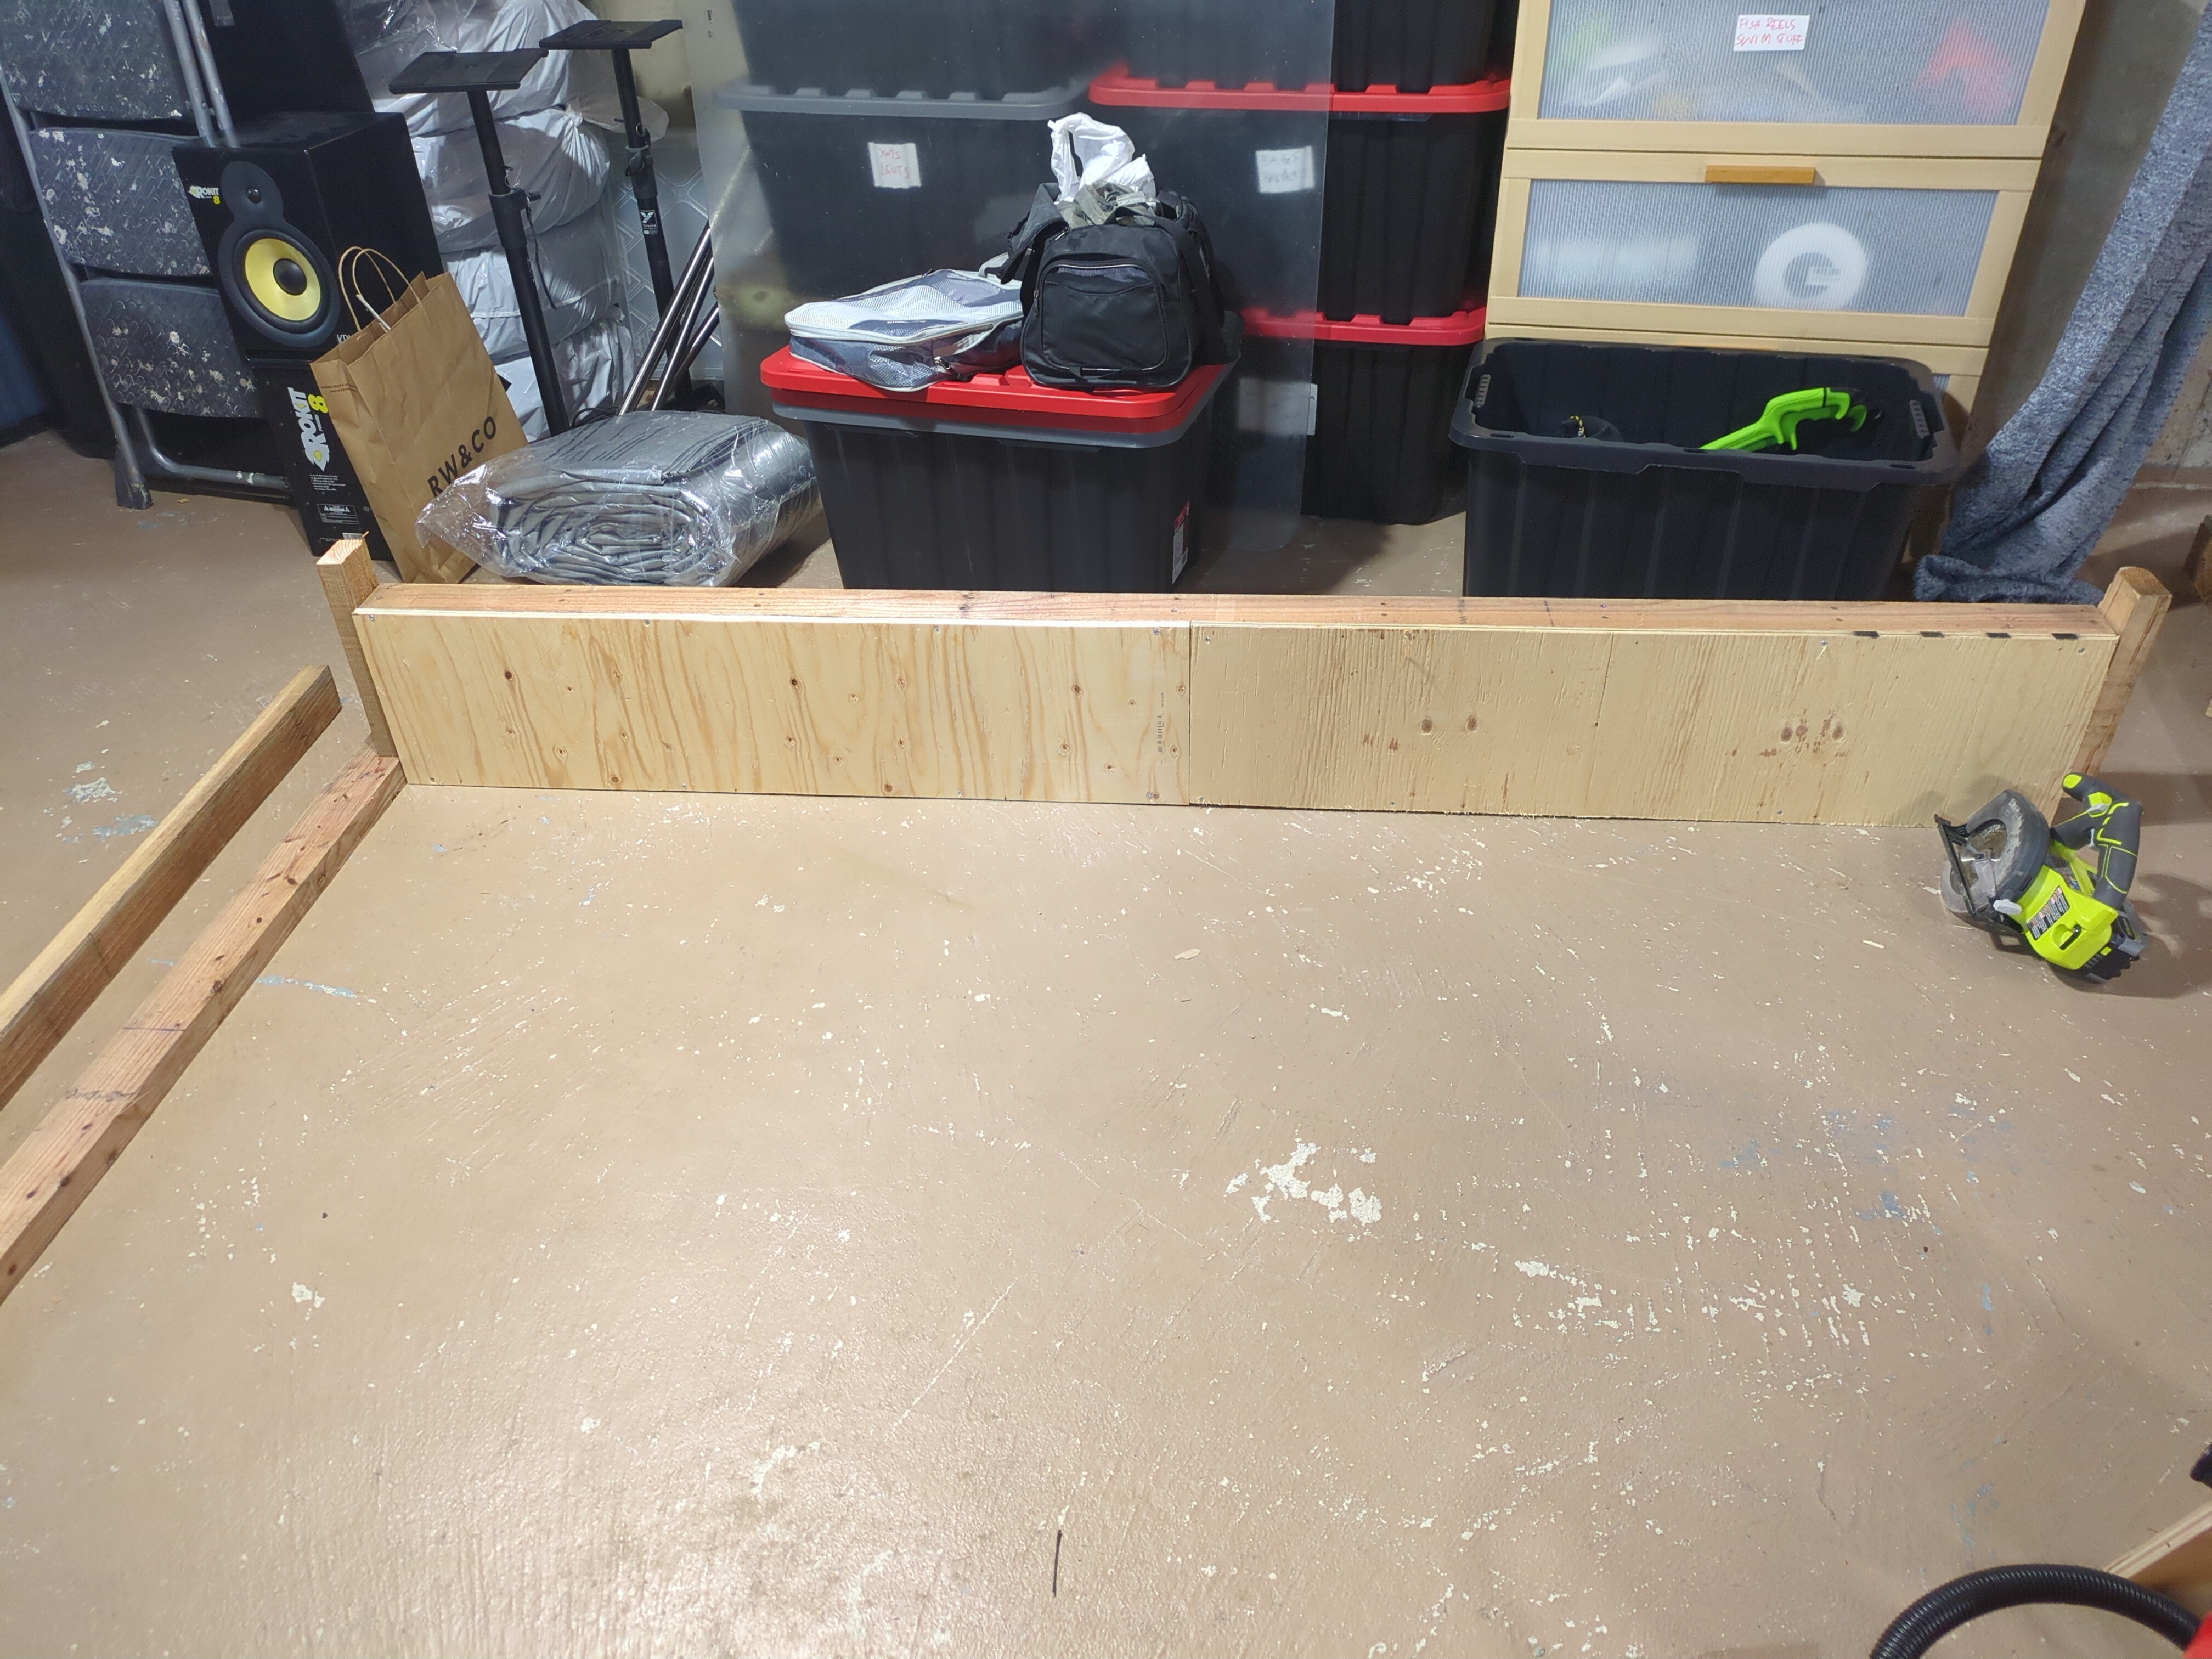
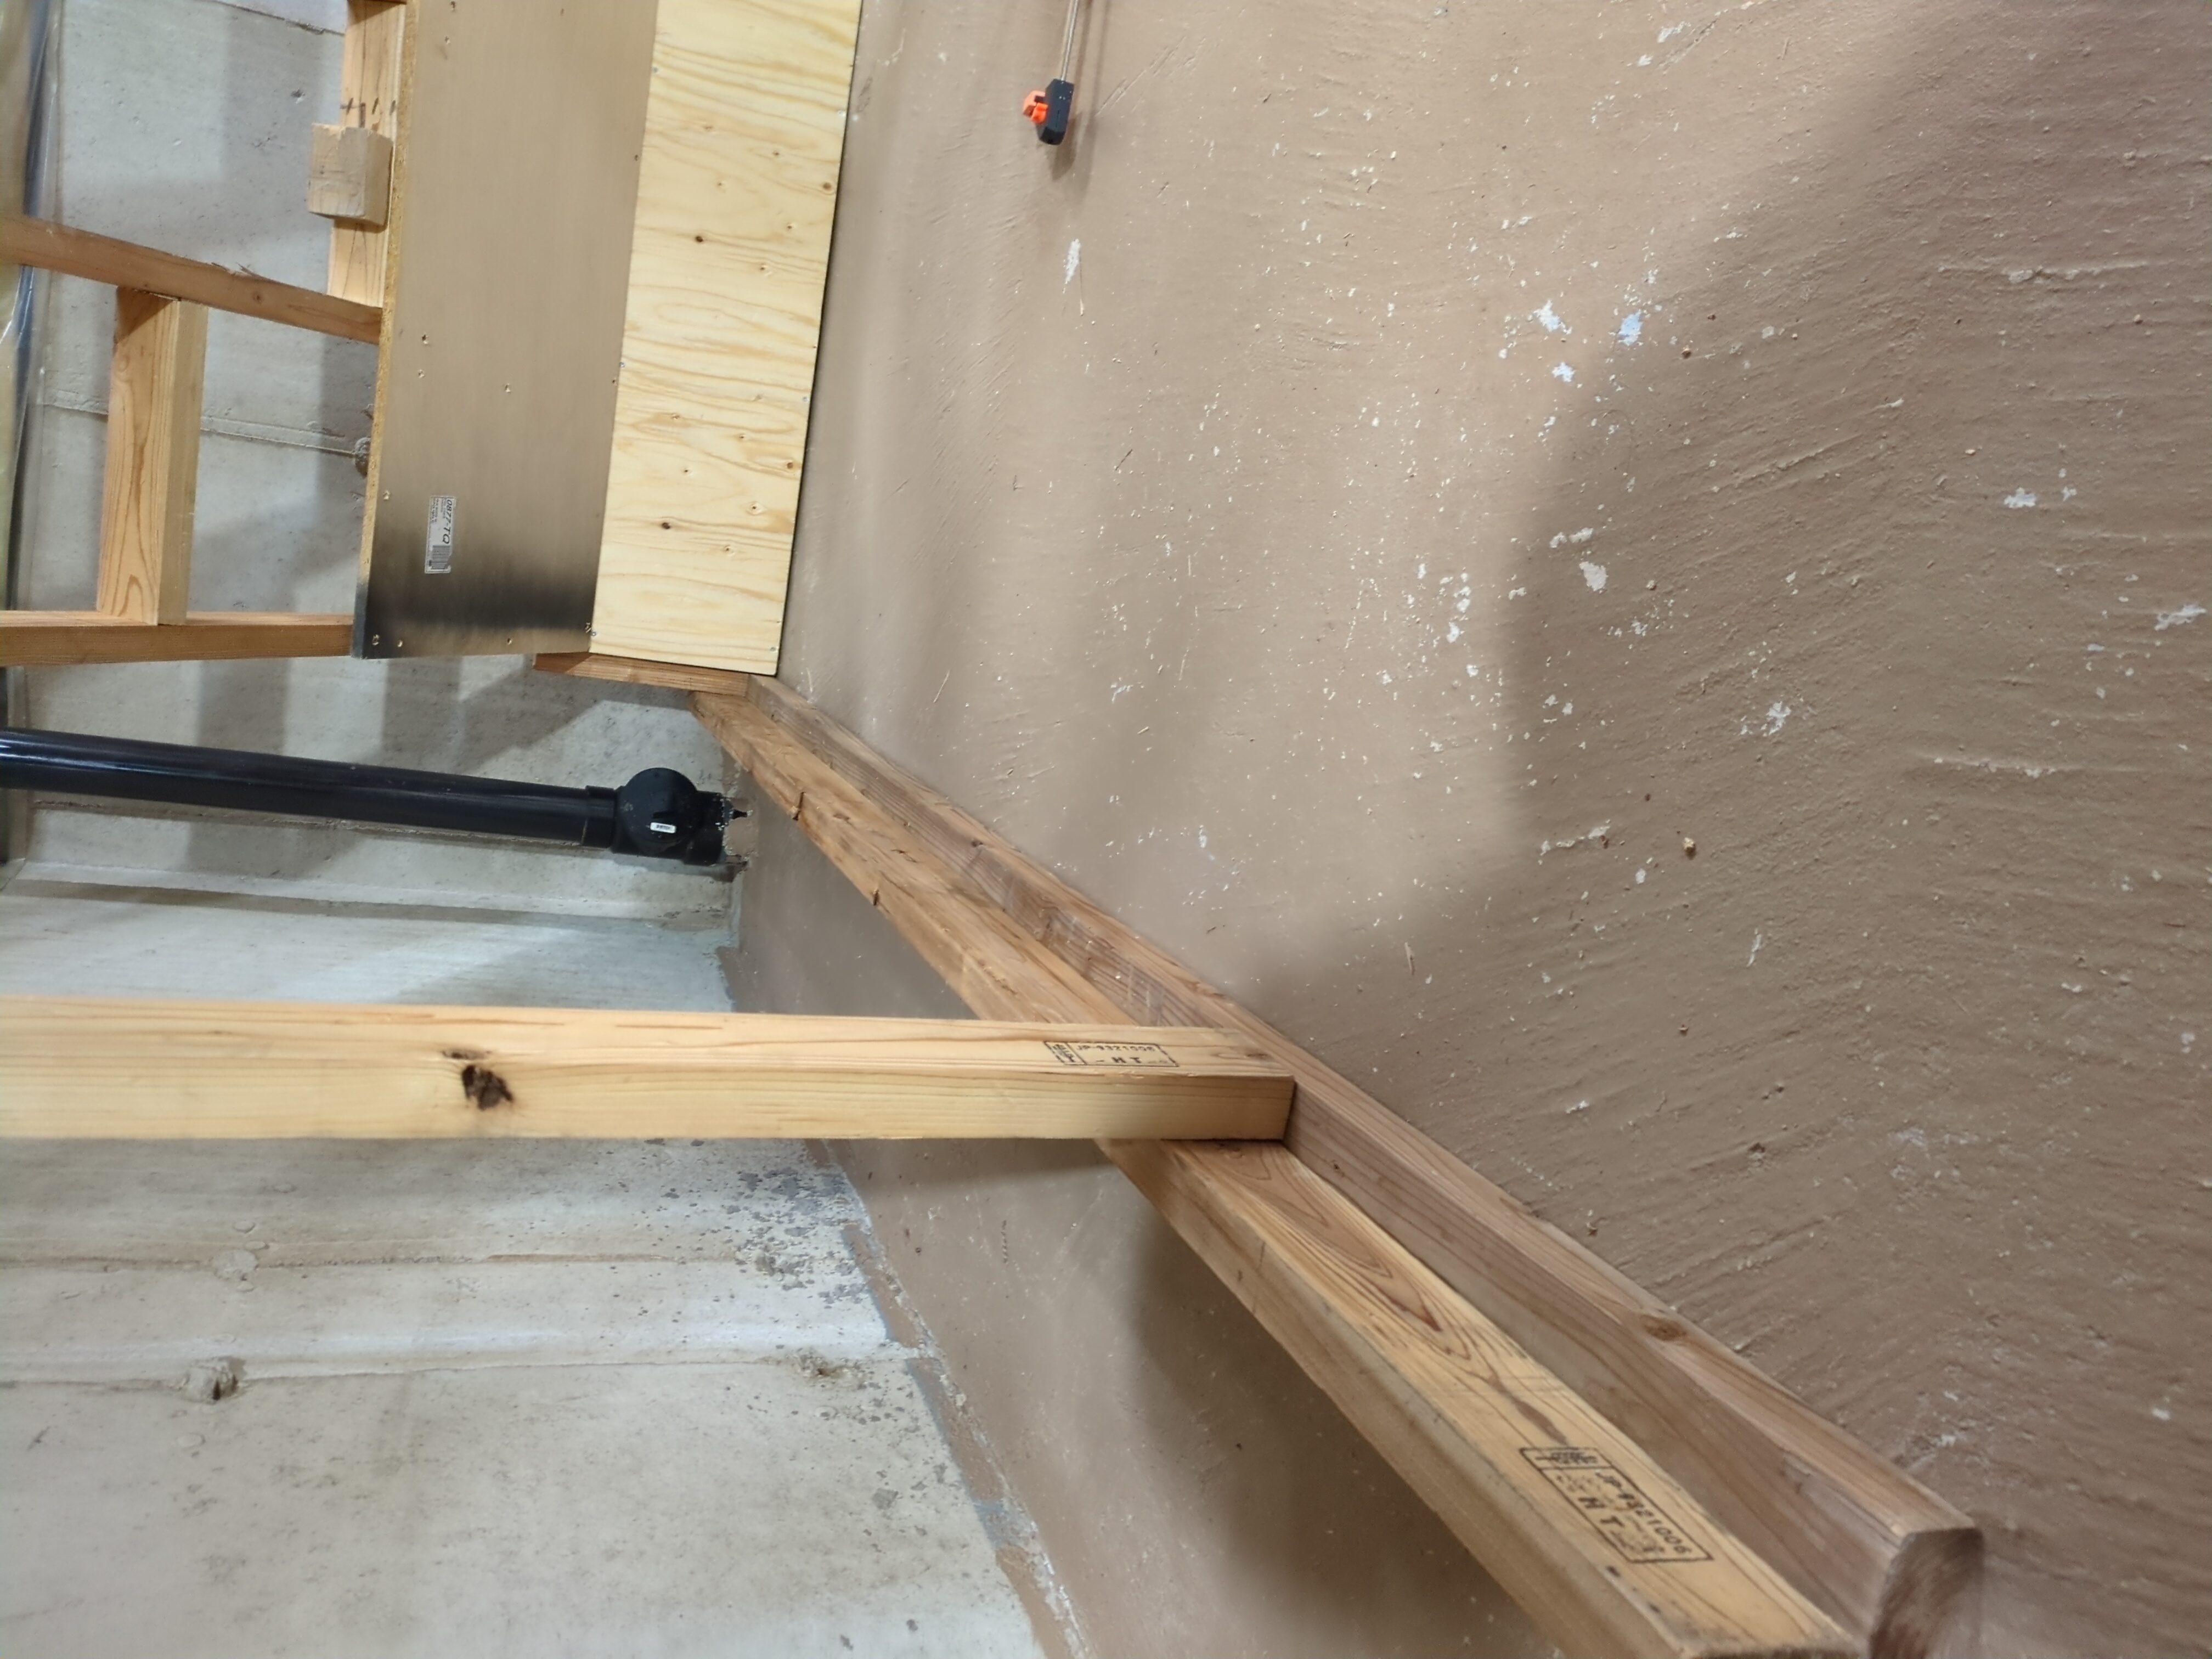
Later, we’ll attach a 2x4 on each side, which will give some more stability to the 2x4s that will hold the main board up. These will be screwed onto two pieces of 2x4 that can be seen at the side of the kickboard above. This is so that we can screw them into the kickboard from the sides, rather than flipping the whole thing over and back again. My ceiling is too low for me to be flipping 8 ft things. The final product looks something like this:
I basically screwed everything together before screwing it onto the kickboard. Again, it would be impossible or extremely difficult to do this (I tried!) once everything is already assembled. We’ll see another mistake I made later.
The Main Board Frame
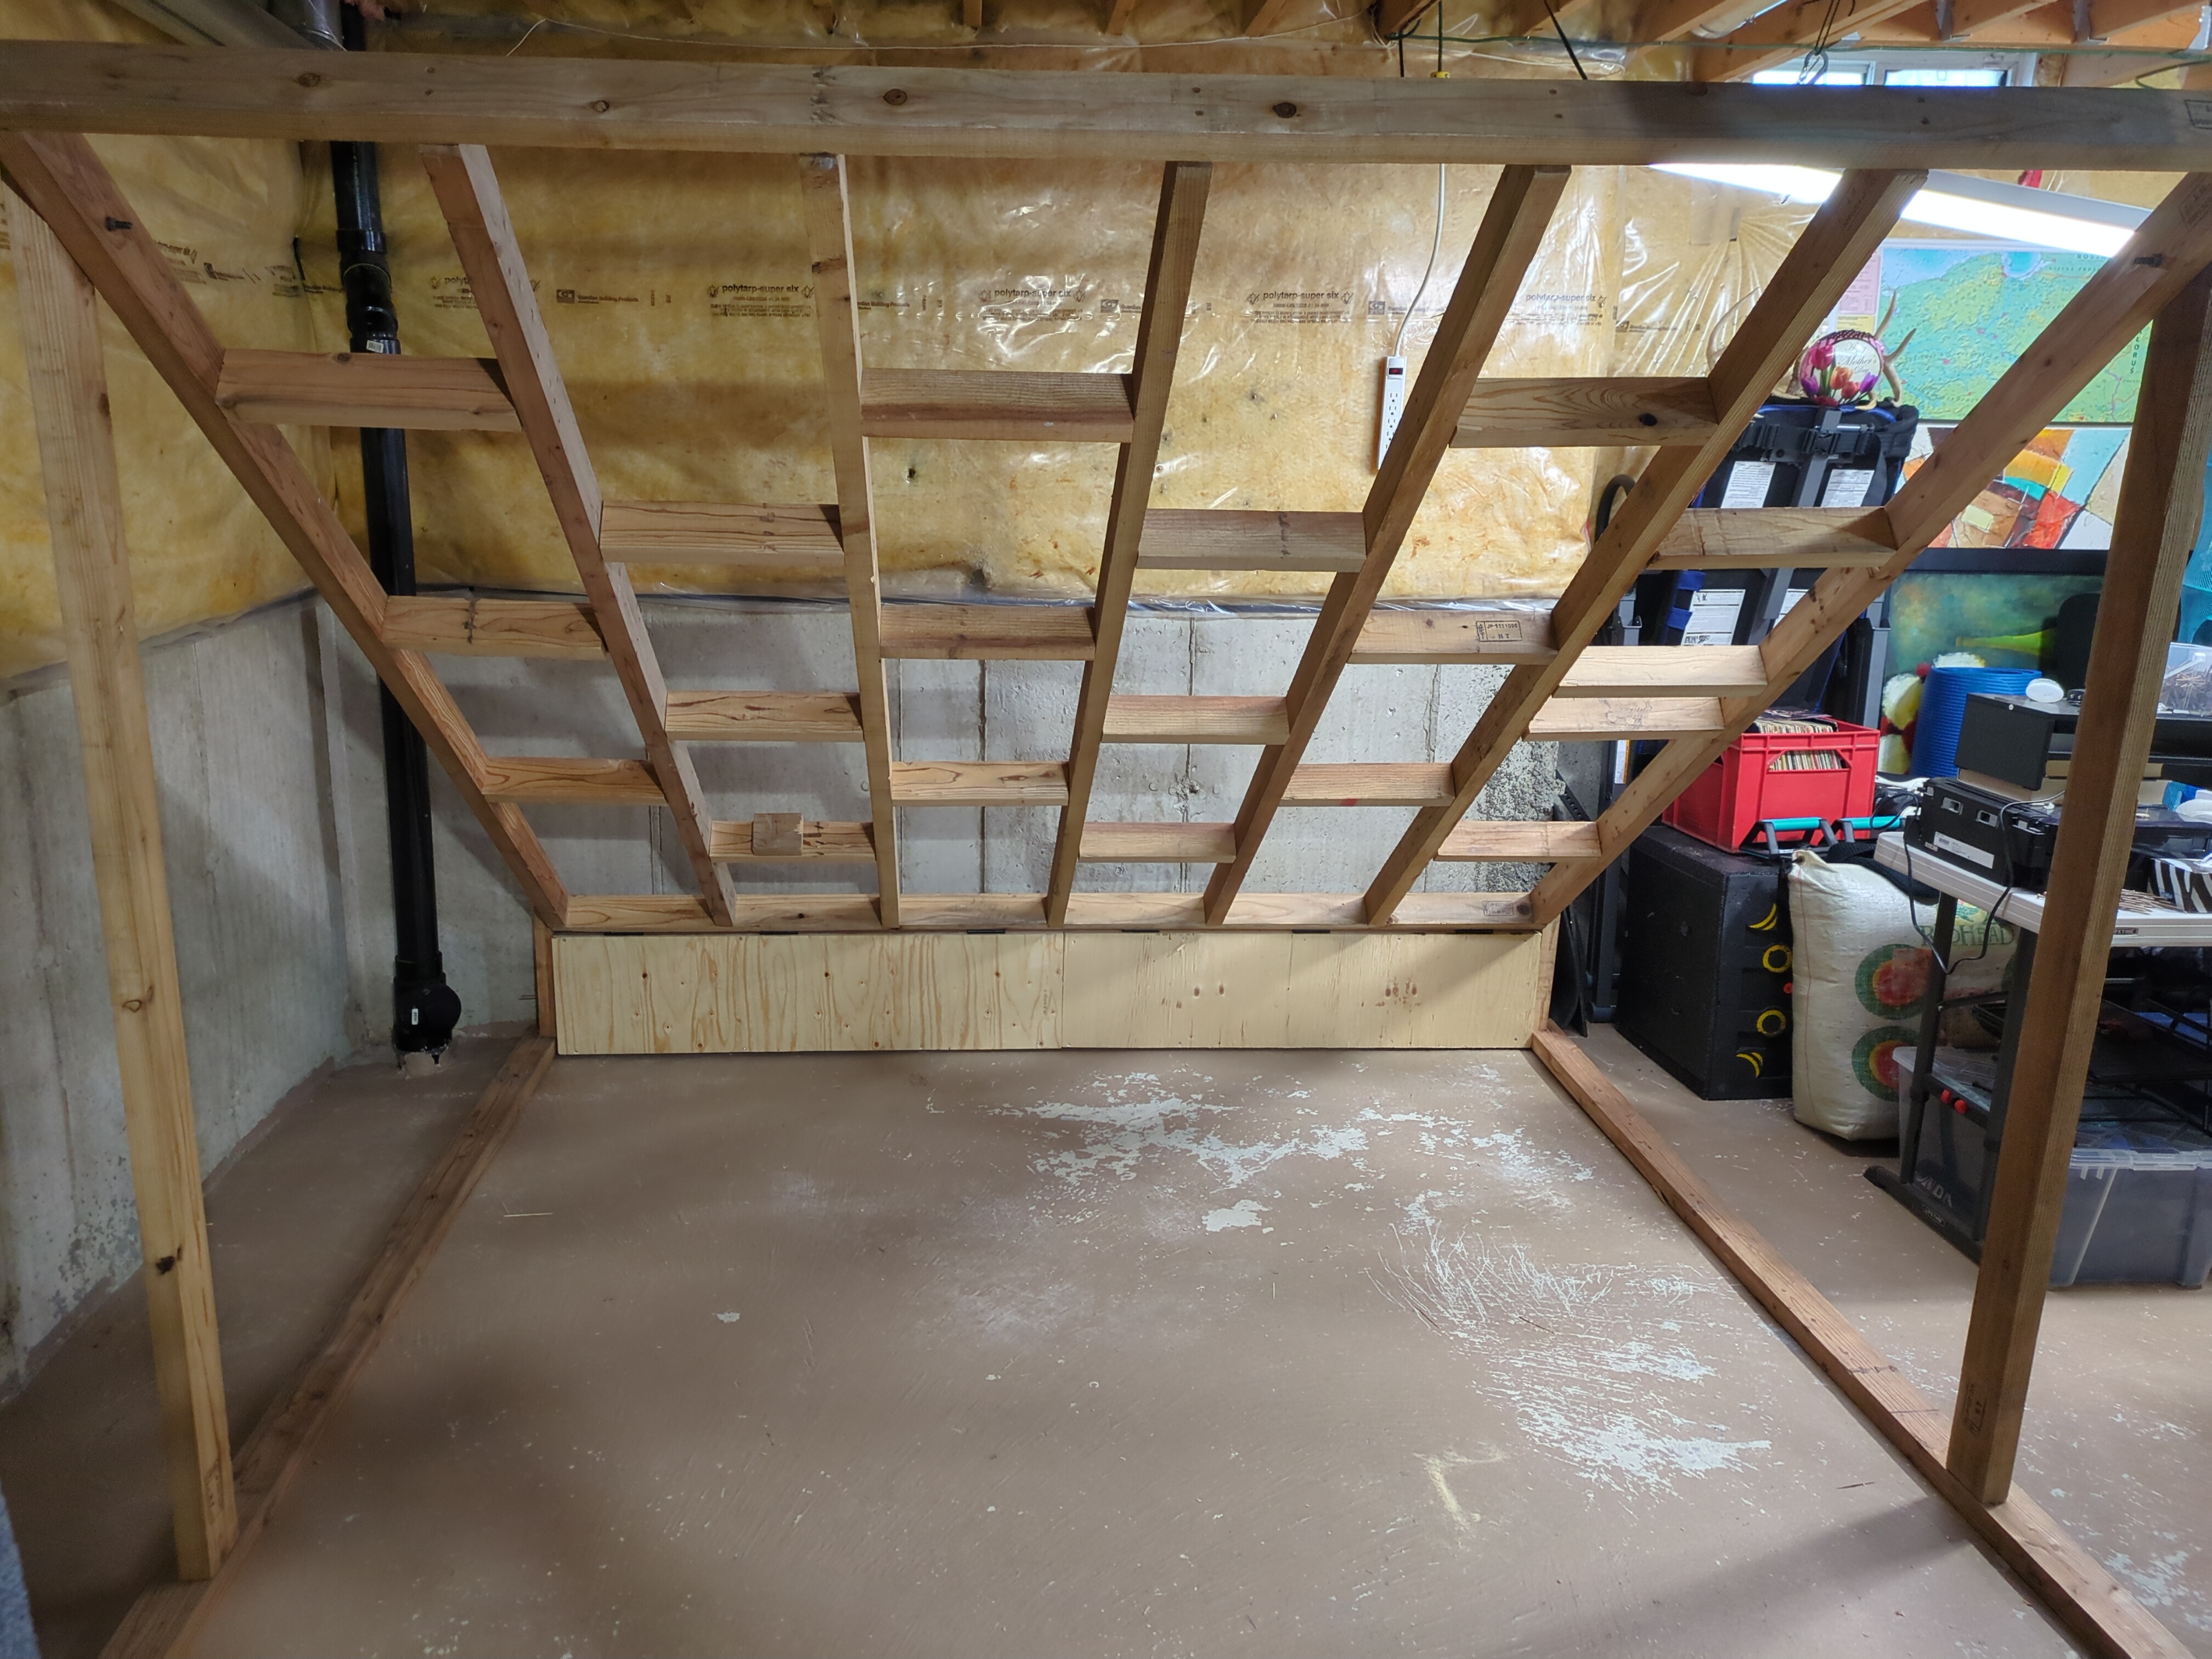
The main board is approximately 8 ft by 8 ft. This will fit in my basement at an angle, but will not fit straight up. We first need to build the frame. This will be a series of 2x4s screwed together with about 6 vertical boxes in the middle. So it’s a box of 2x4s with 5 vertical pieces in the middle. I then cut some wood to fill things in horizontally. I decided on the density because I was using 2x4s instead of 2x6s, along with the fact that I would be using assorted pieces of plywood.
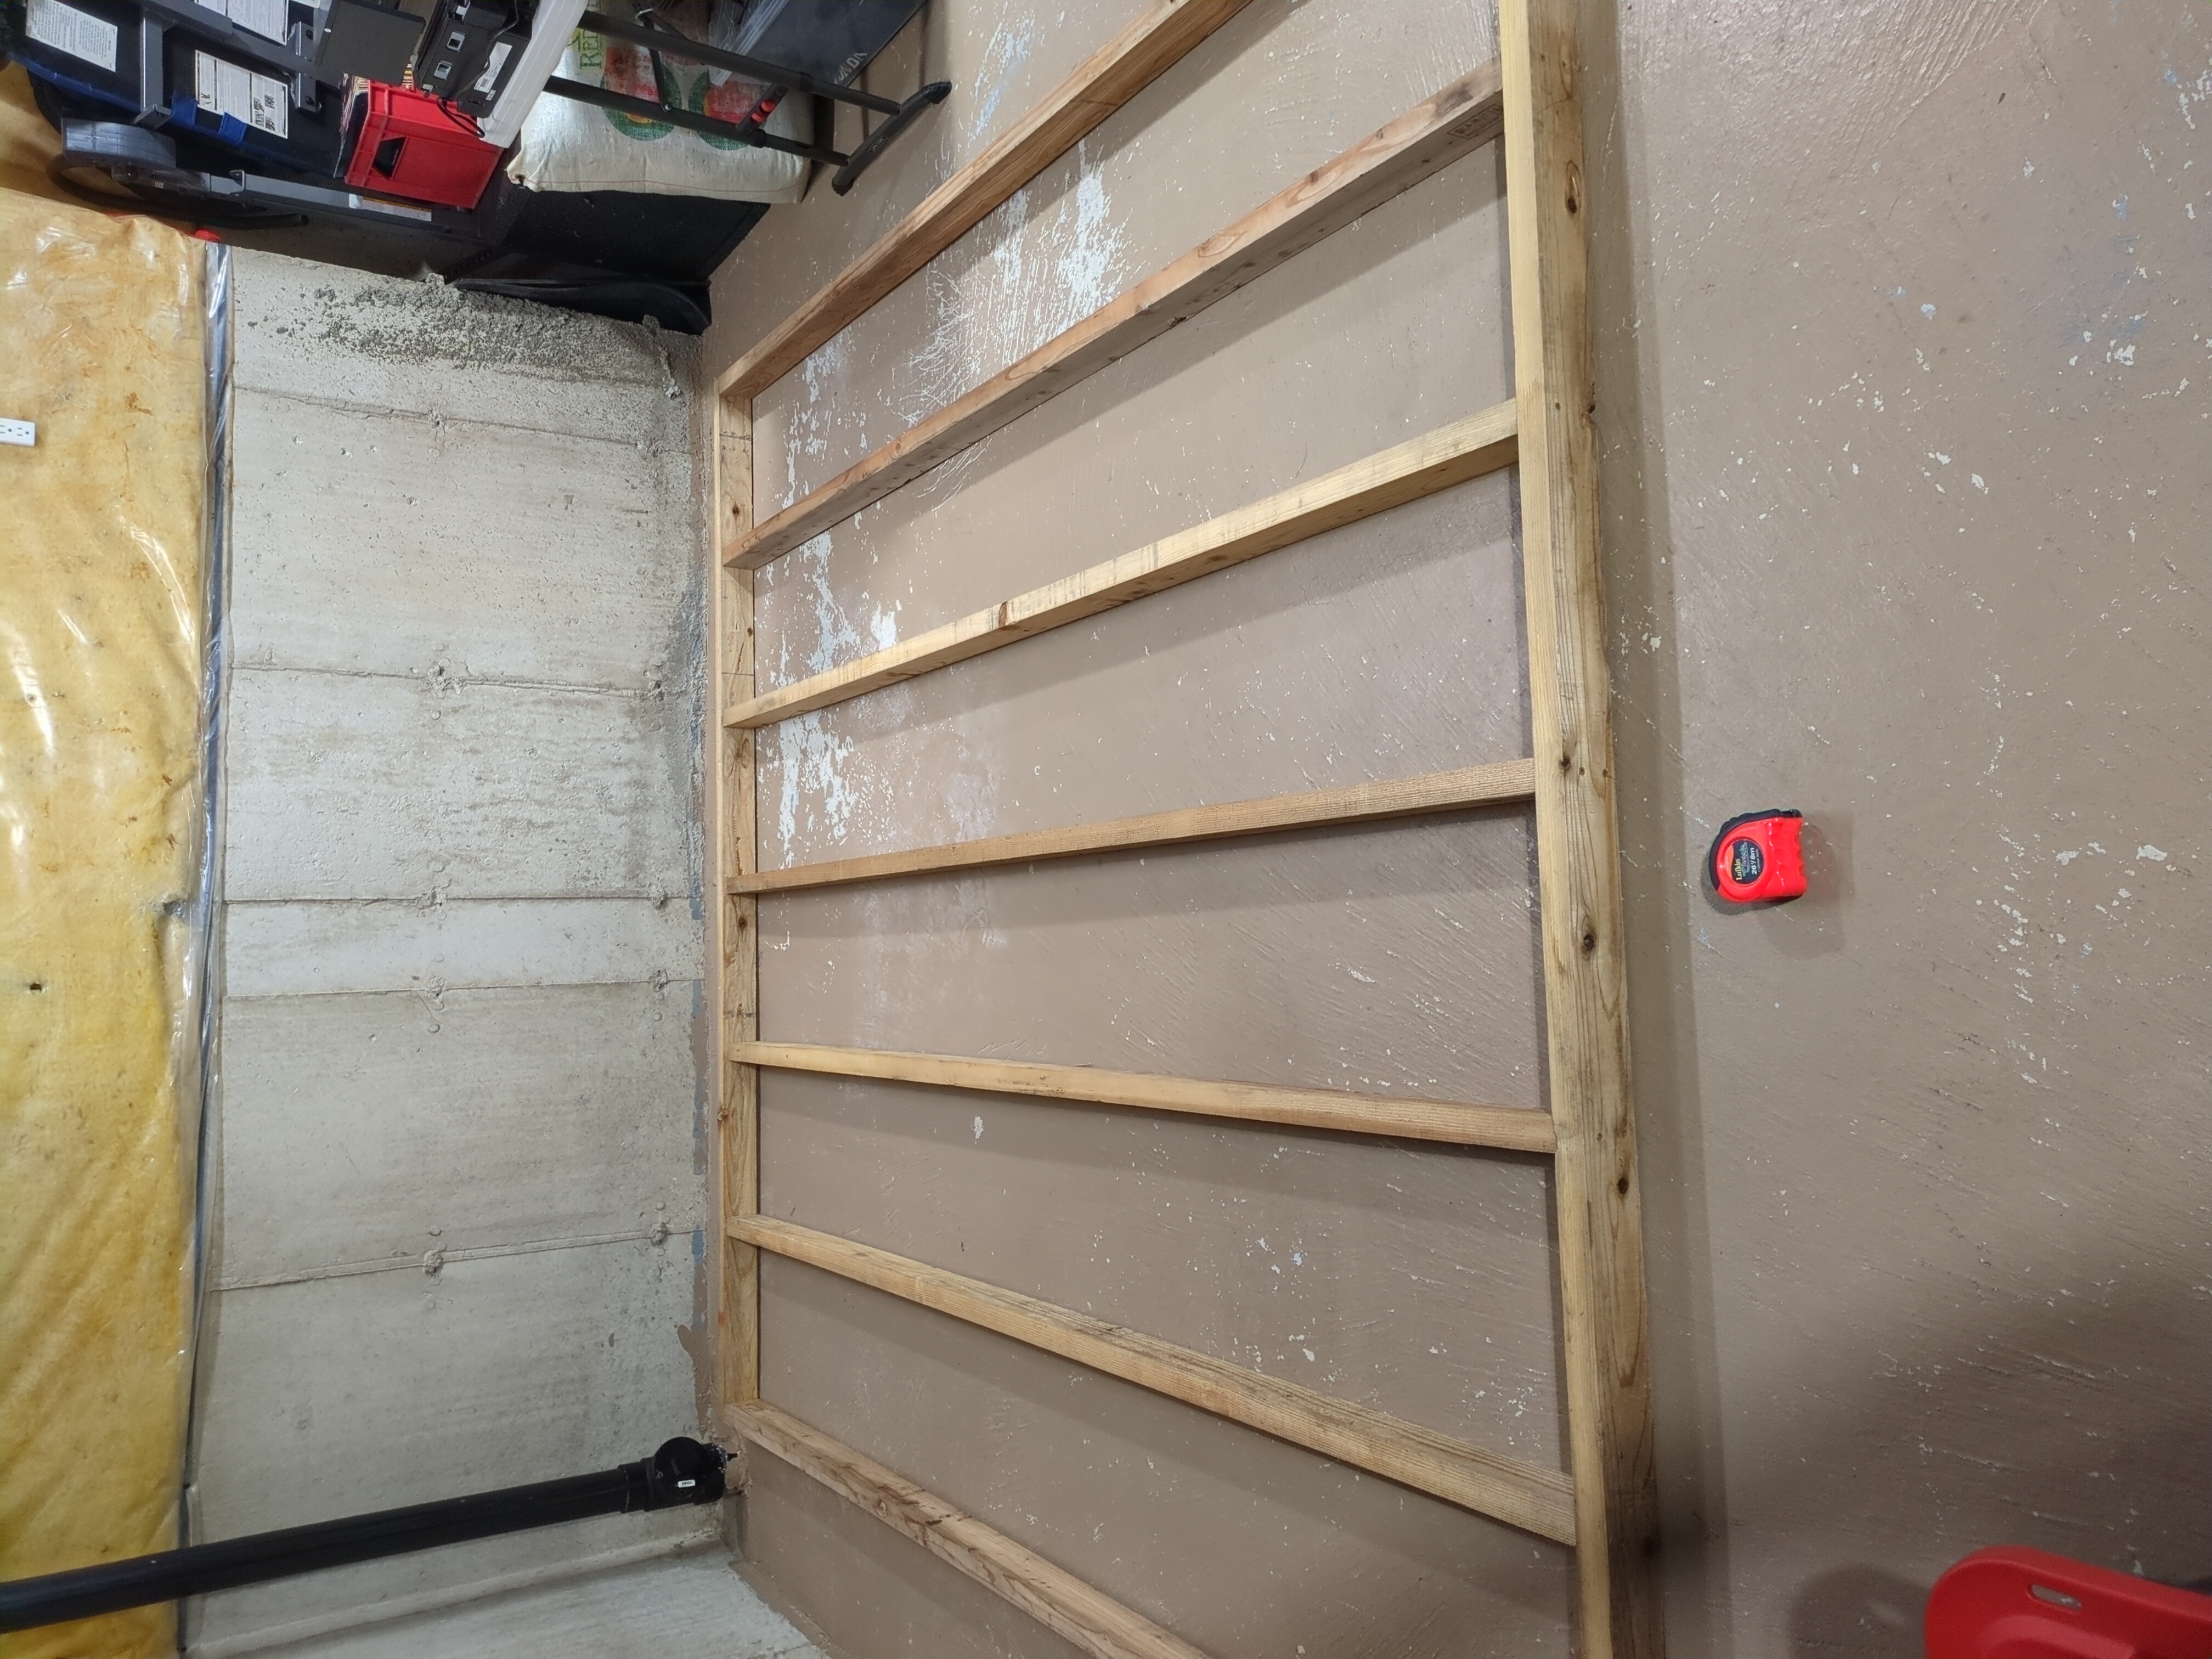
I forgot to take a picture of the frame with the horizontal pieces installed, but here it is hoisted up before installing the plywood.

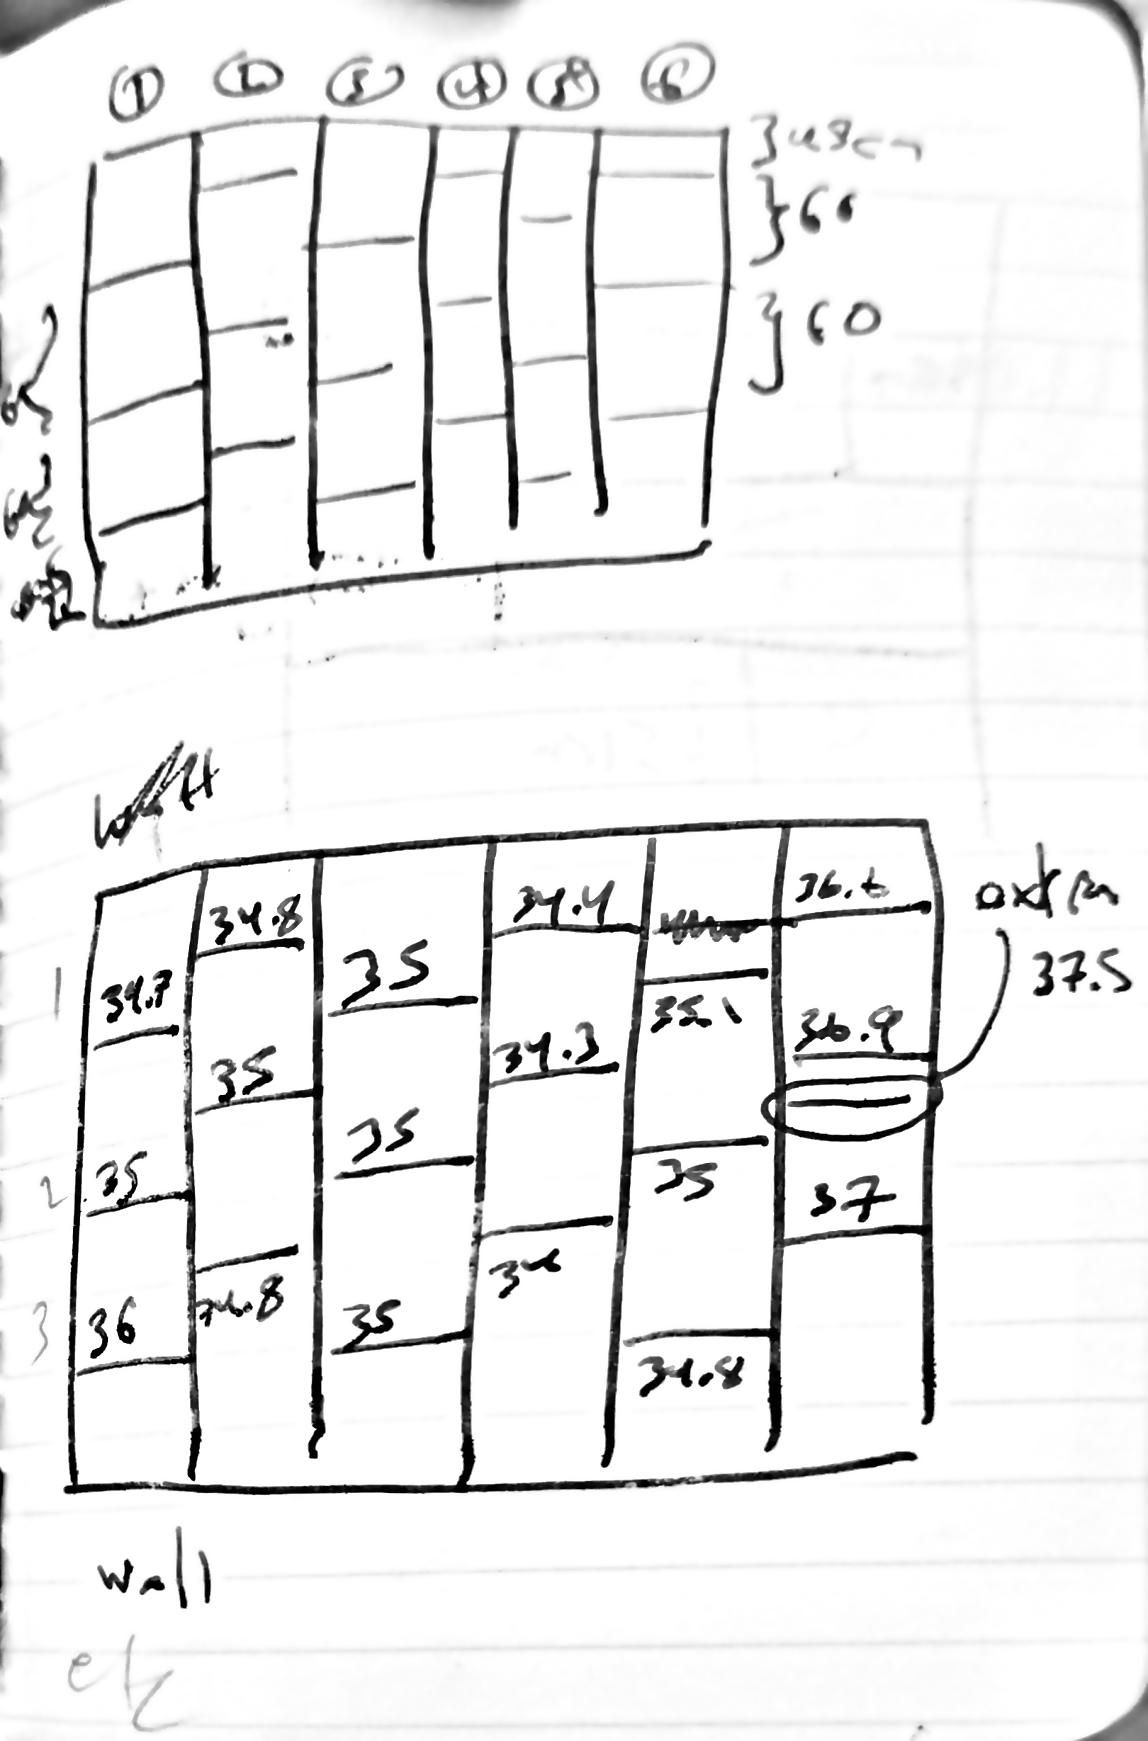
Also, here is a diagram. By virtue of just going with whatever wood I could find, the wood was a bit warped (and I didn’t space things out evenly…). So in order to have appropriately sized pieces of wood, they all had to be different sizes. Here are some measurements.
I ended up putting in an extra piece or two to give me more places to screw the plywood in. This is because, as we’ll get to, I didn’t just use two 4 ft × 8 ft sheets of 3/4 inch plywood. I used what was lying around, so I used more than two boards and had to do some cutting.
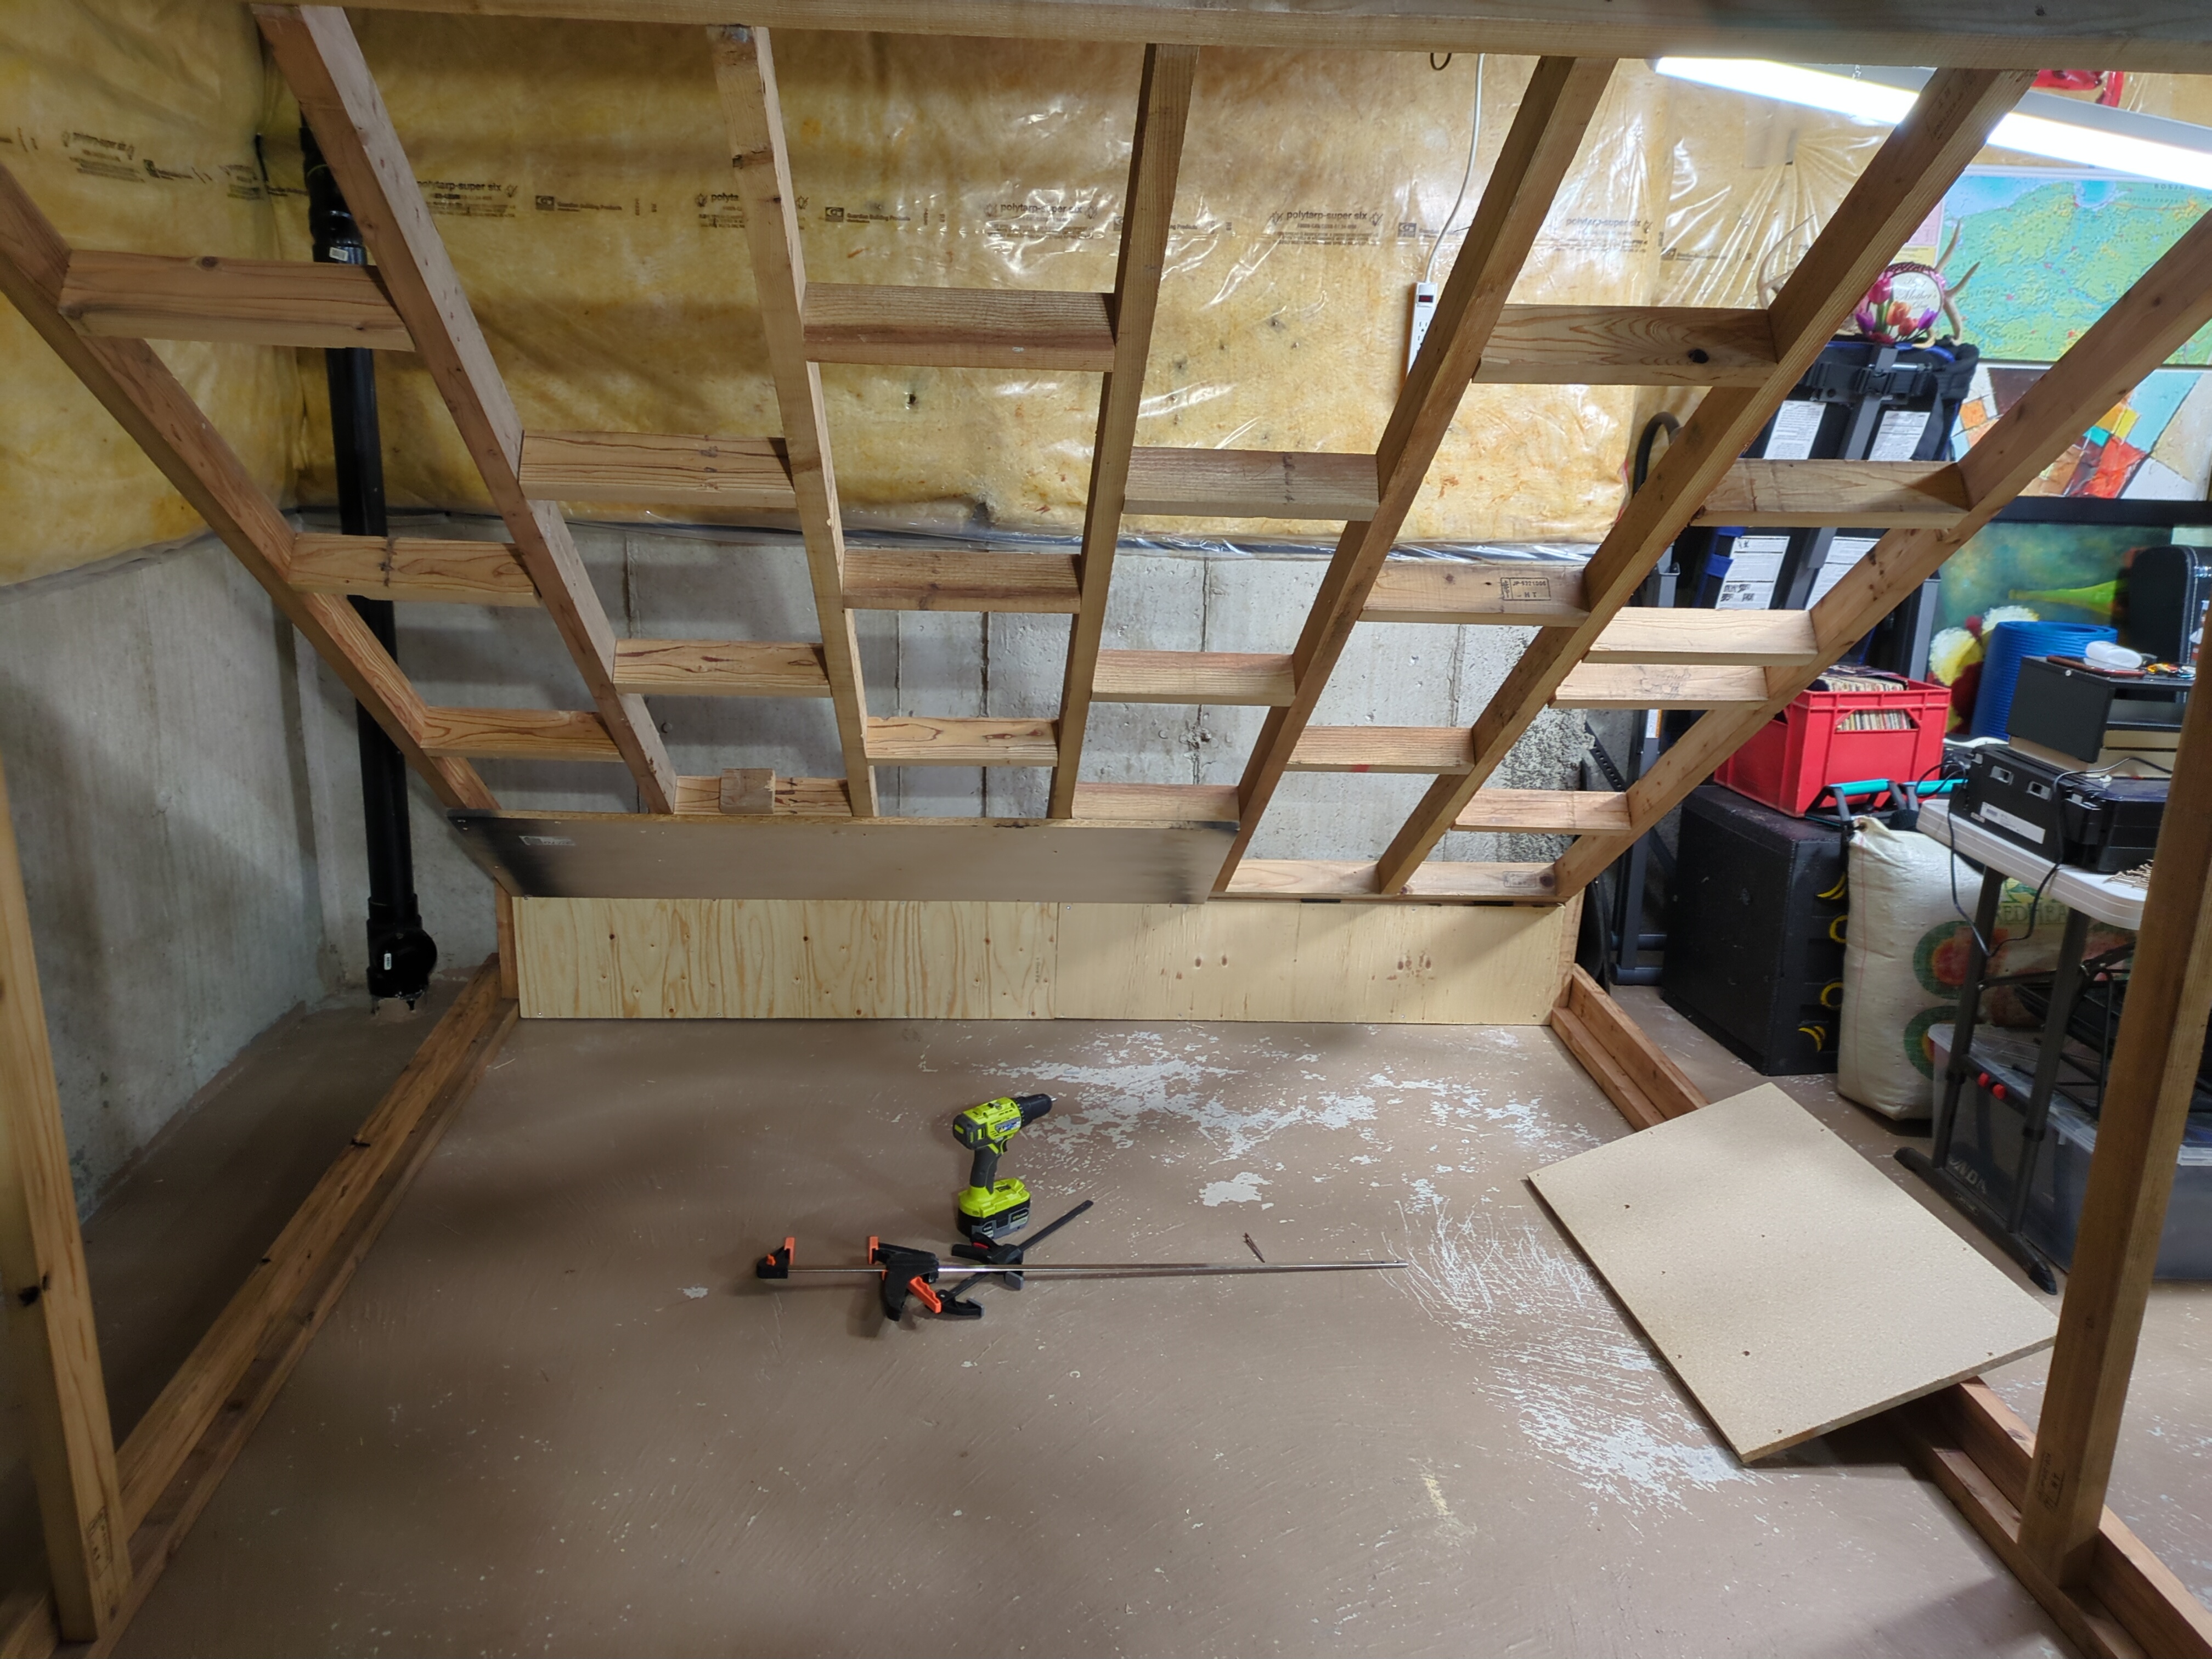
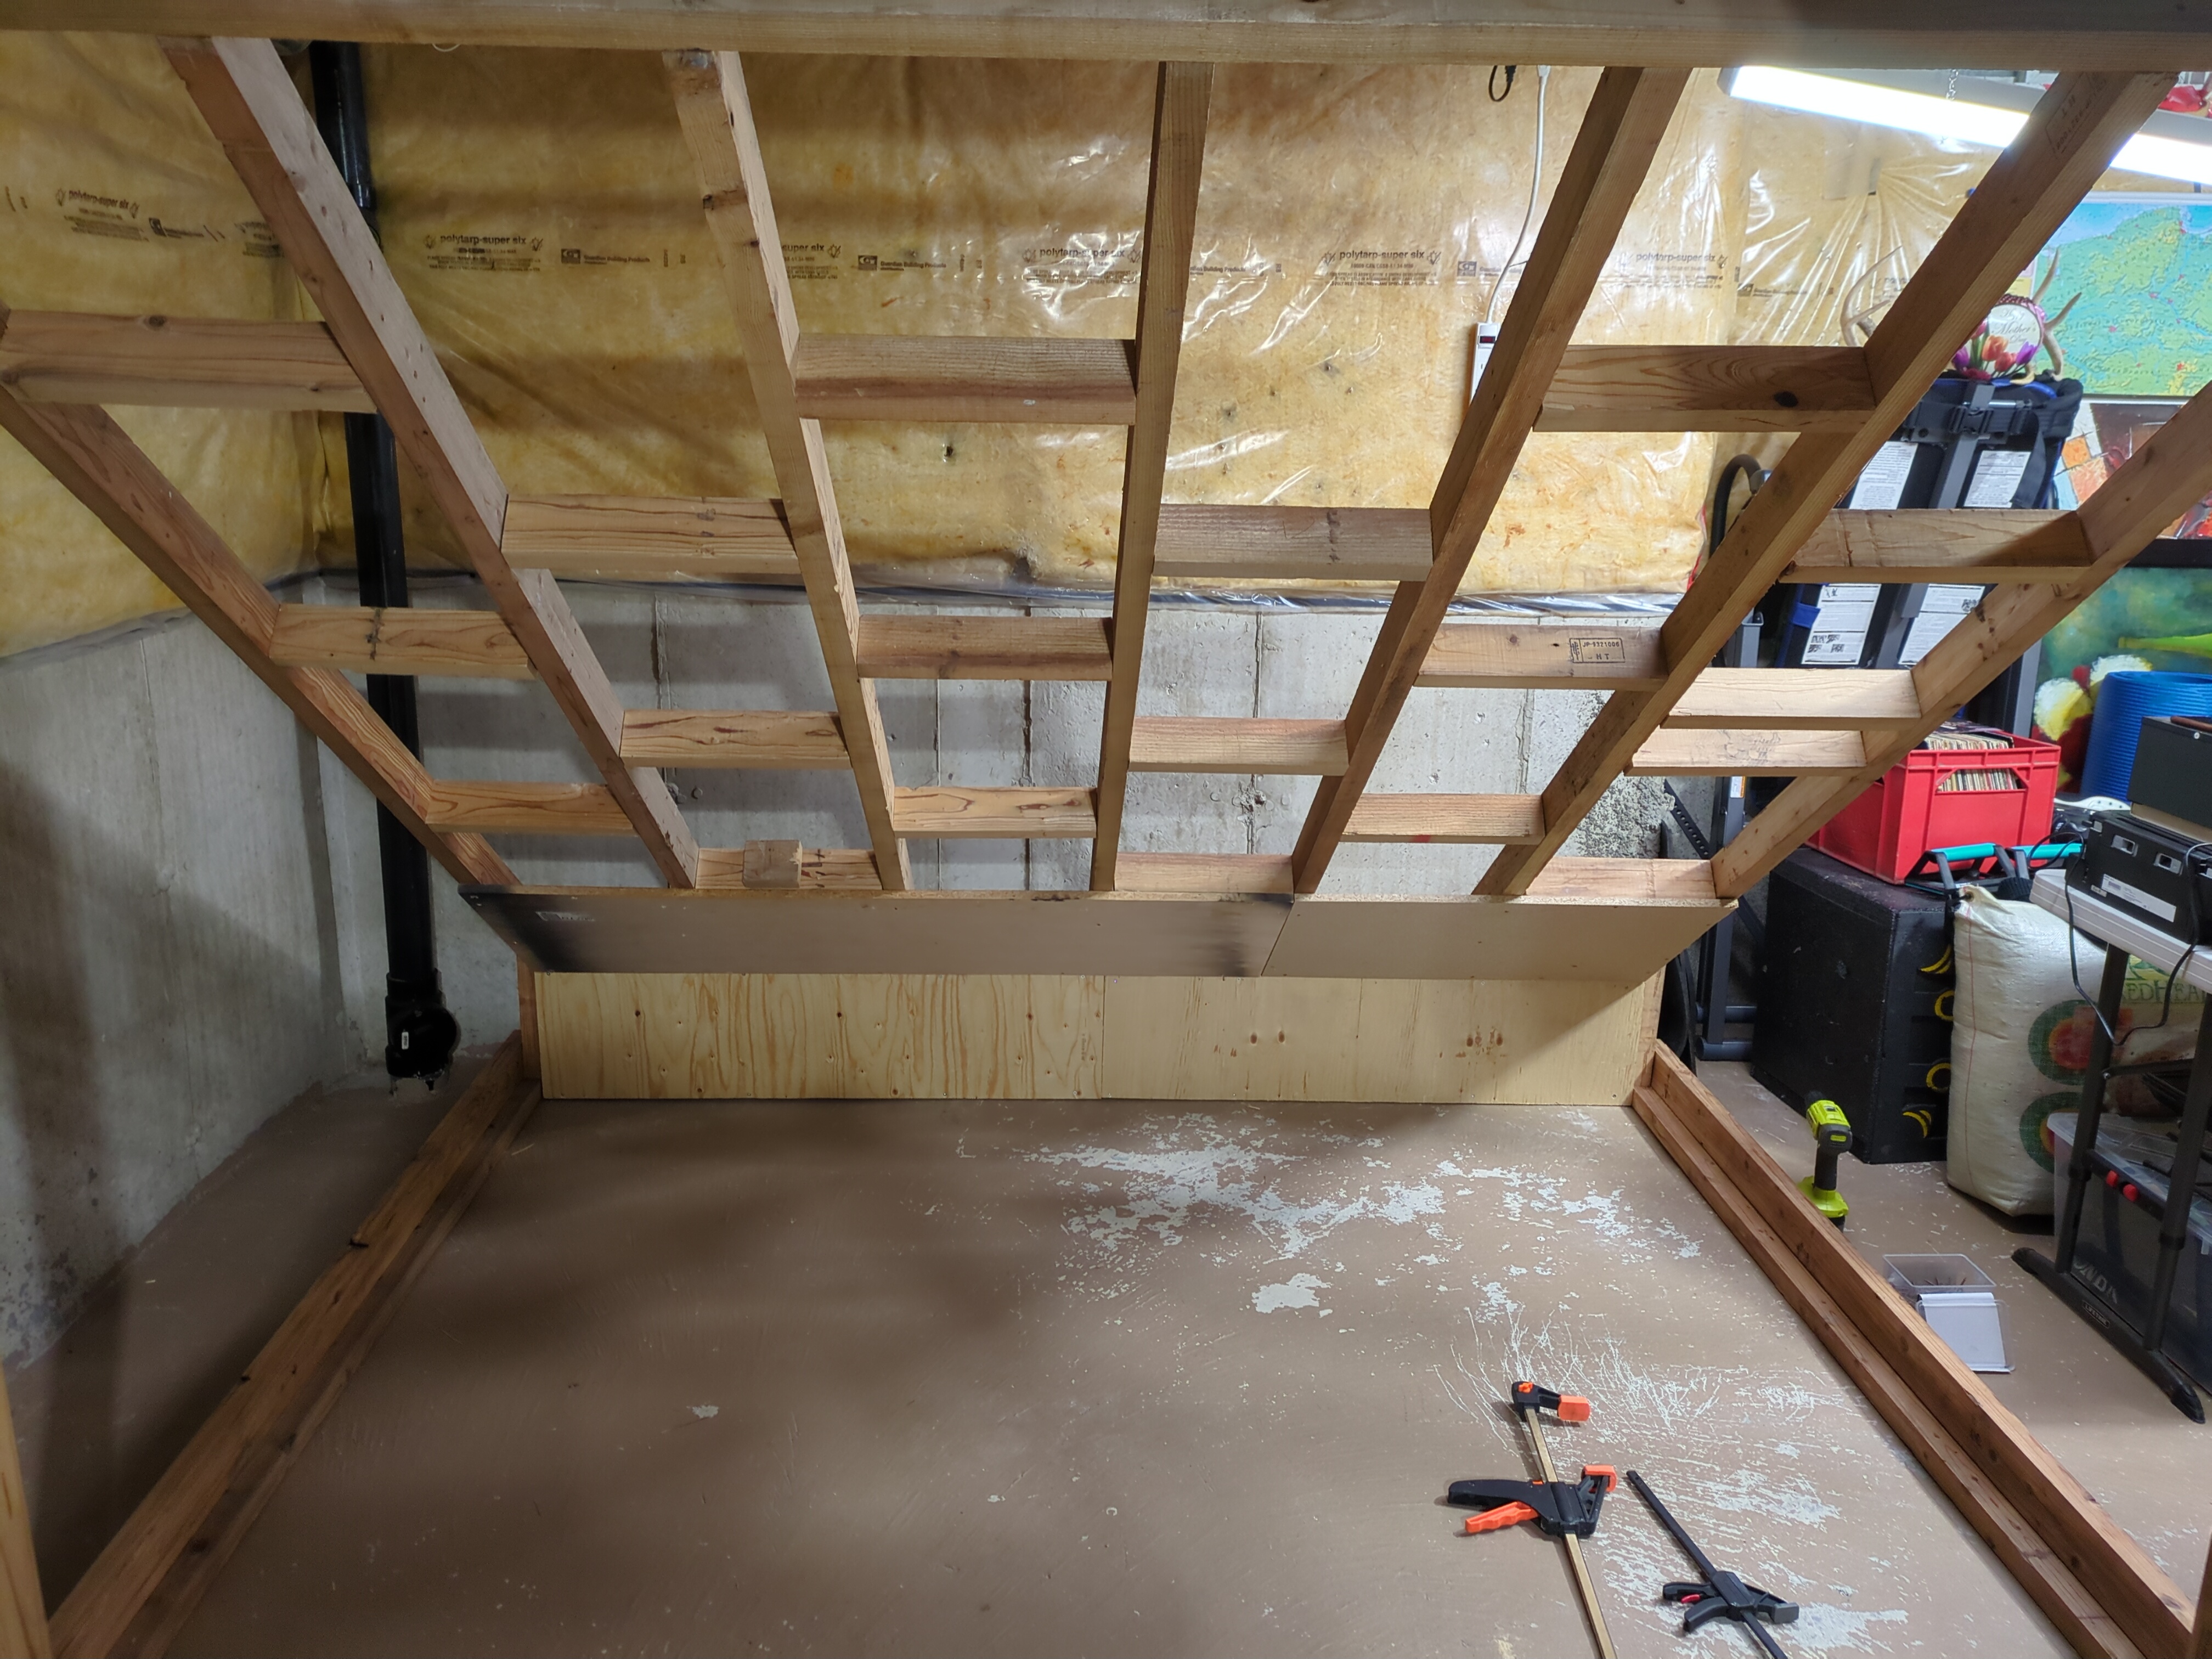
I tried to mount the plywood onto the frame while it was lying down…
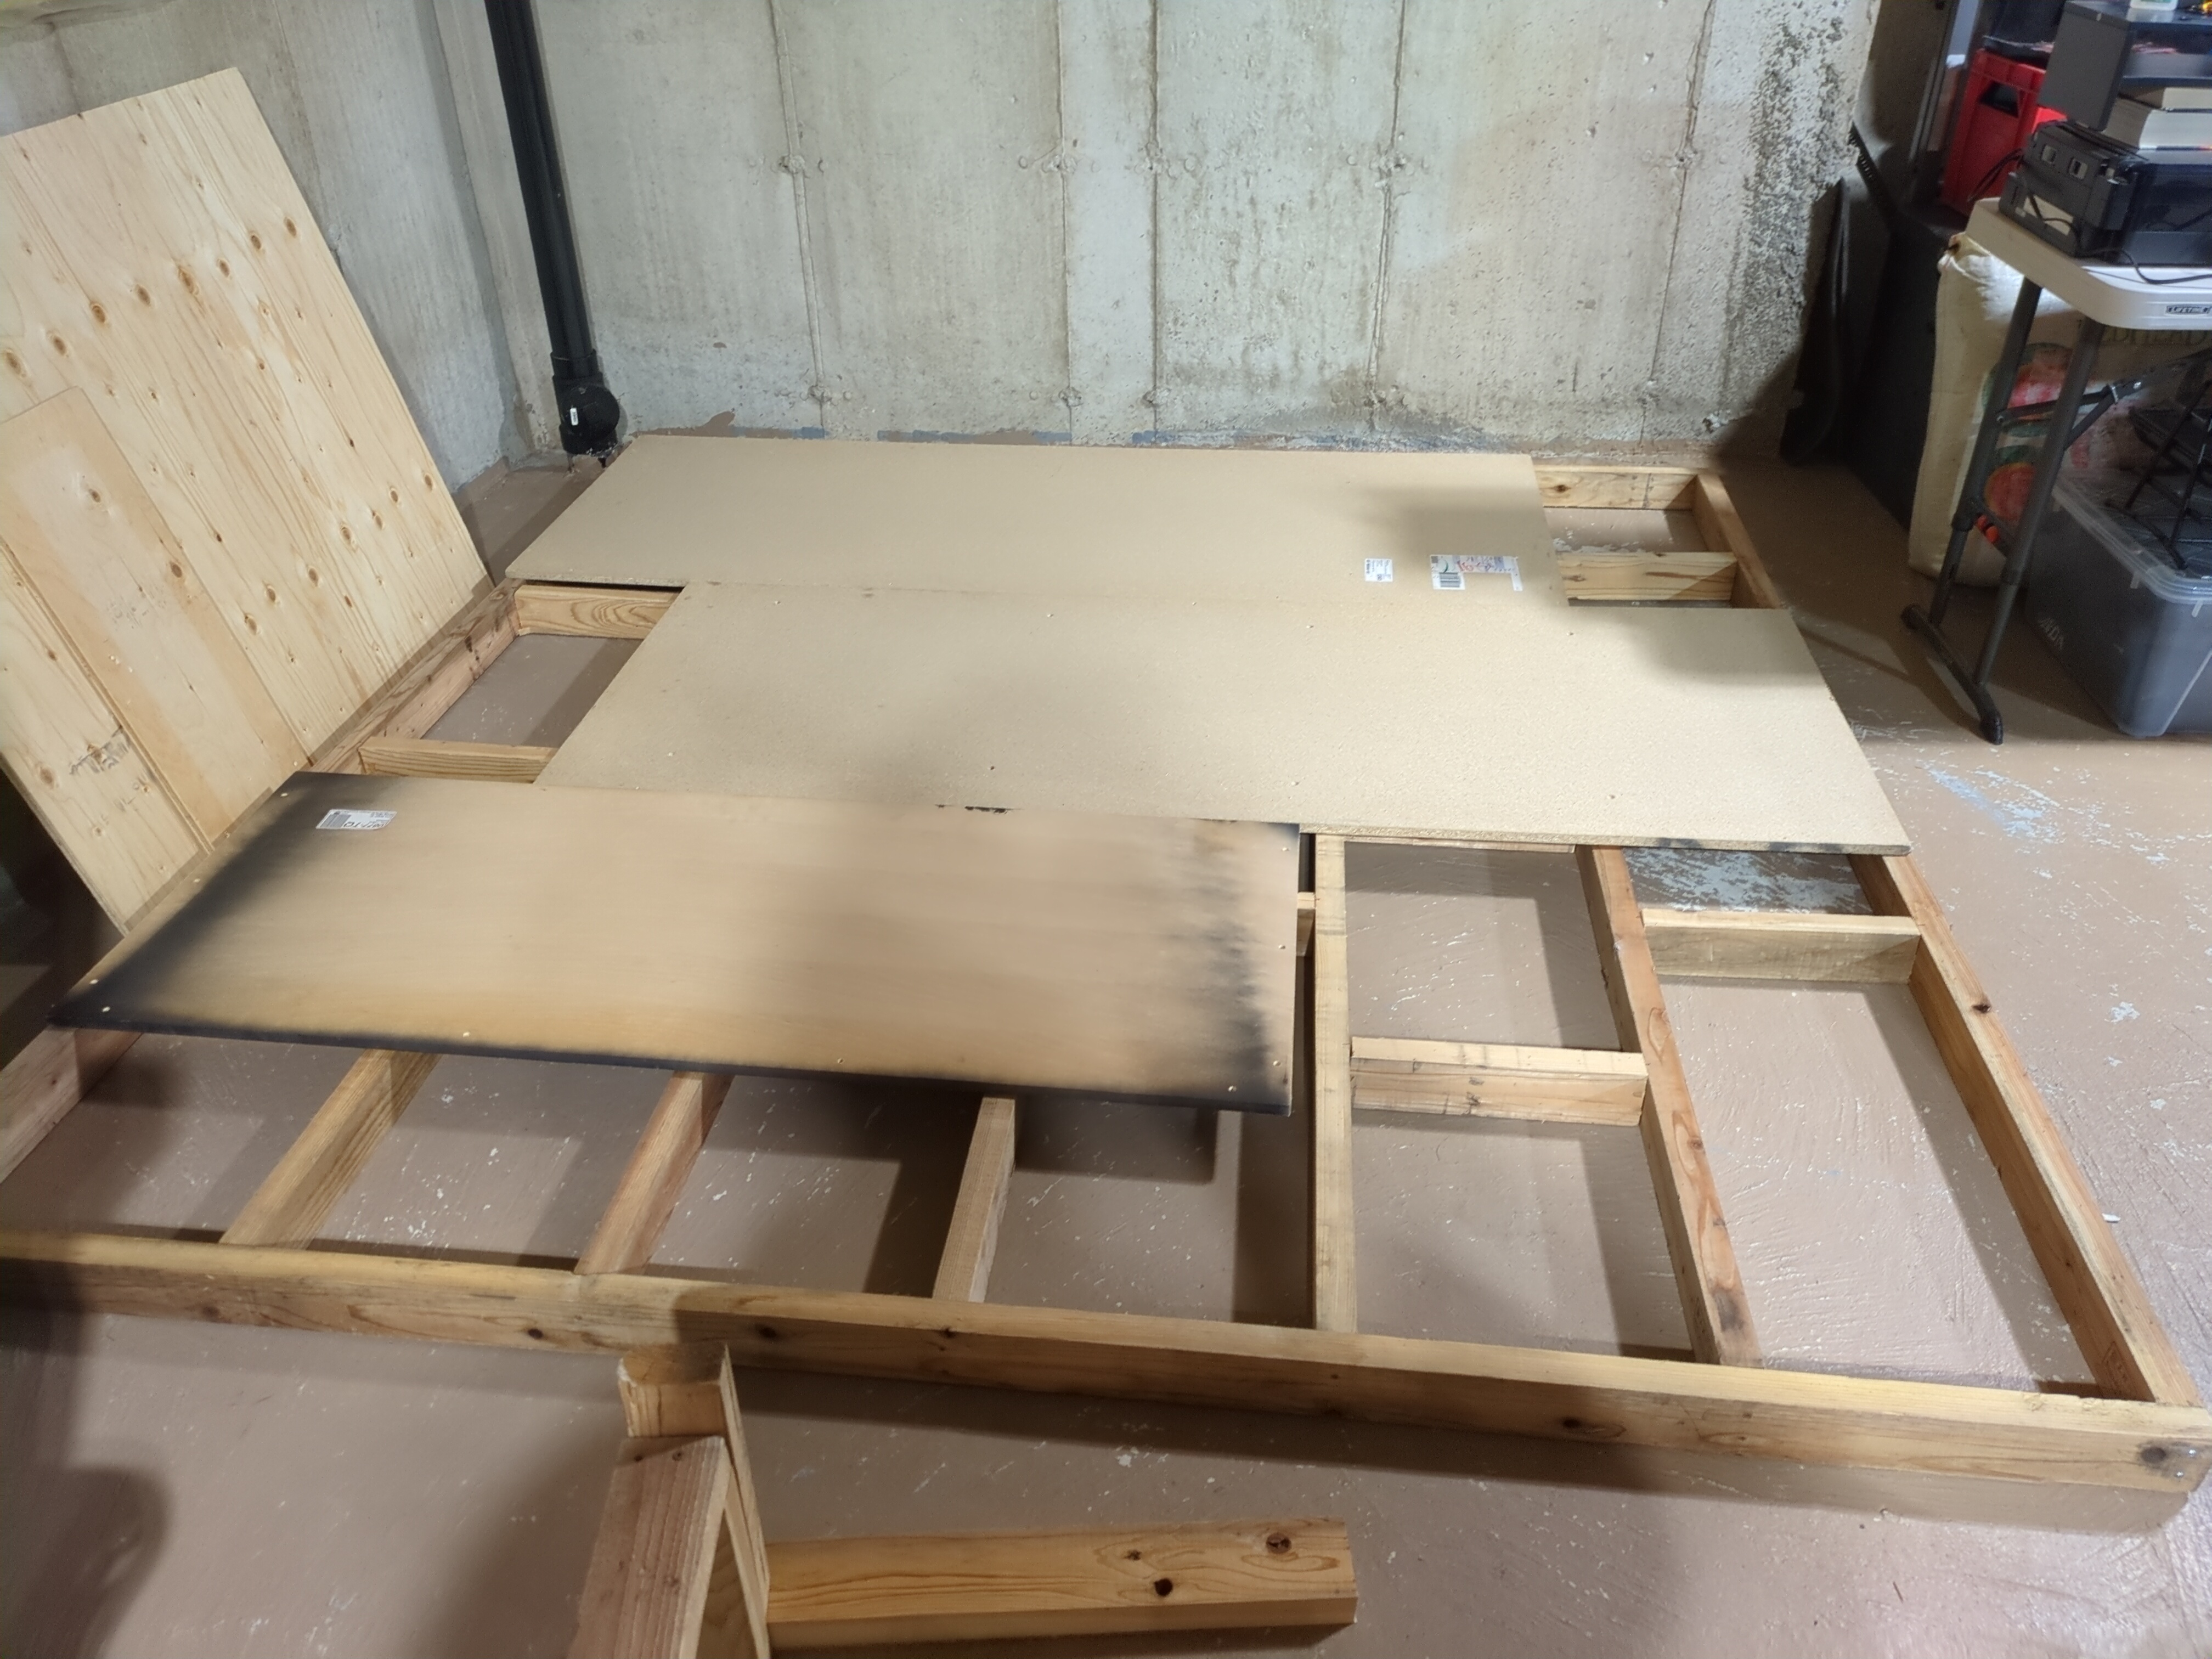
I then realized I would have to flip the 8 ft × 8 ft board in my basement, whose ceiling is just under 8 ft. It is technically larger than 8 ft, but there is wood framing on the ceiling that makes the usable height slightly shorter. Unless I’m a terrible mathematician, I believe this is impossible. So I had to take off all the plywood and mount it again later, once the board was already standing.
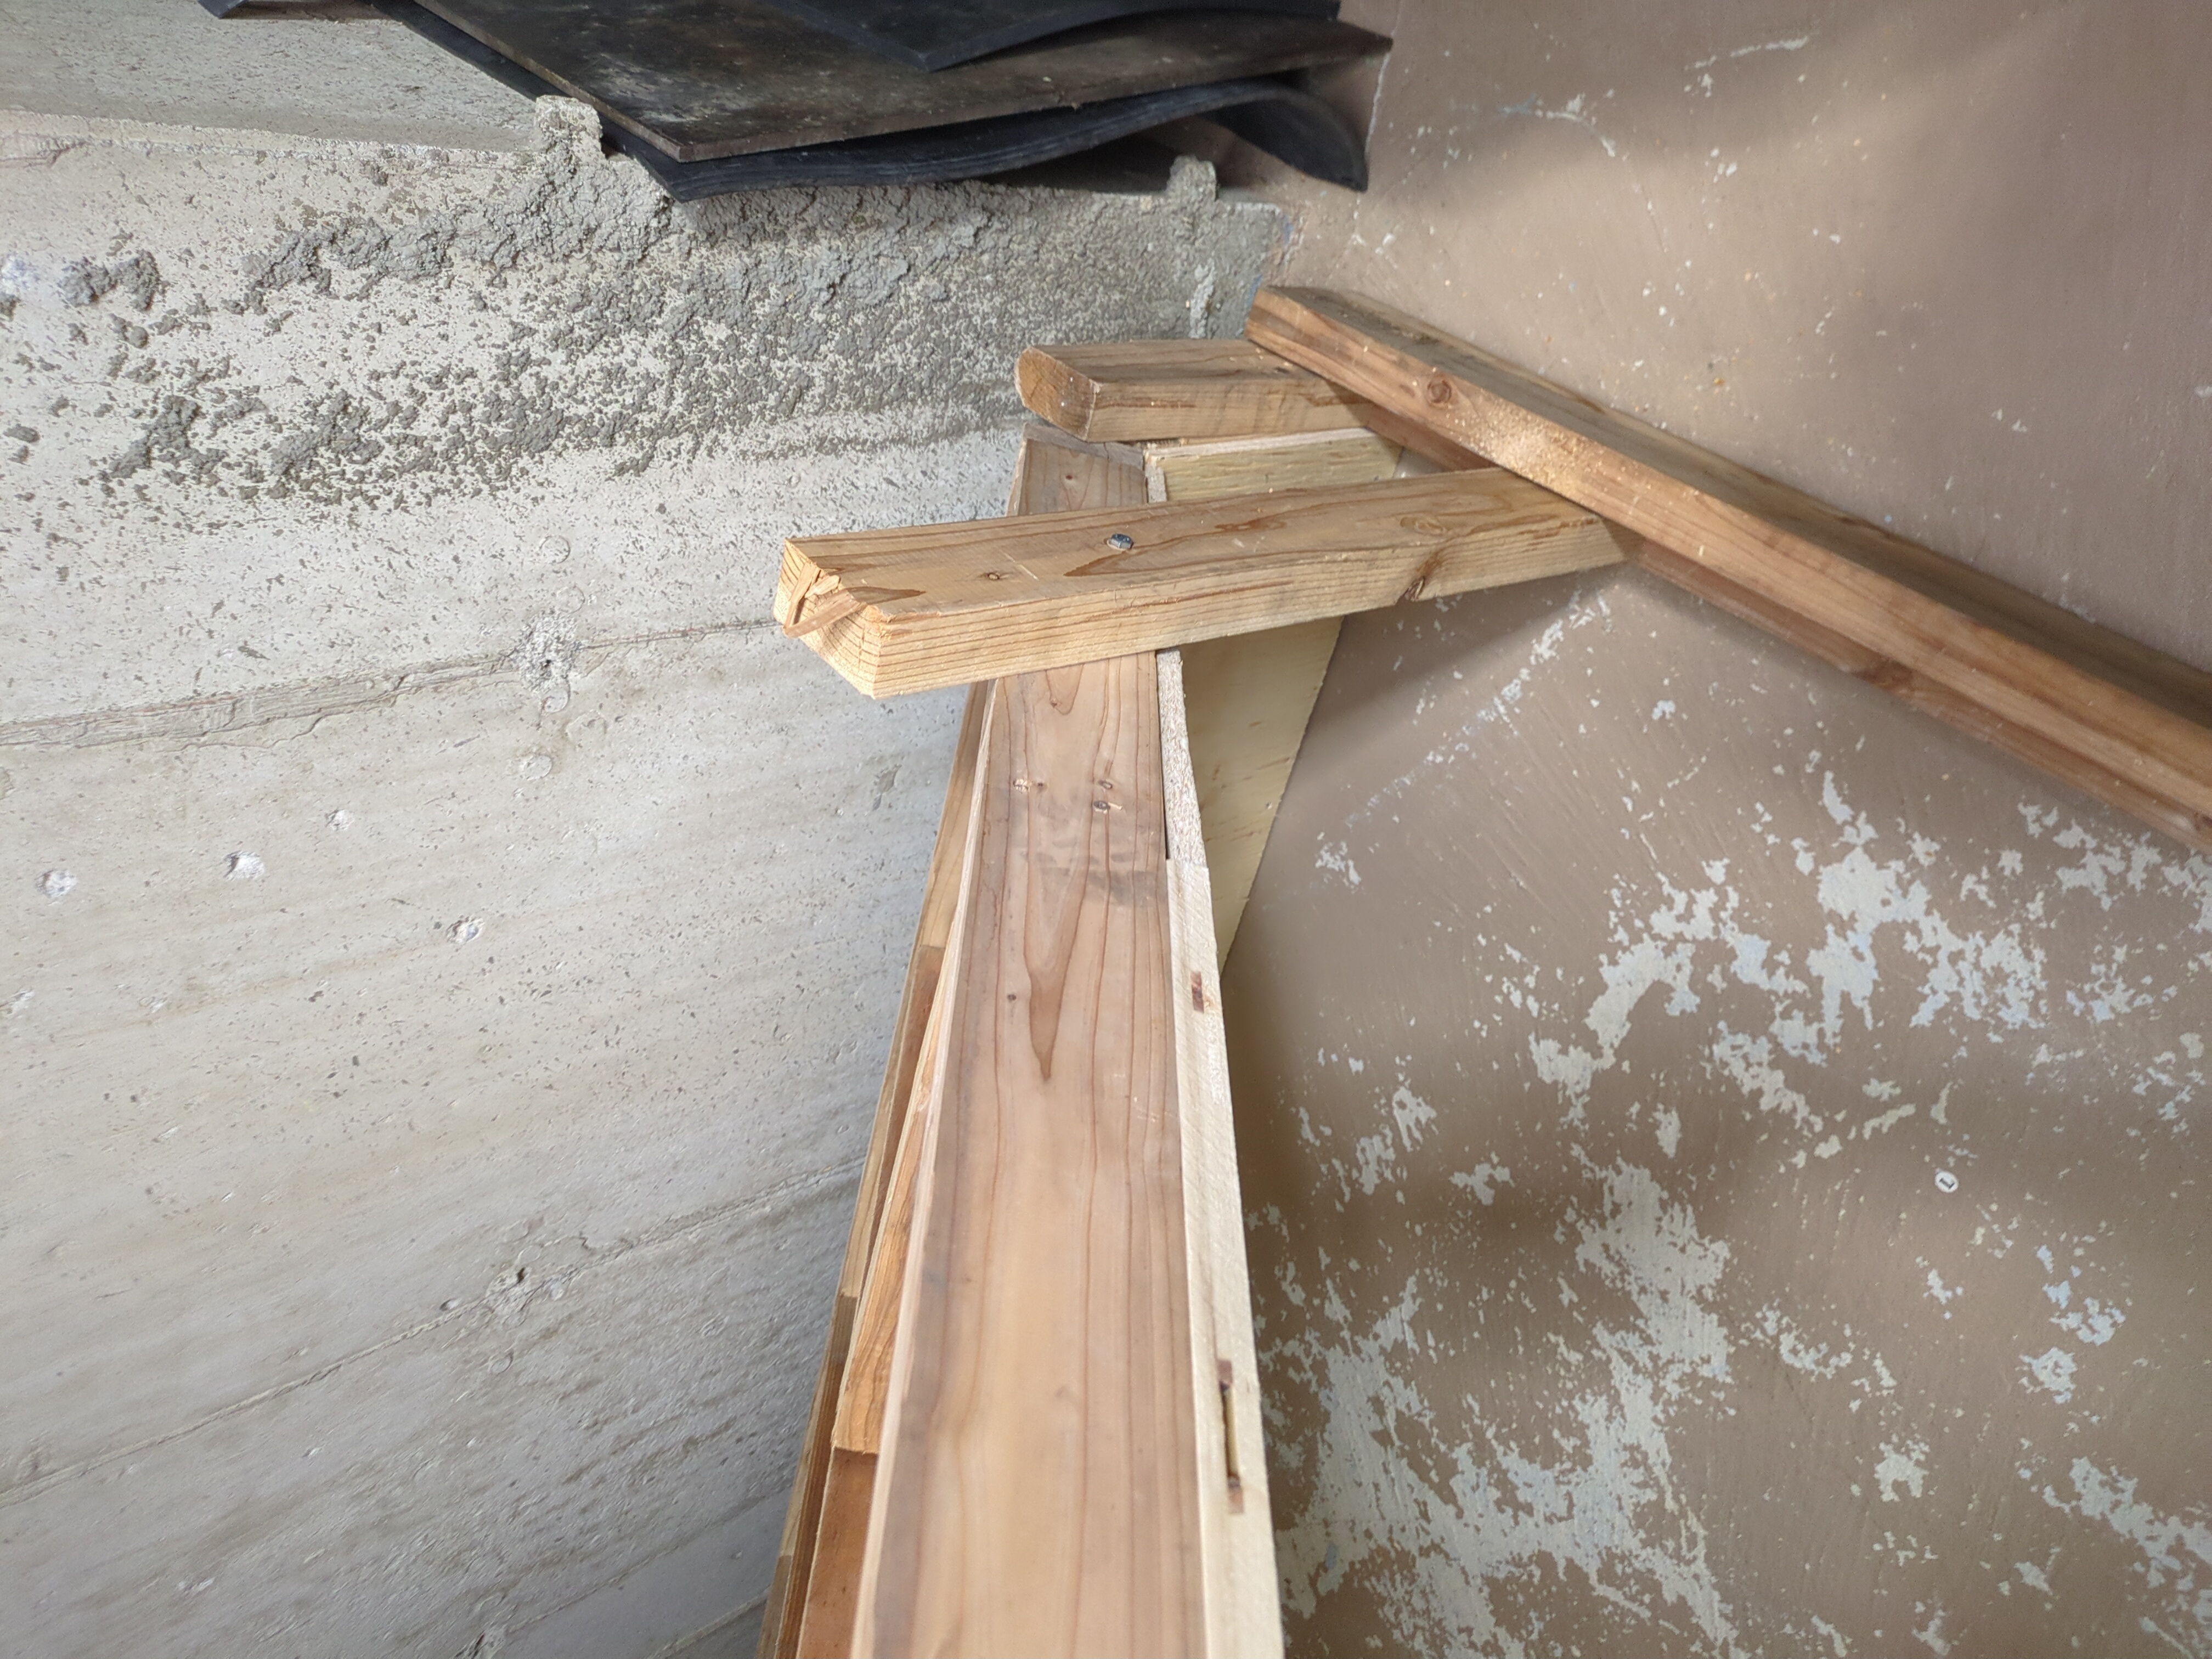
The Hinged Connection
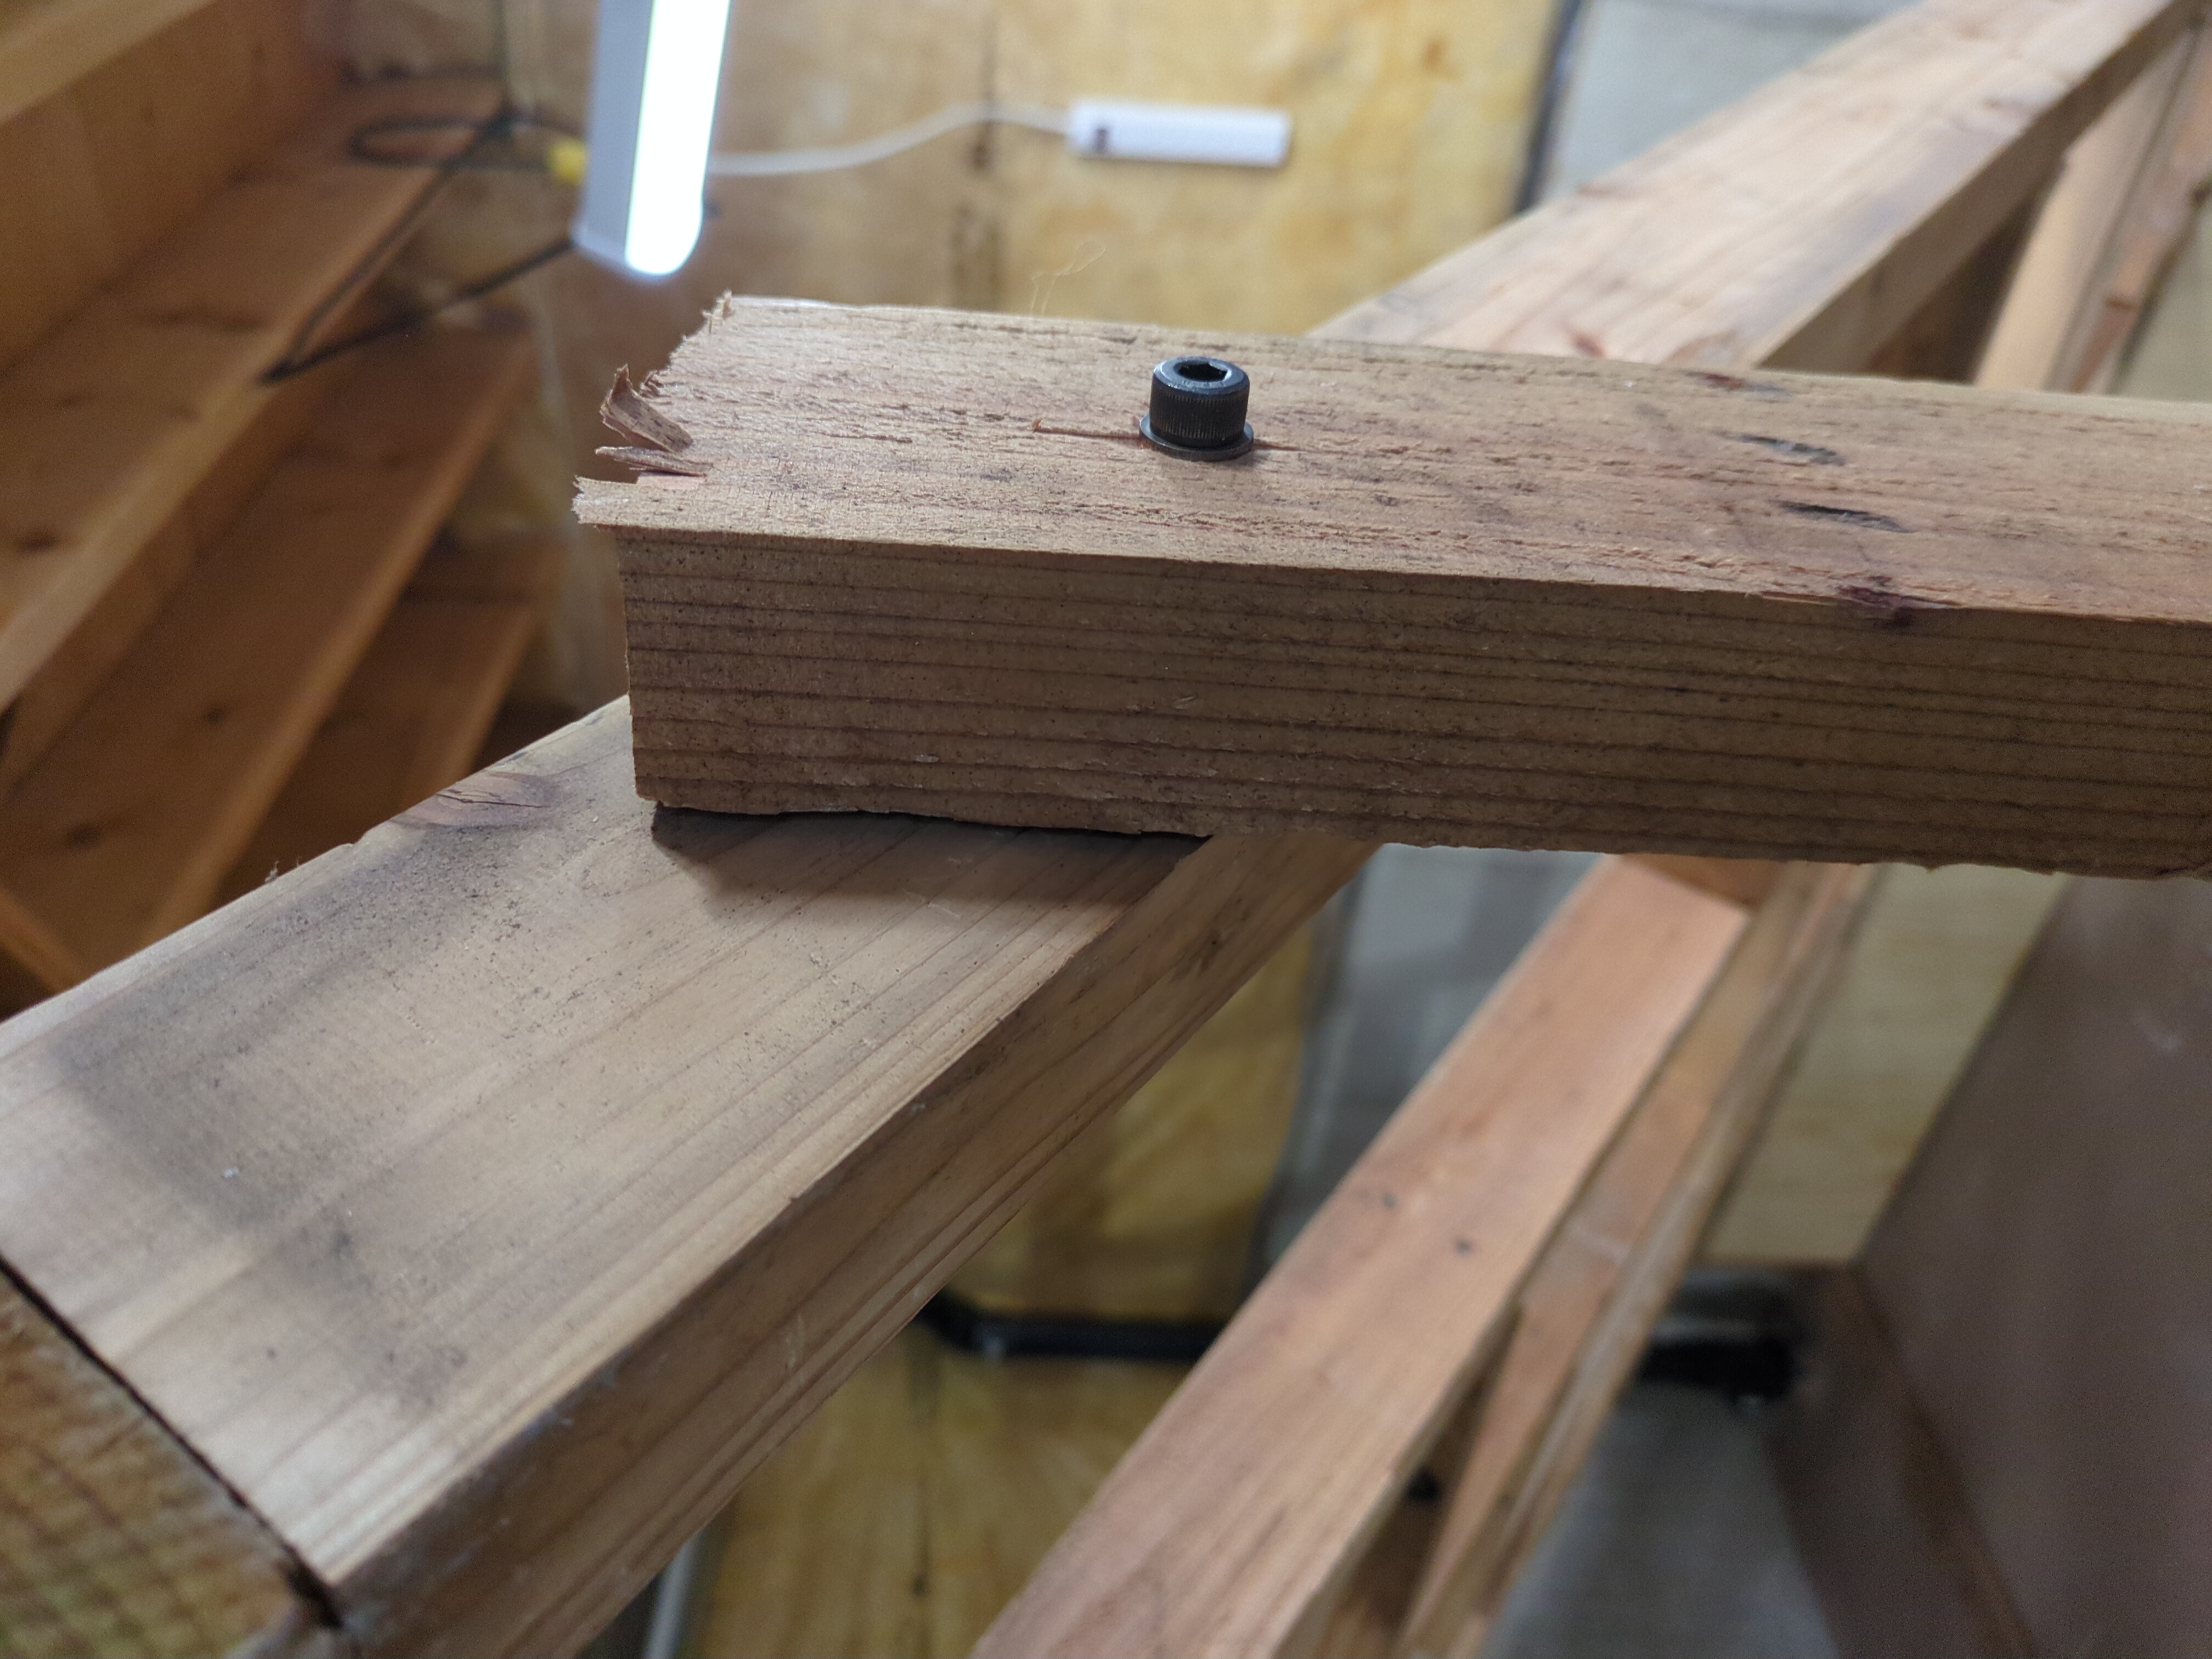
The kickboard and main board are connected with hinges. I used six door hinges. The hinges are not meant to be the main structural support; they mostly let the main board rotate relative to the kickboard. I used jack stands to hold the frame in place while I screwed the hinges into both the kickboard and the frame. During construction, this made positioning the wall easier, and in principle it means the angle could be changed later.

The important thing is that the hinges are not the only thing holding the wall in position during climbing. The wall also needs fixed supports/bracing to lock it at the chosen angle. The hinges provide rotation. The bracing provides strength.
Now I put a bolt through a 2x4 and the frame on each side, allowing it to freely move.
From here, one can just hoist the wall up.
Mounting the Plywood
Now for the plywood. It is recommended to use at least 3/4" thick plywood, which is mostly what I used. I also had a few straggler pieces in my basement, so I used them to fill in spots. I’ve tested it, and even though it works for me, I wouldn’t recommend going any thinner than the recommended 3/4".
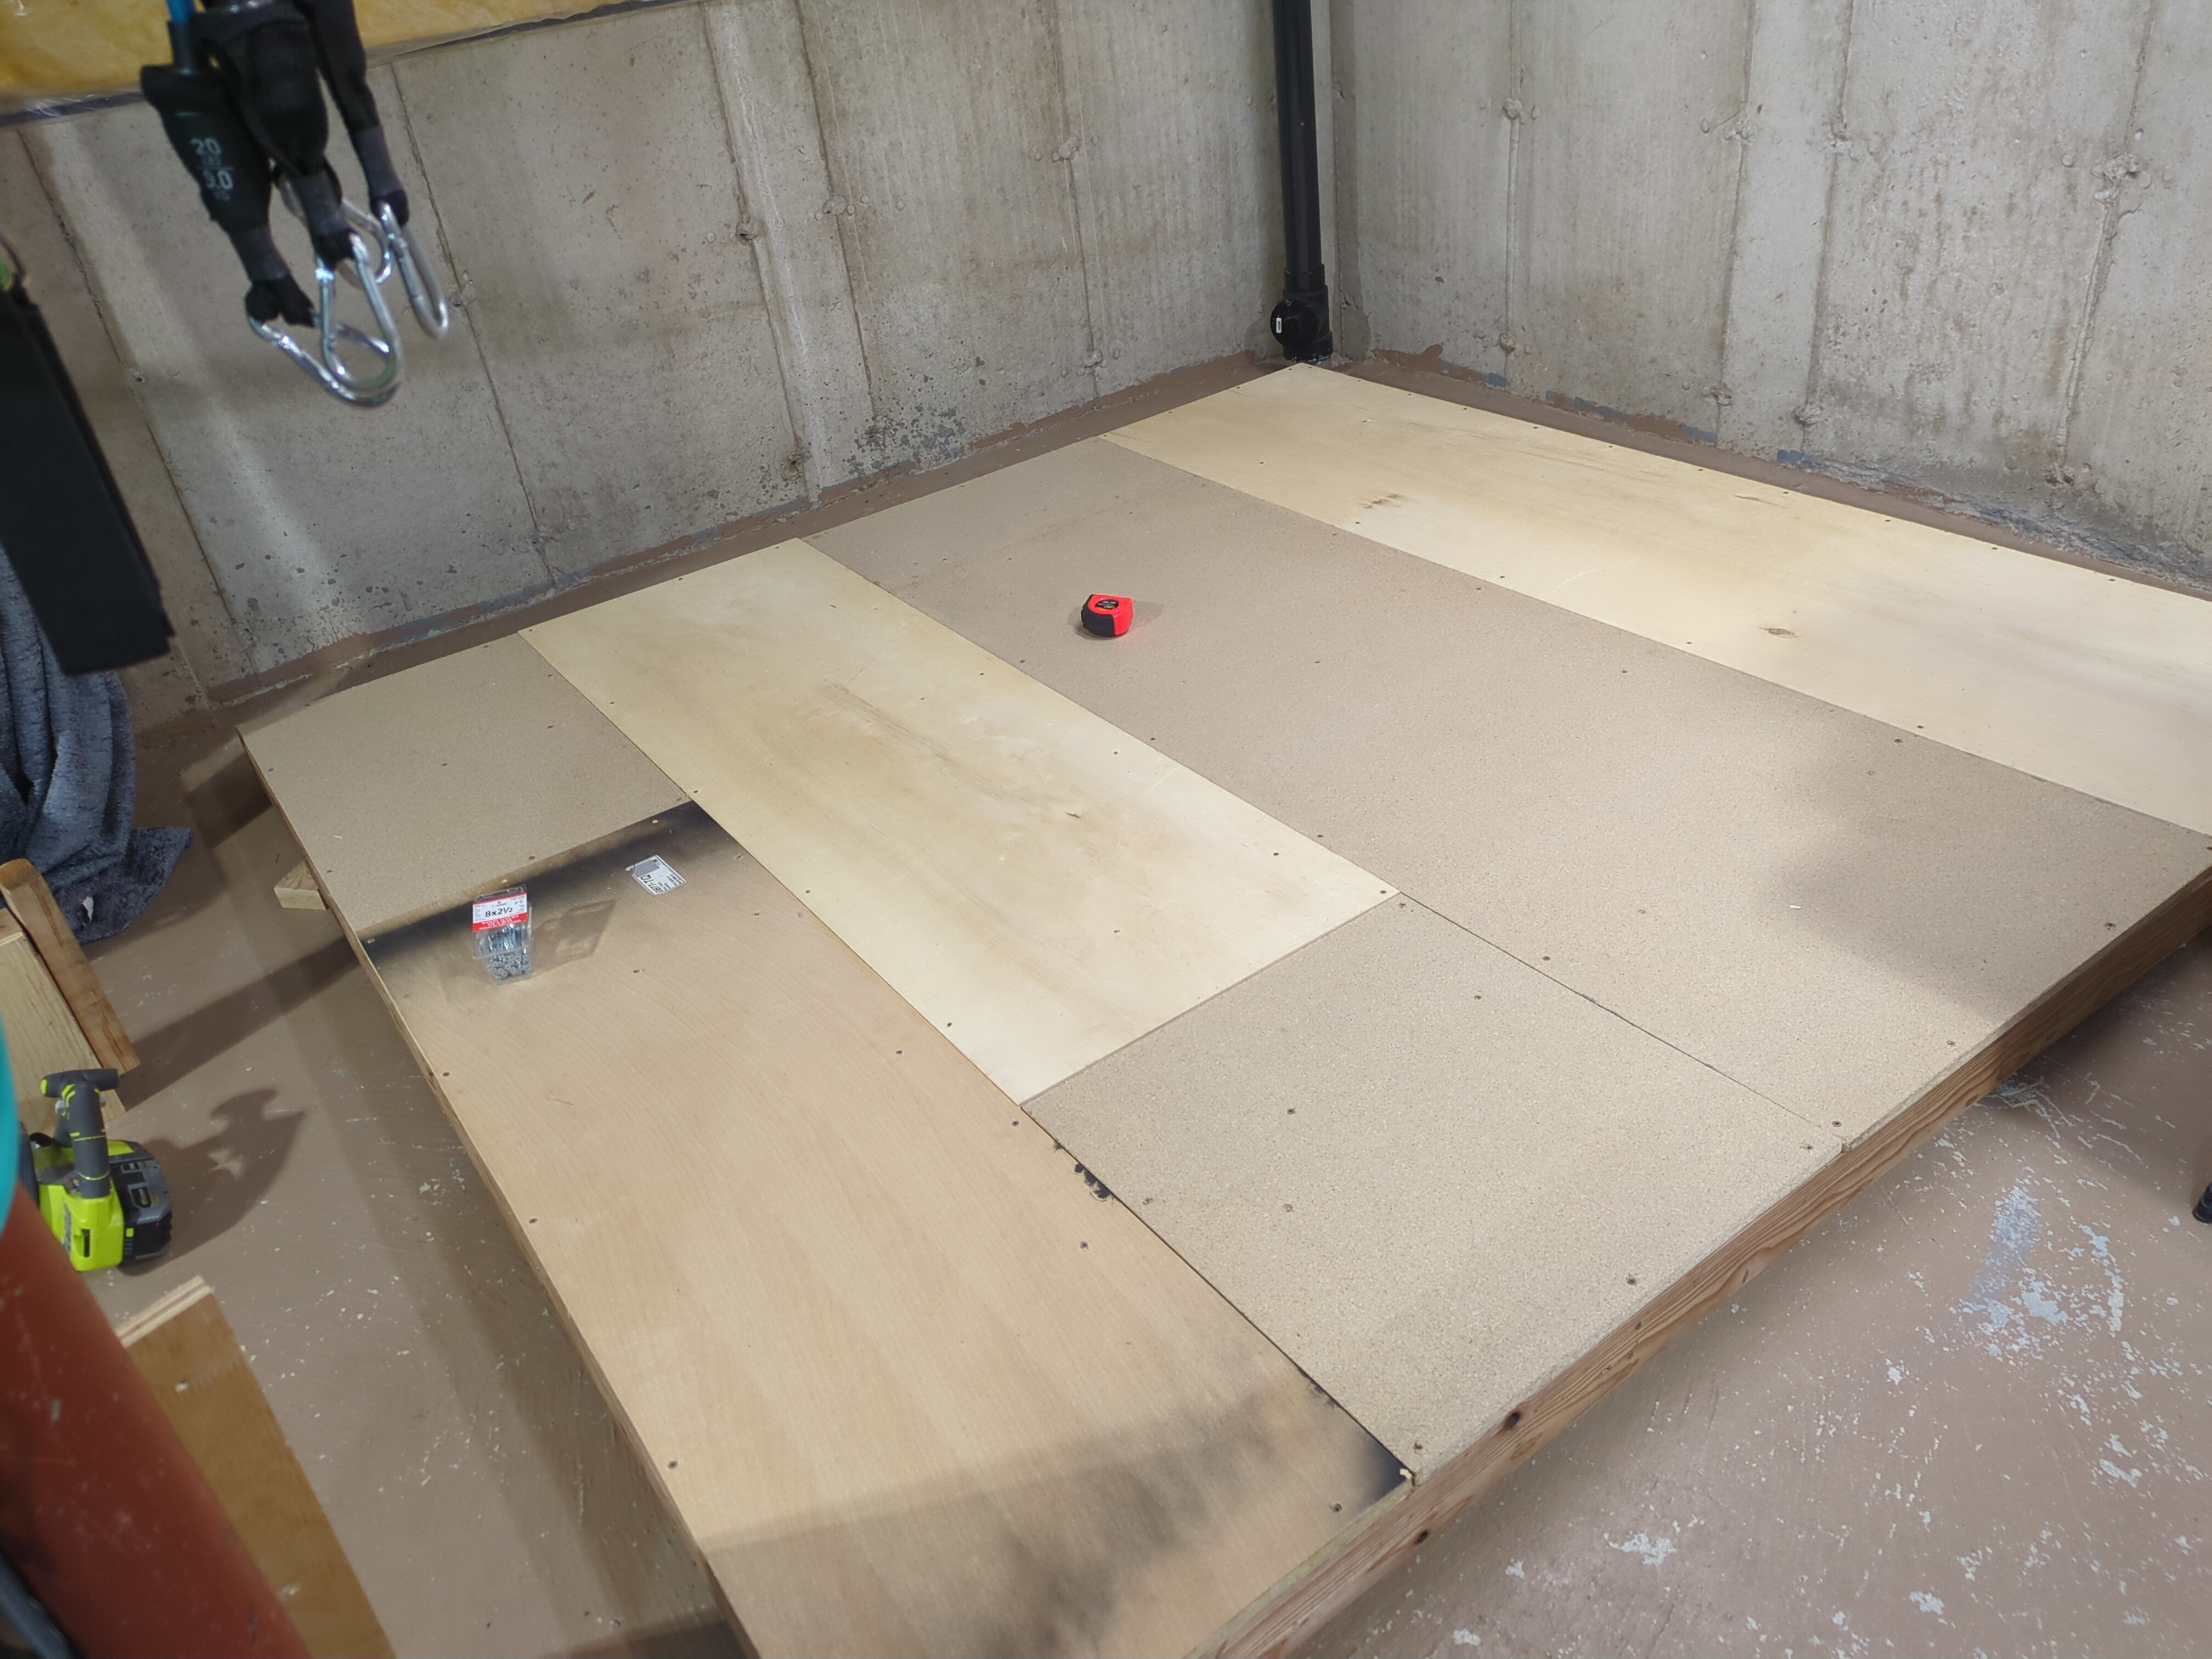
Getting the plywood on by yourself is a difficult task – it’s recommended to do it with a friend (or girlfriend!). I did most of the board myself, except the top row, where my girlfriend helped me out. I used a bunch of clamps to hold things in place while I drove the screws in. One of the only benefits of putting the plywood onto the wrong side first was that, since I was working with non-standard pieces, I had already cut all the pieces to their appropriate size. So I just had to screw them on.
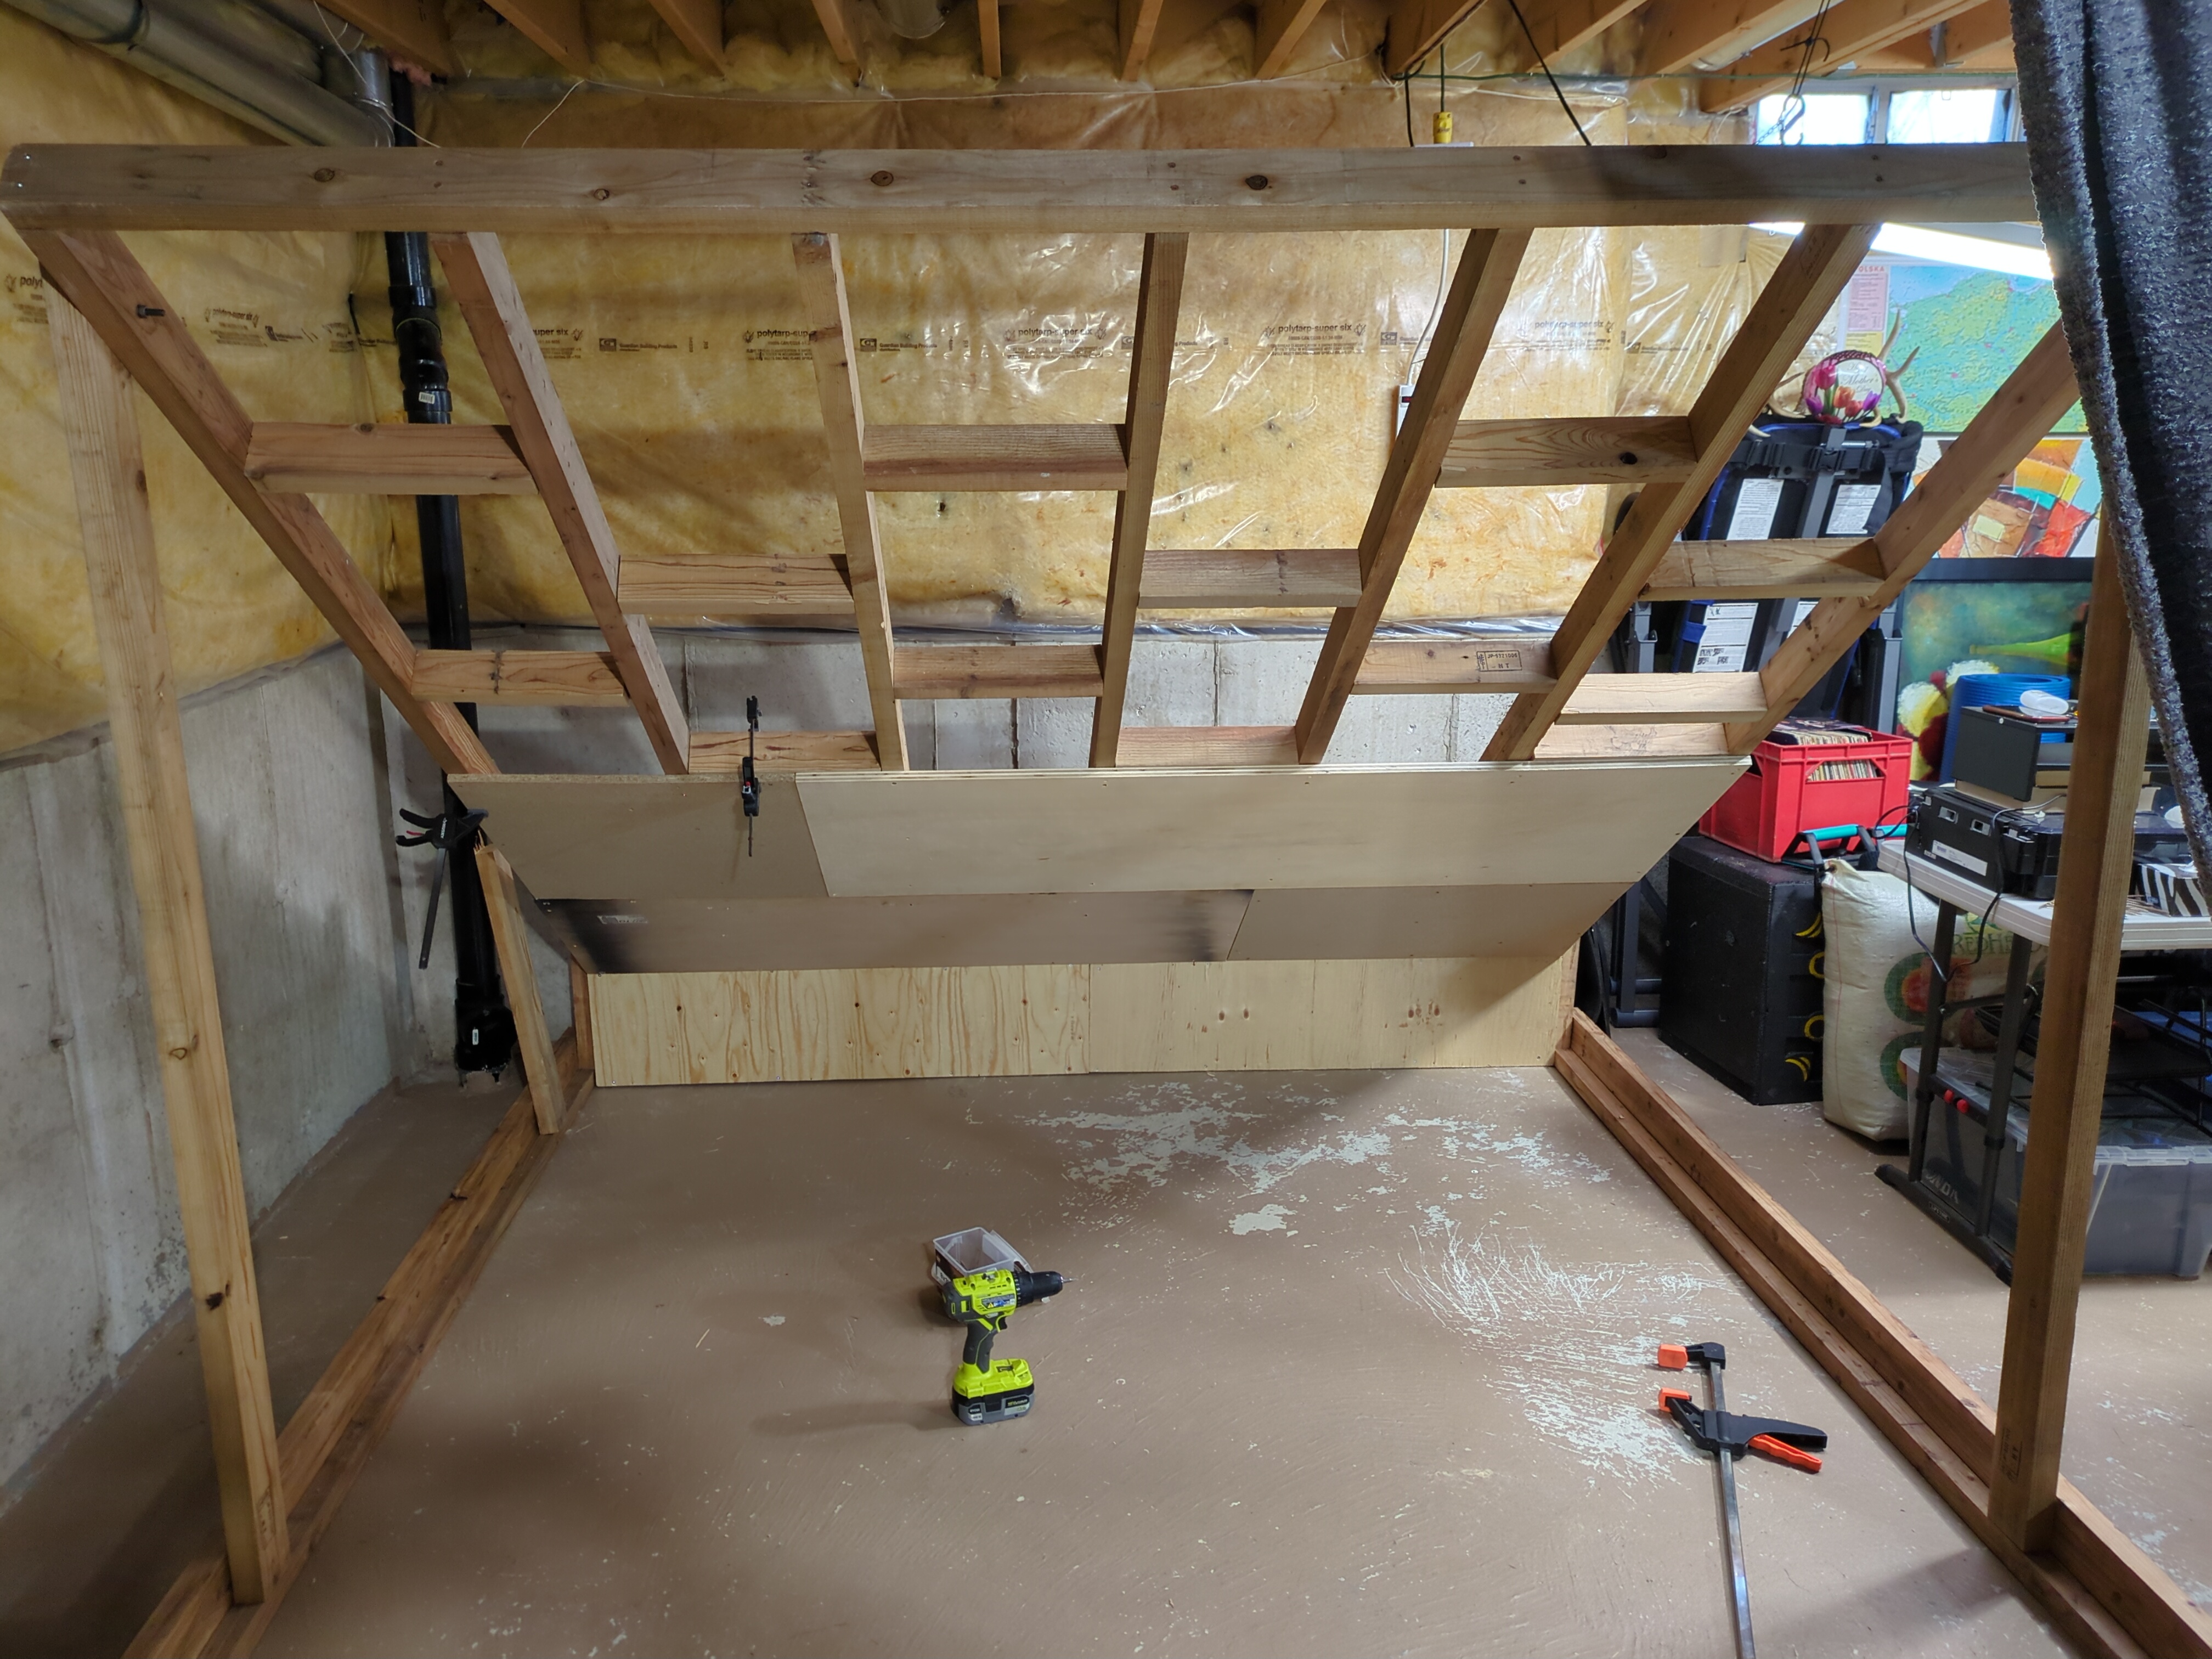
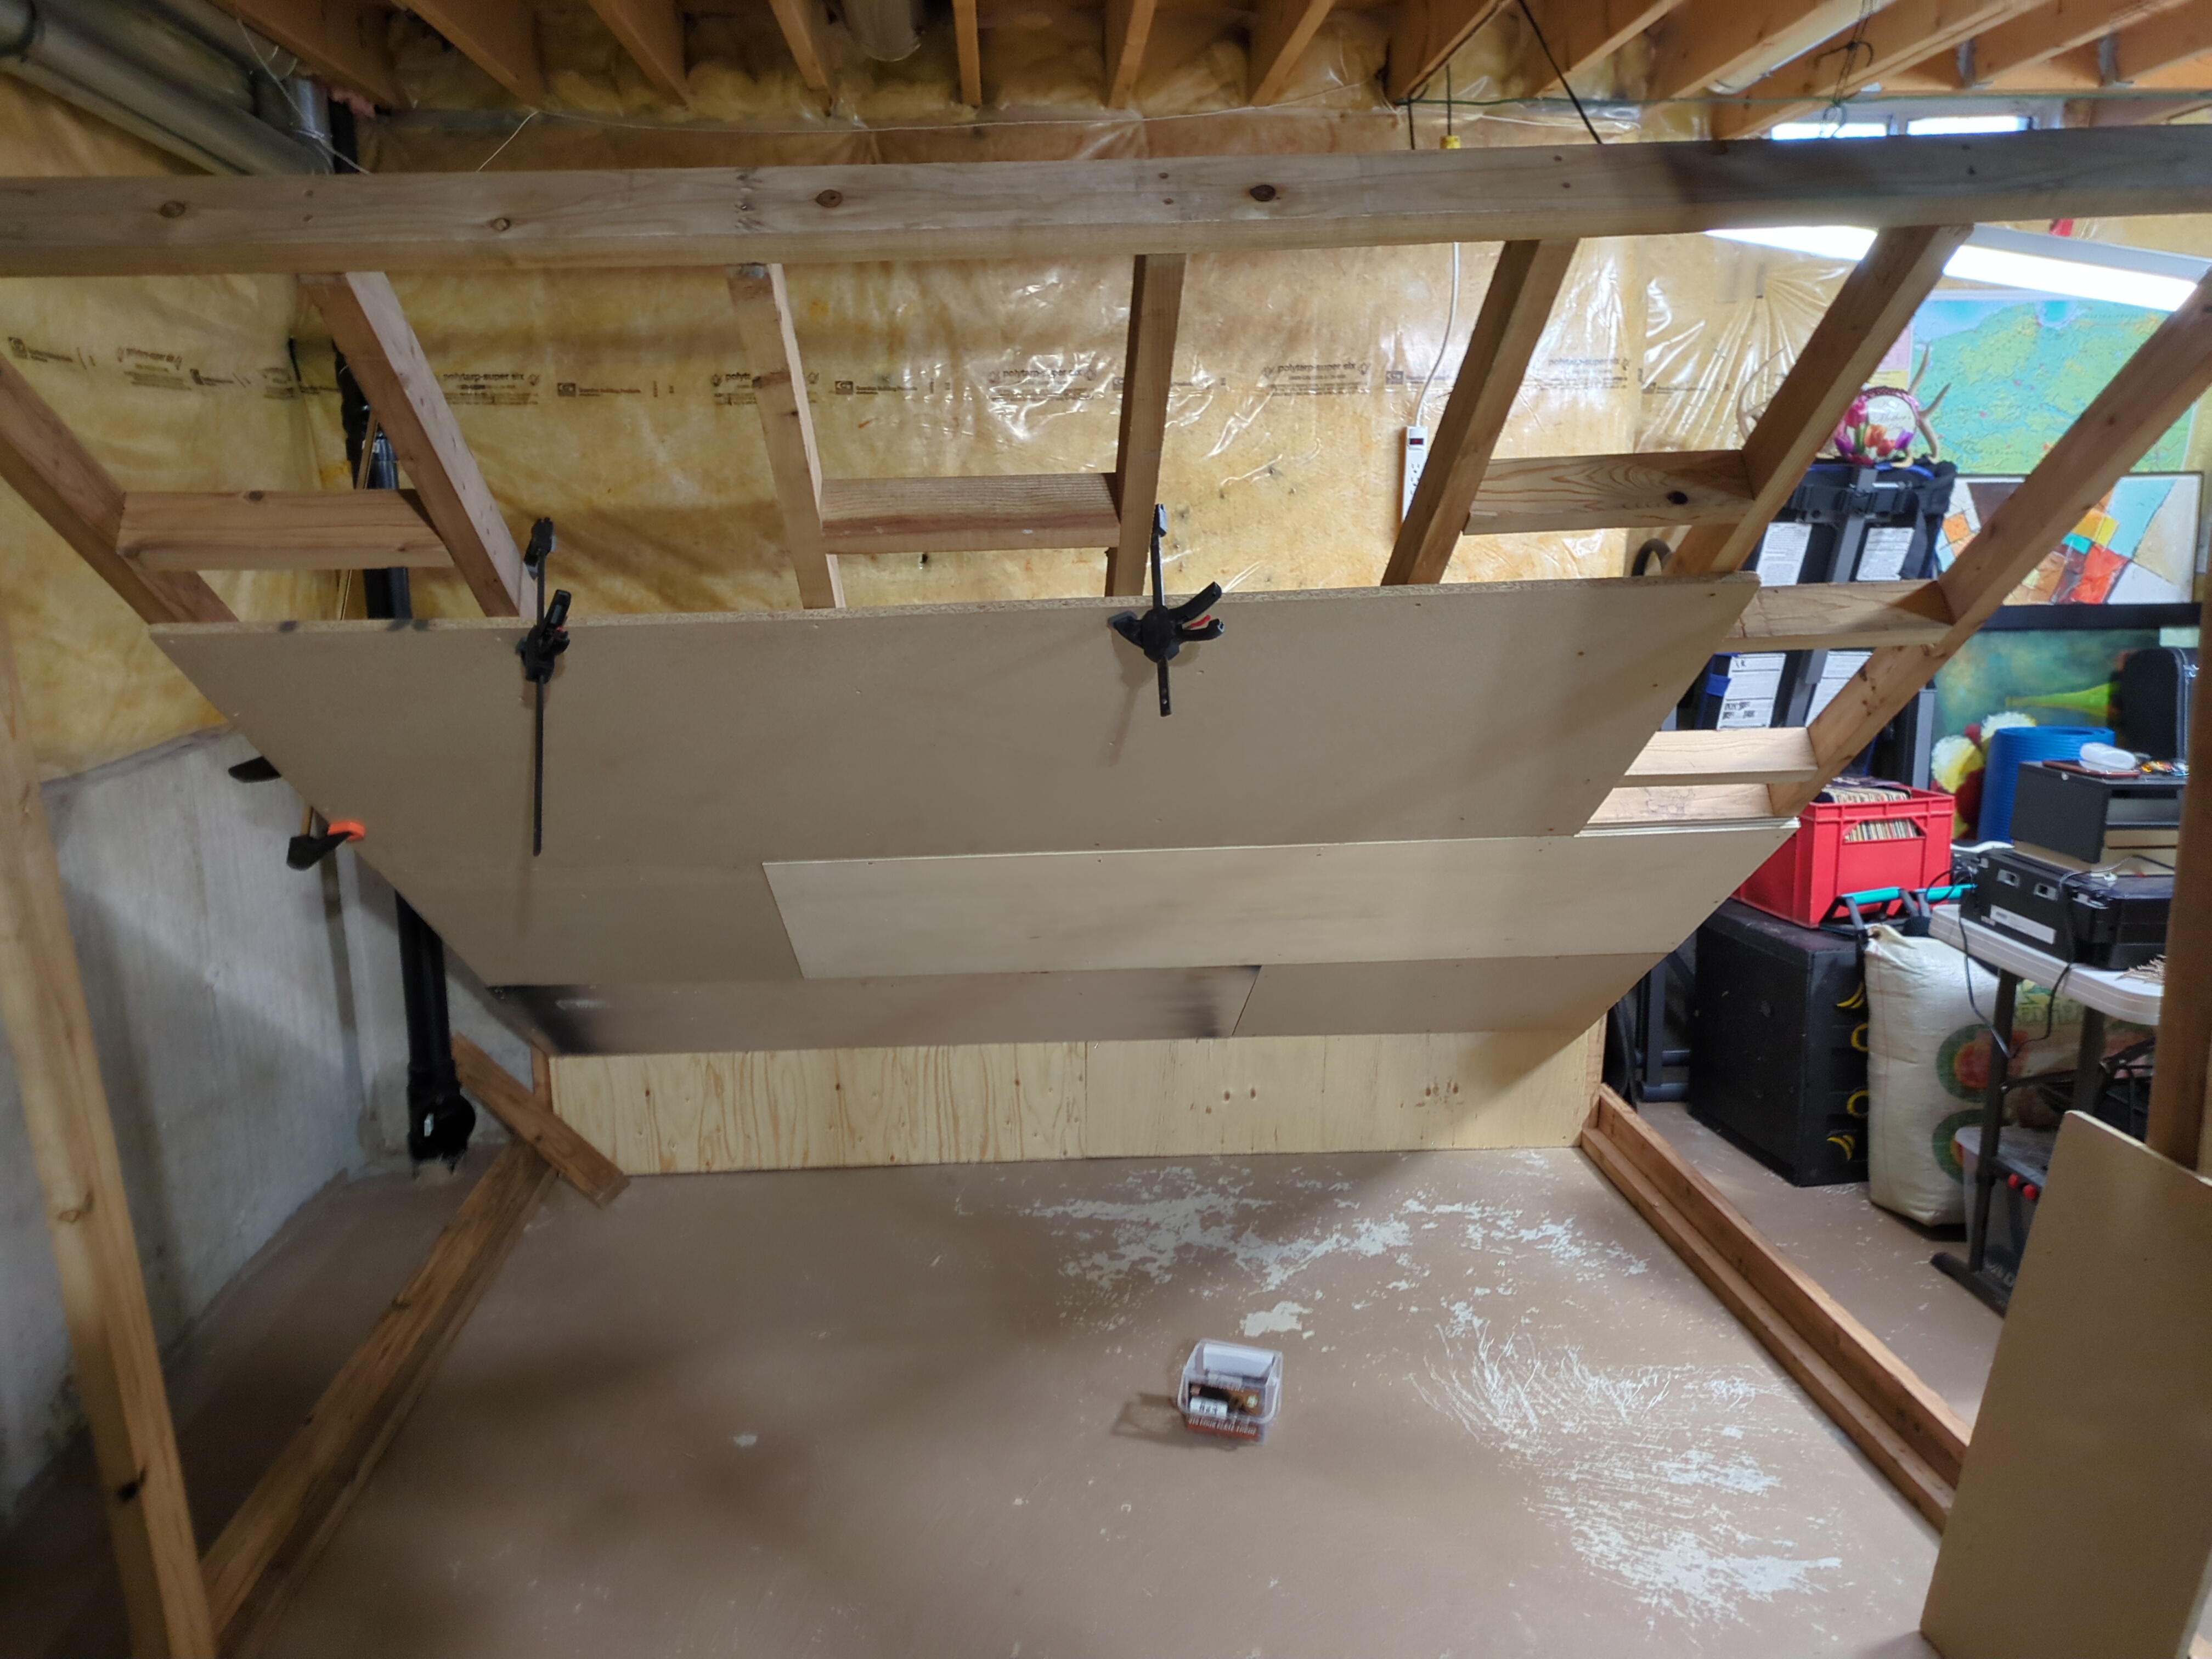
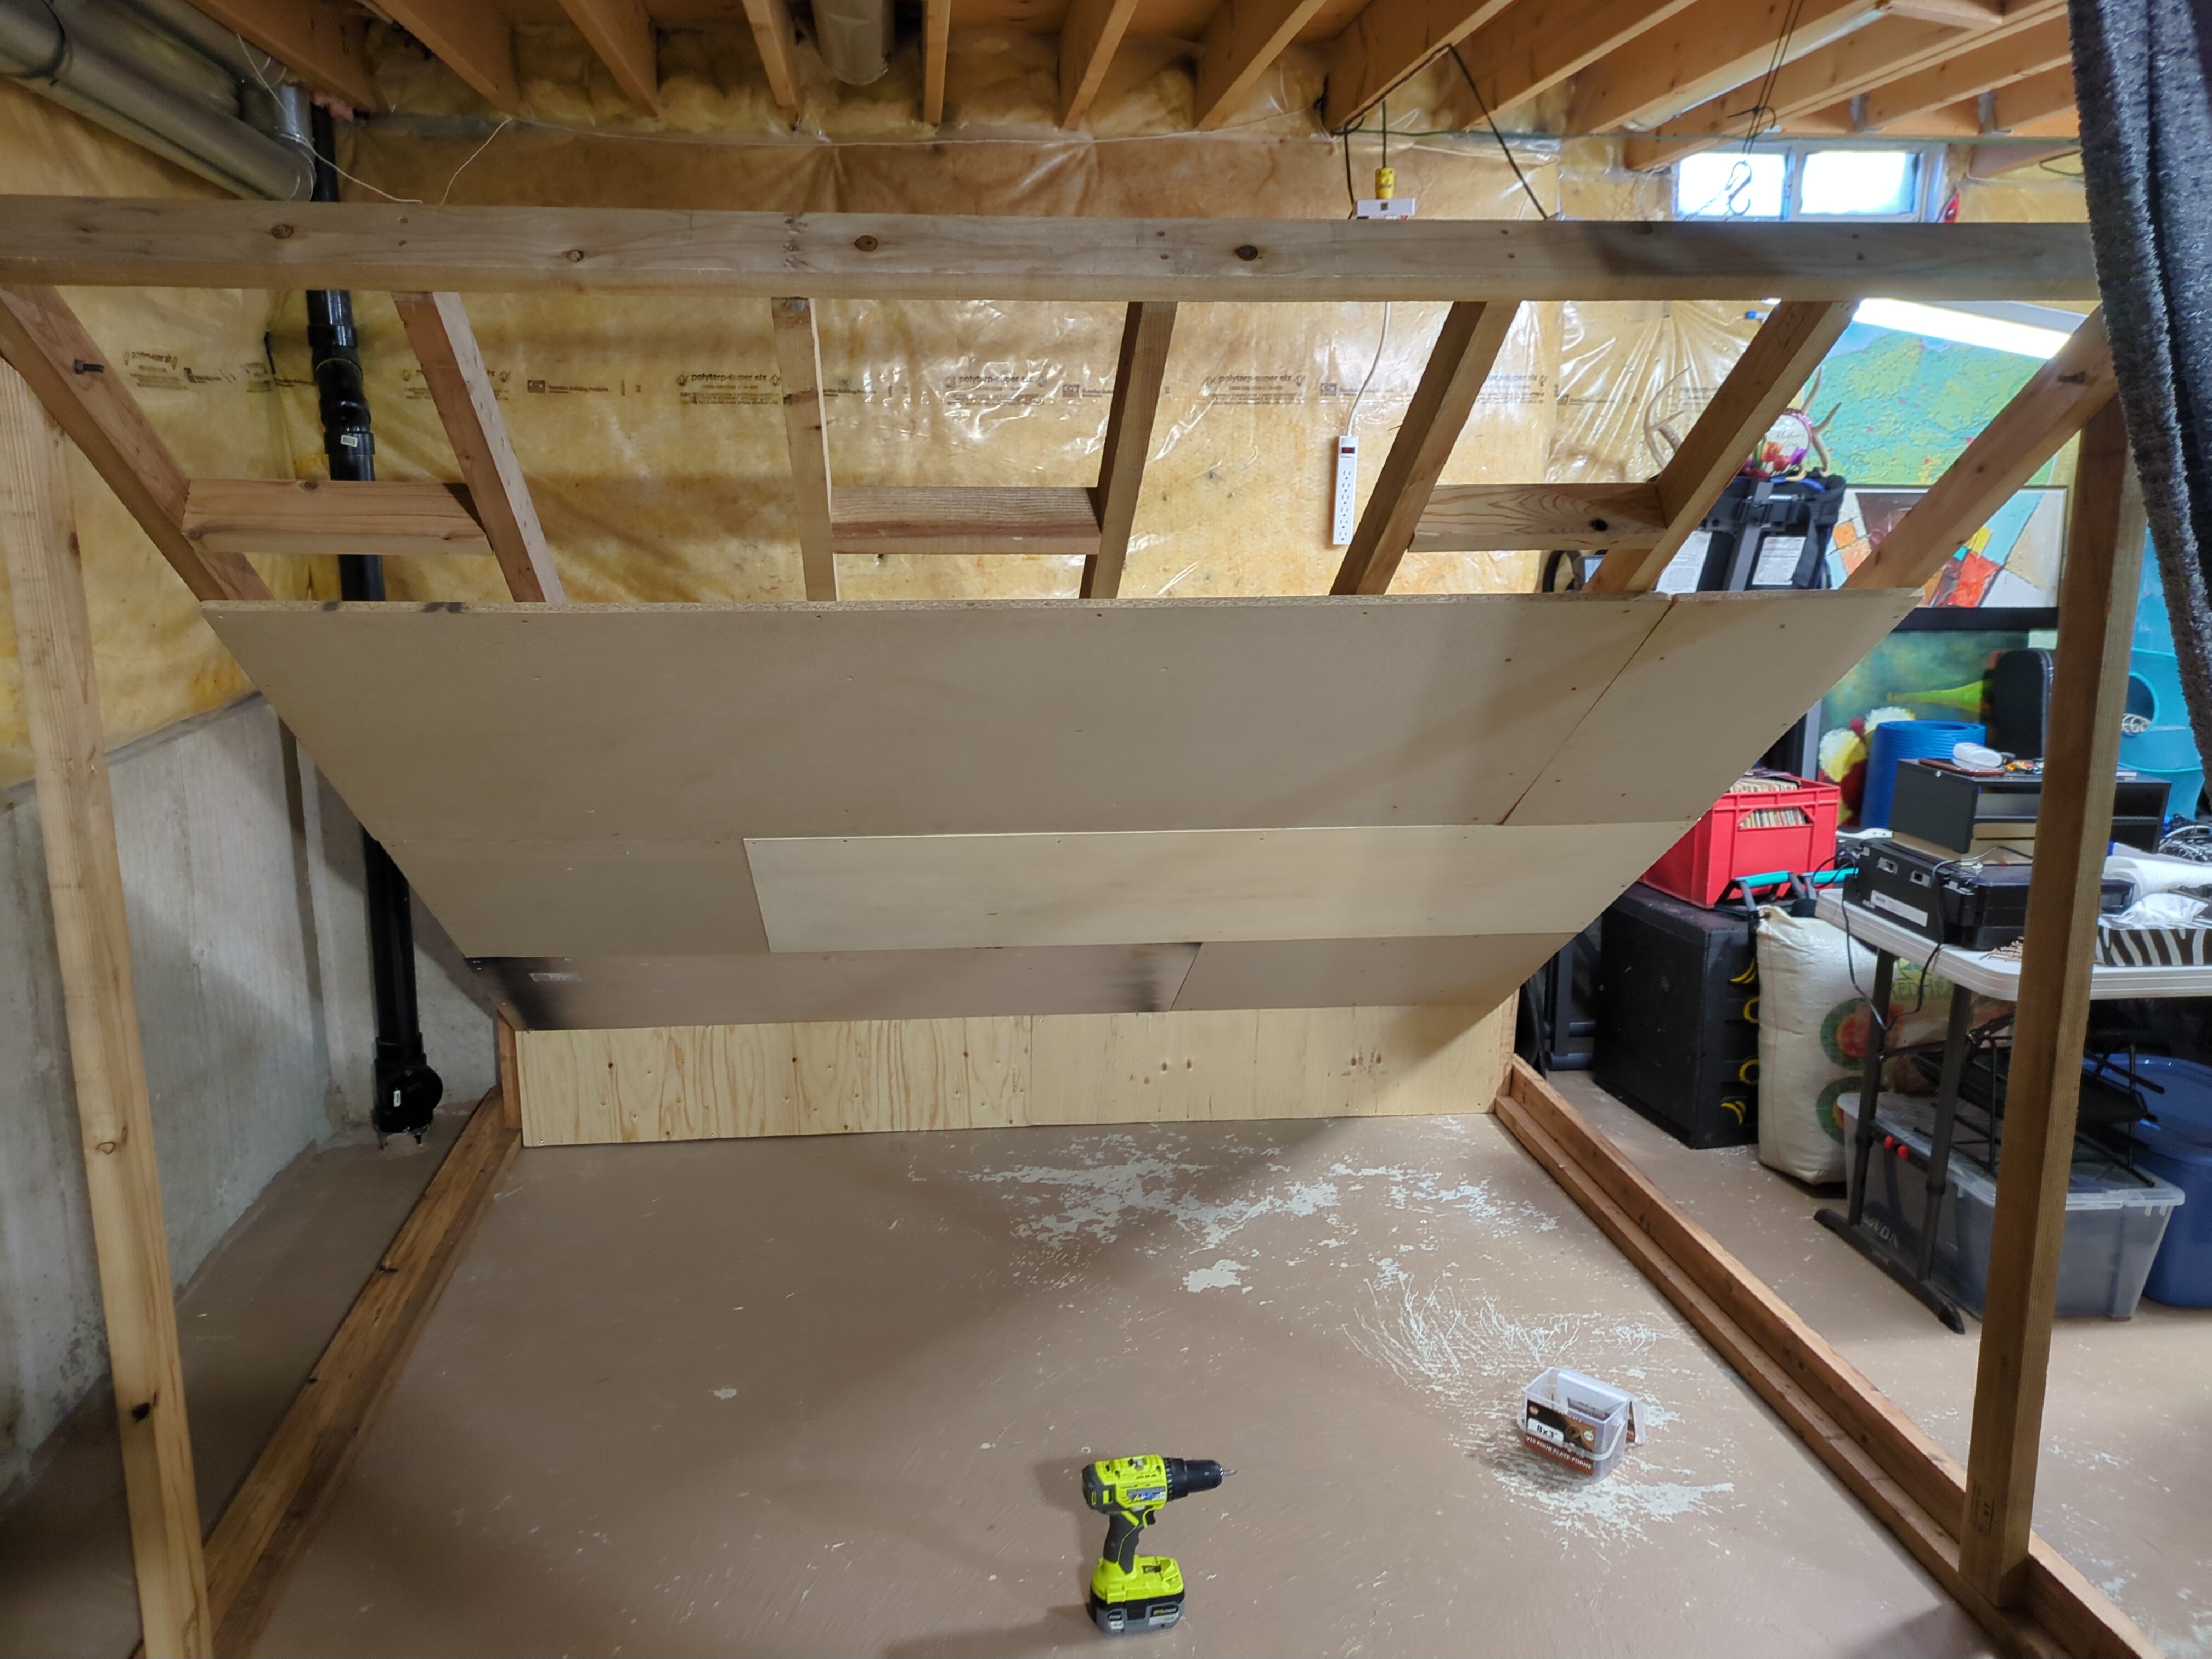

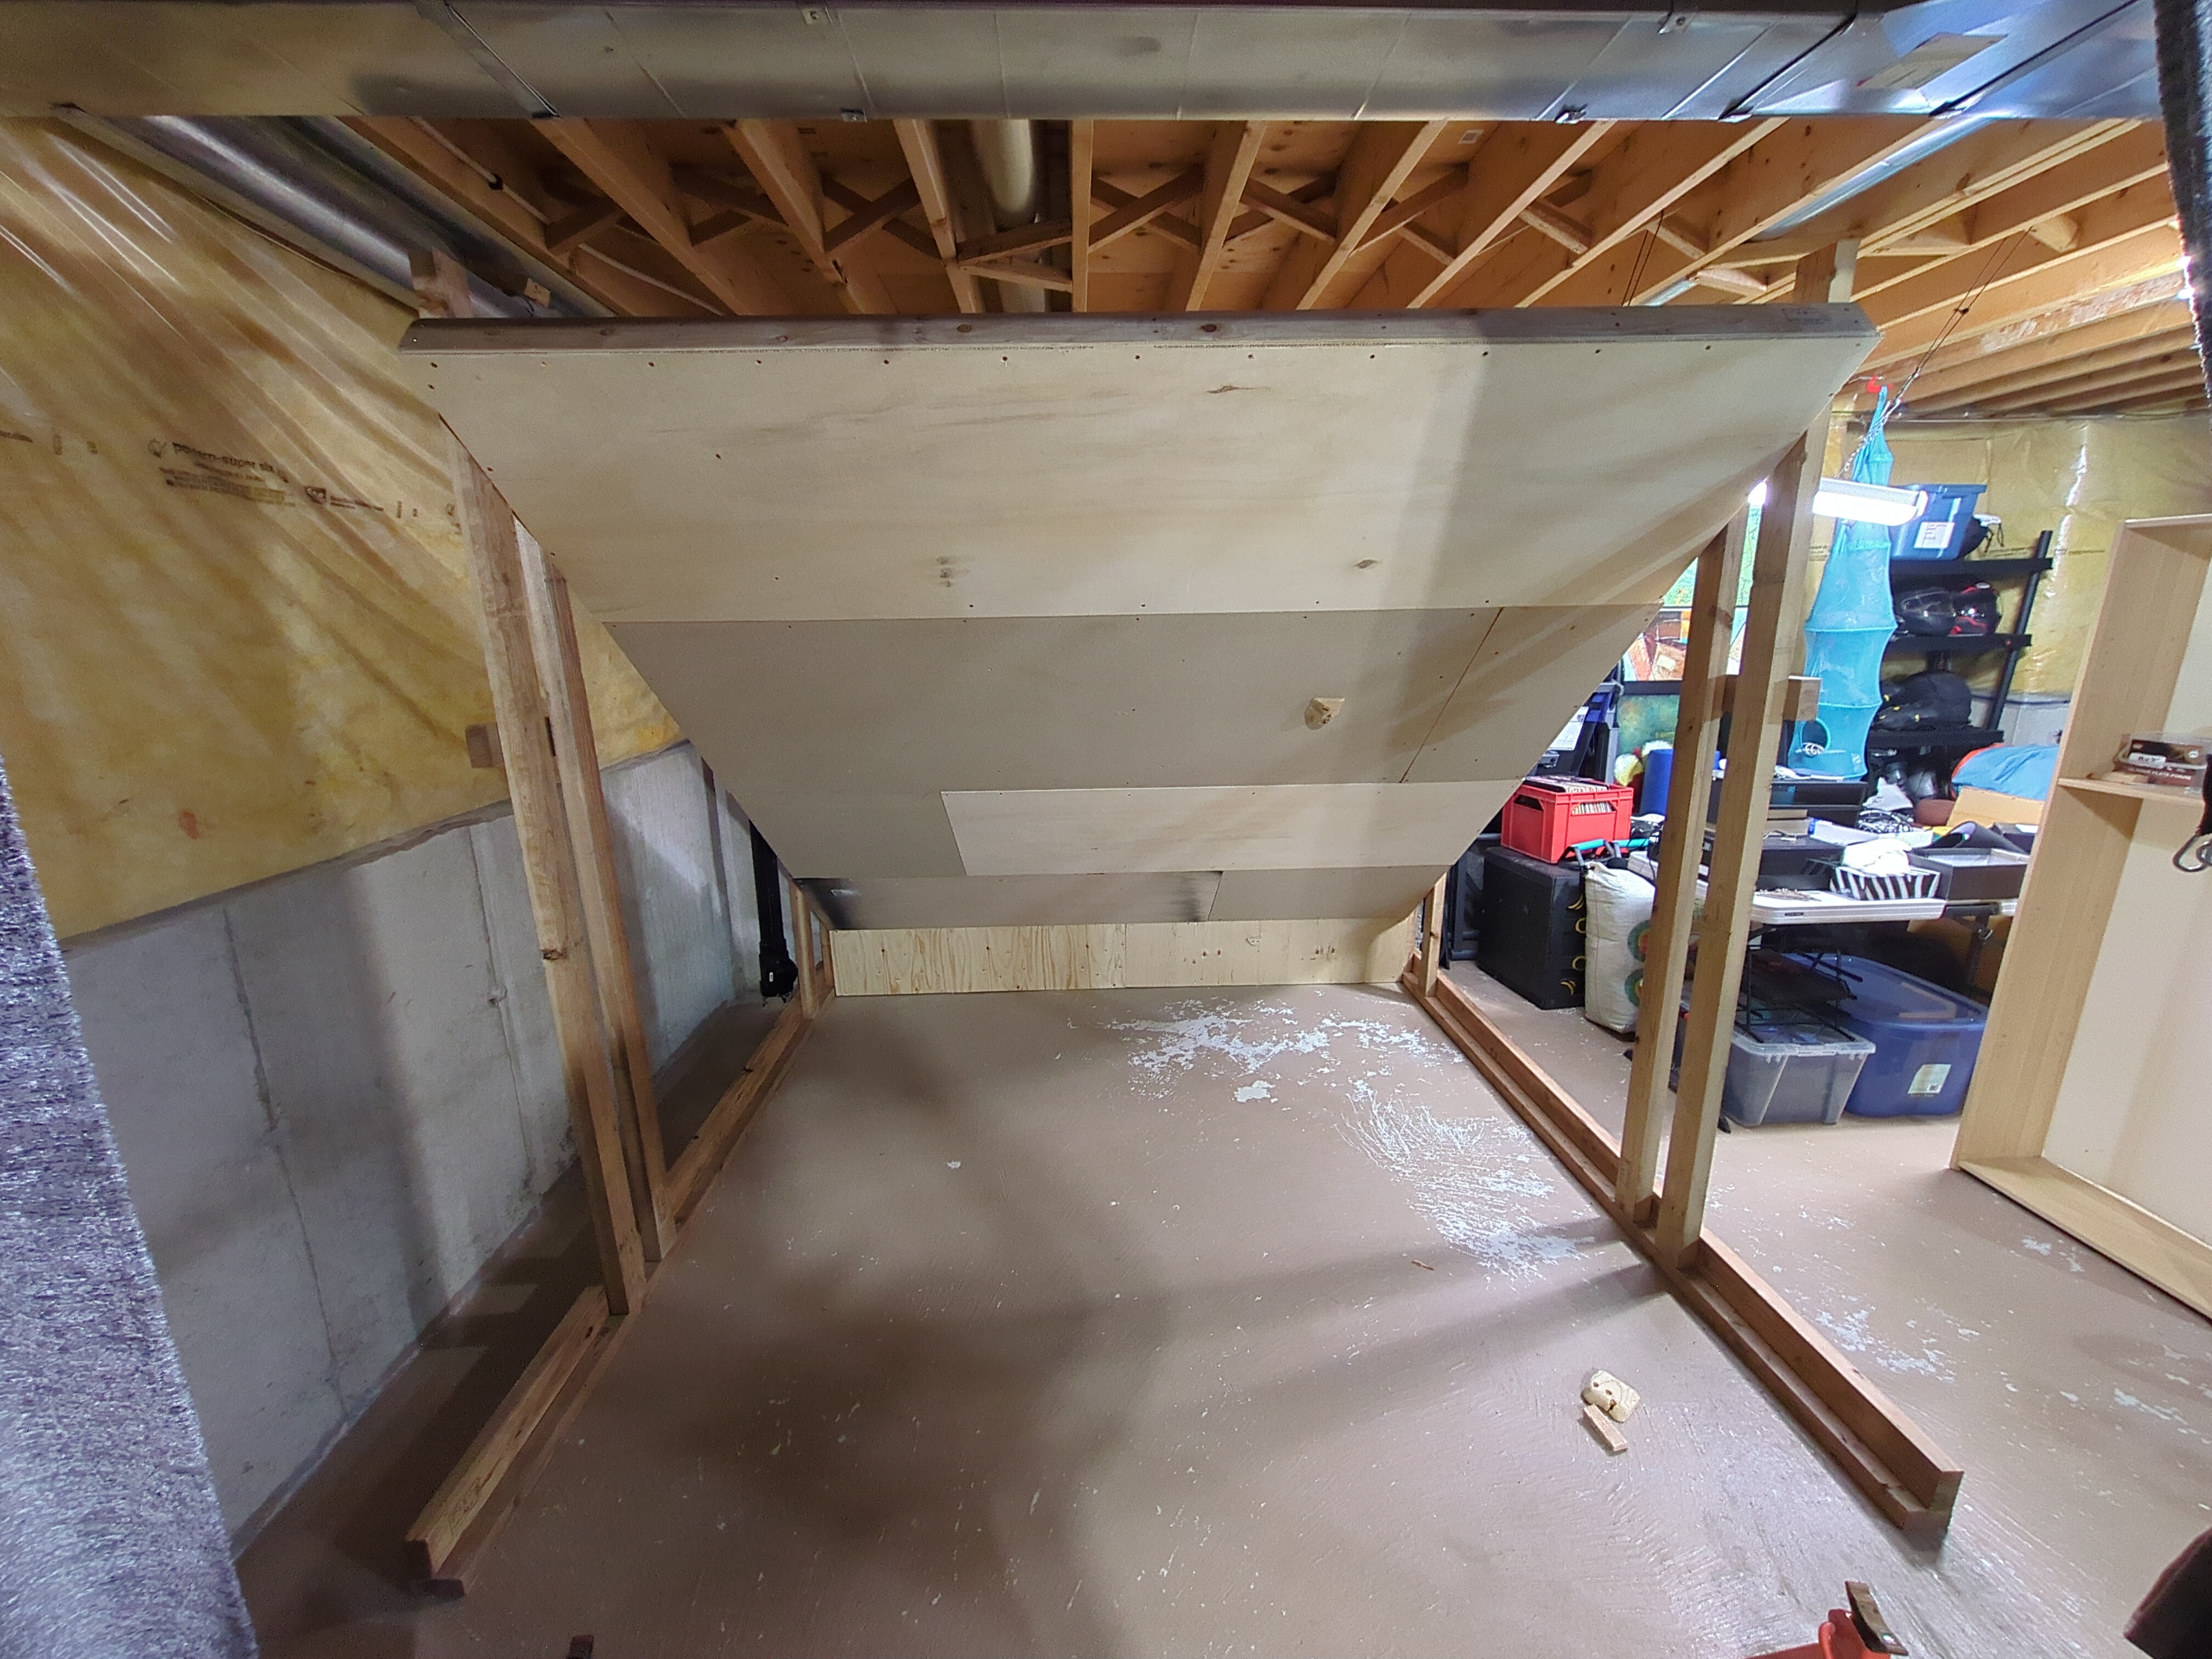
Wow, that’s more or less a board. I tried hanging to test it for stability, and it was decent.
Fixing the Angle
Although the board is on hinges, it is fixed in place for actual climbing. First, we make sure we get an appropriate angle. At first, I miscalculated and got an angle of 53° when I was aiming for 45°. I tried again and did better. Here is the diagram:

To fix the angle, I just screwed the pieces into the 2x4s that are bolted into the frame. I then reinforced this by adding some more 2x4s with bolts.
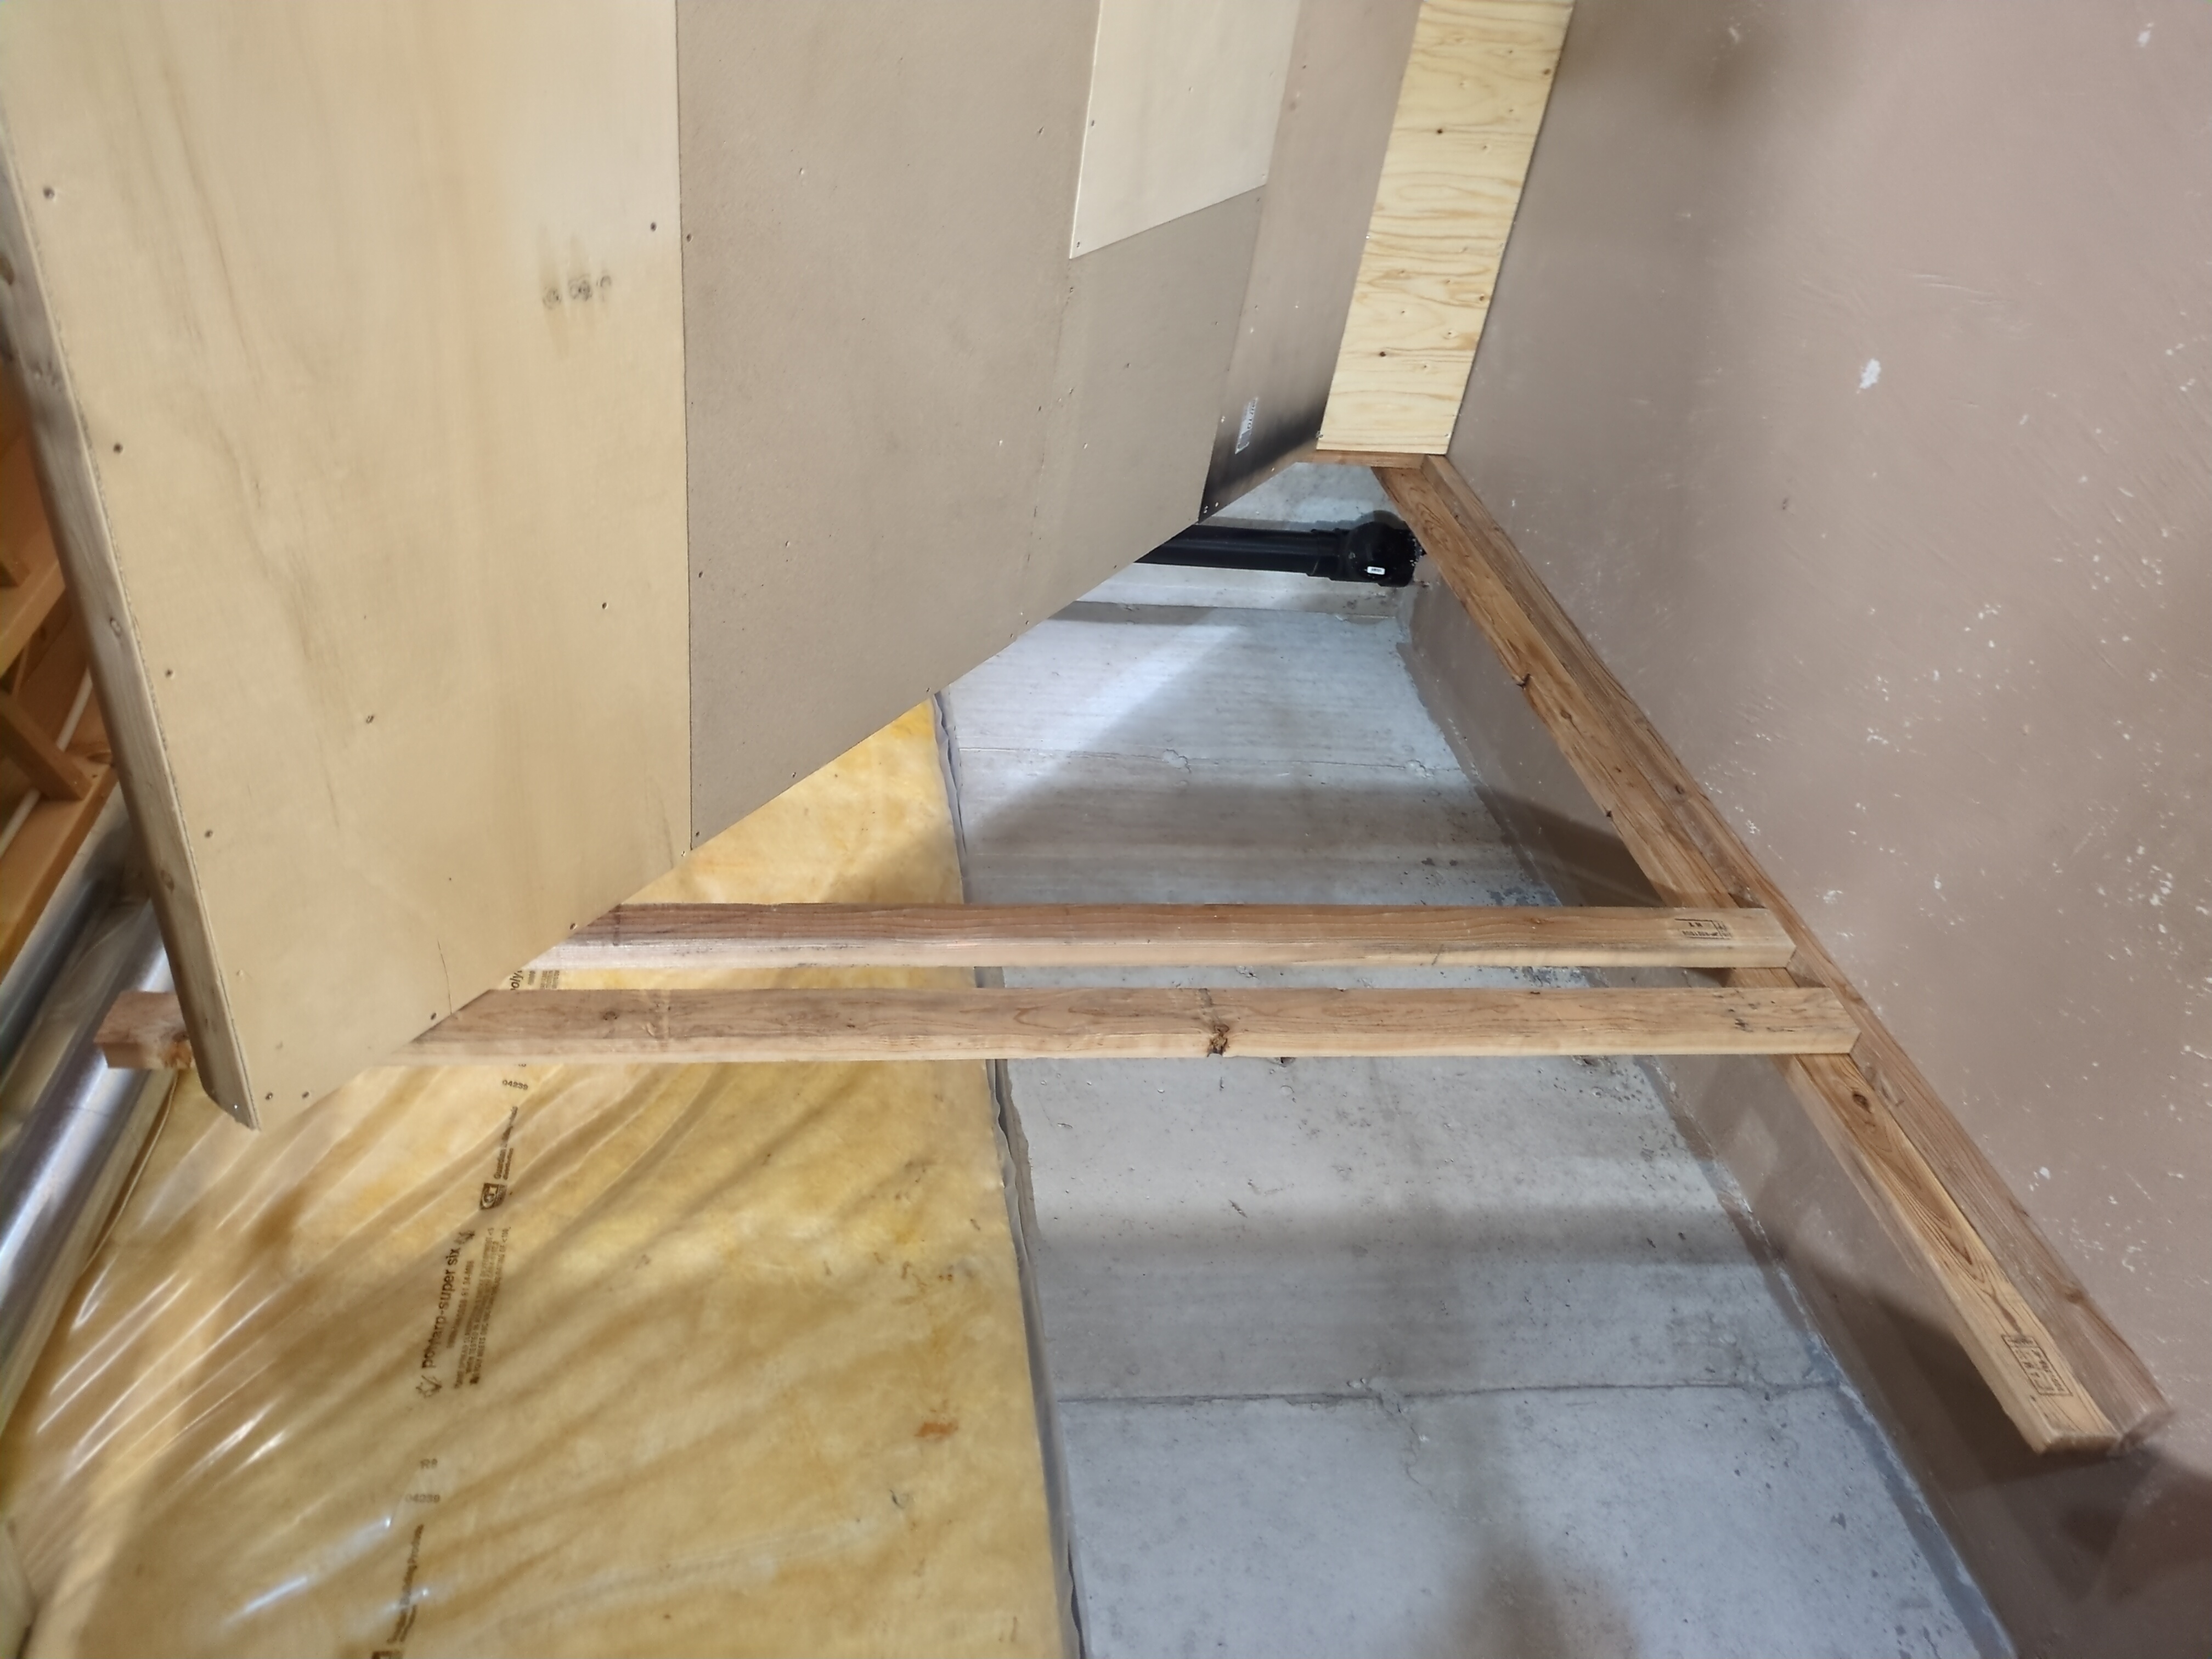

I also added one closer to the kickboard.
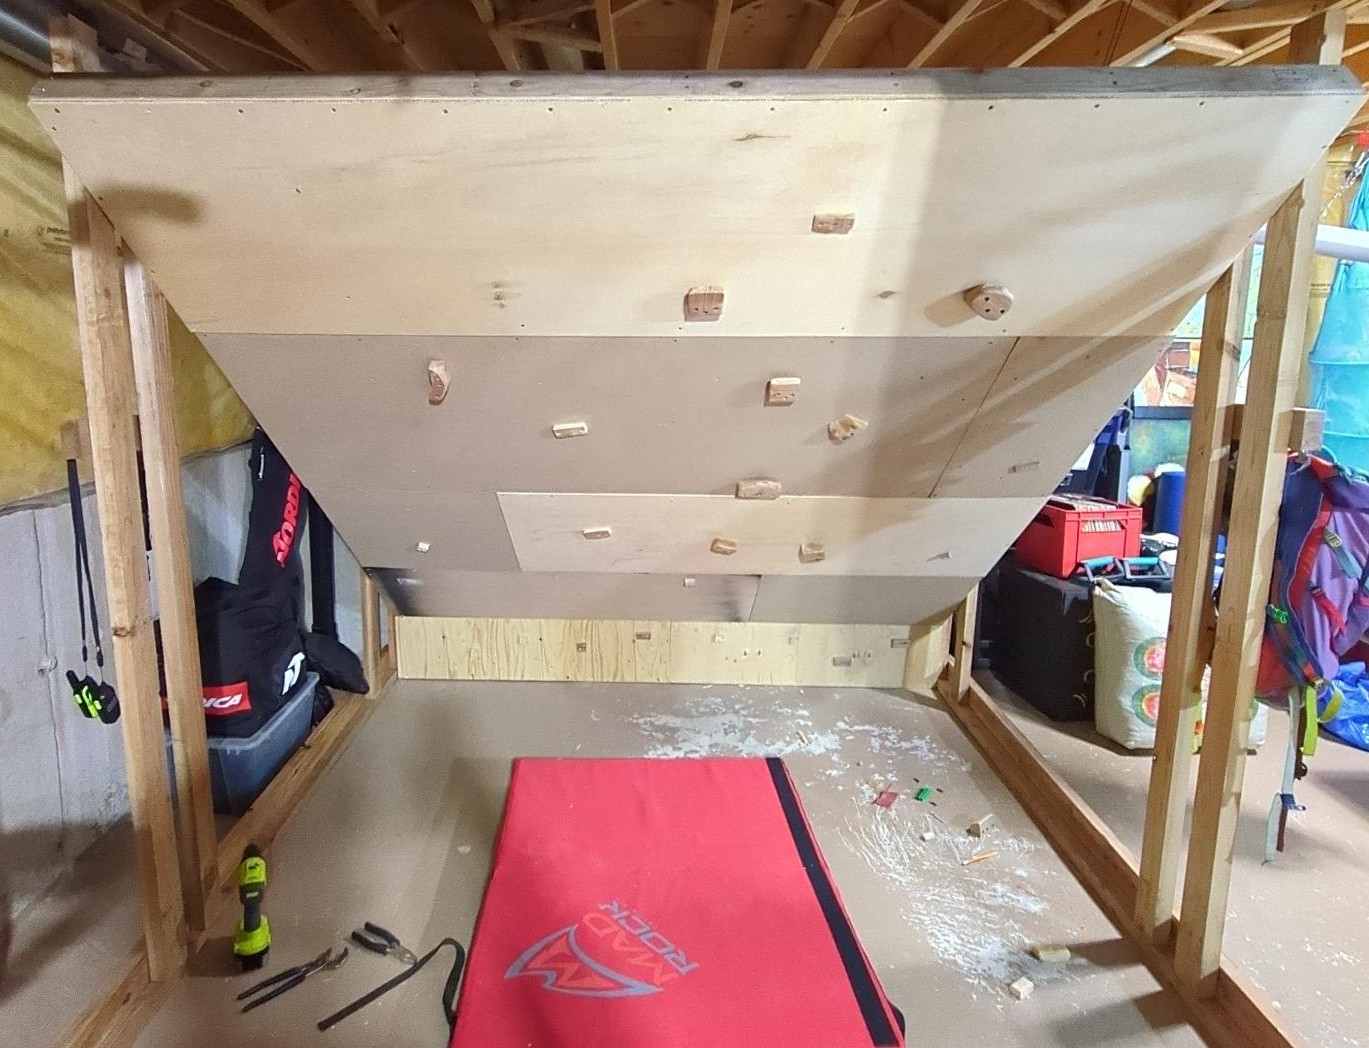
Now, the final product:
The holds
Here we explain what I did for holds. Most home climbing walls use T-nuts. They make it easy to bolt holds on and move them around repeatedly. That is the standard approach, and for many walls it is probably the best approach. I chose to use homemade screw-on holds exclusively. Two of the main reasons for building this board were to learn and to use some of the spare wood that was lying around. I also didn’t want to spend too much money because I wanted to see how cheaply I could do this. So homemade screw-ons seemed like the best fit.
The main advantage is simplicity, along with the flexibility and personalization of the layout. The trade-off is that screw-on holds are less modular, although I plan on treating this more like a spray wall with homemade holds. Moving them around repeatedly can chew up the plywood over time, and large bolt-on holds are not an option unless I later add T-nuts or threaded inserts. For now, this is fine. My goal is not to build a commercial-style adjustable training board; it is to build a useful home wall that I can climb on regularly.
After some experimentation, it is clear that you need to be careful when making your own holds. The first jug I made blew up in my face, and I’ve had pieces/chunks break off of others.
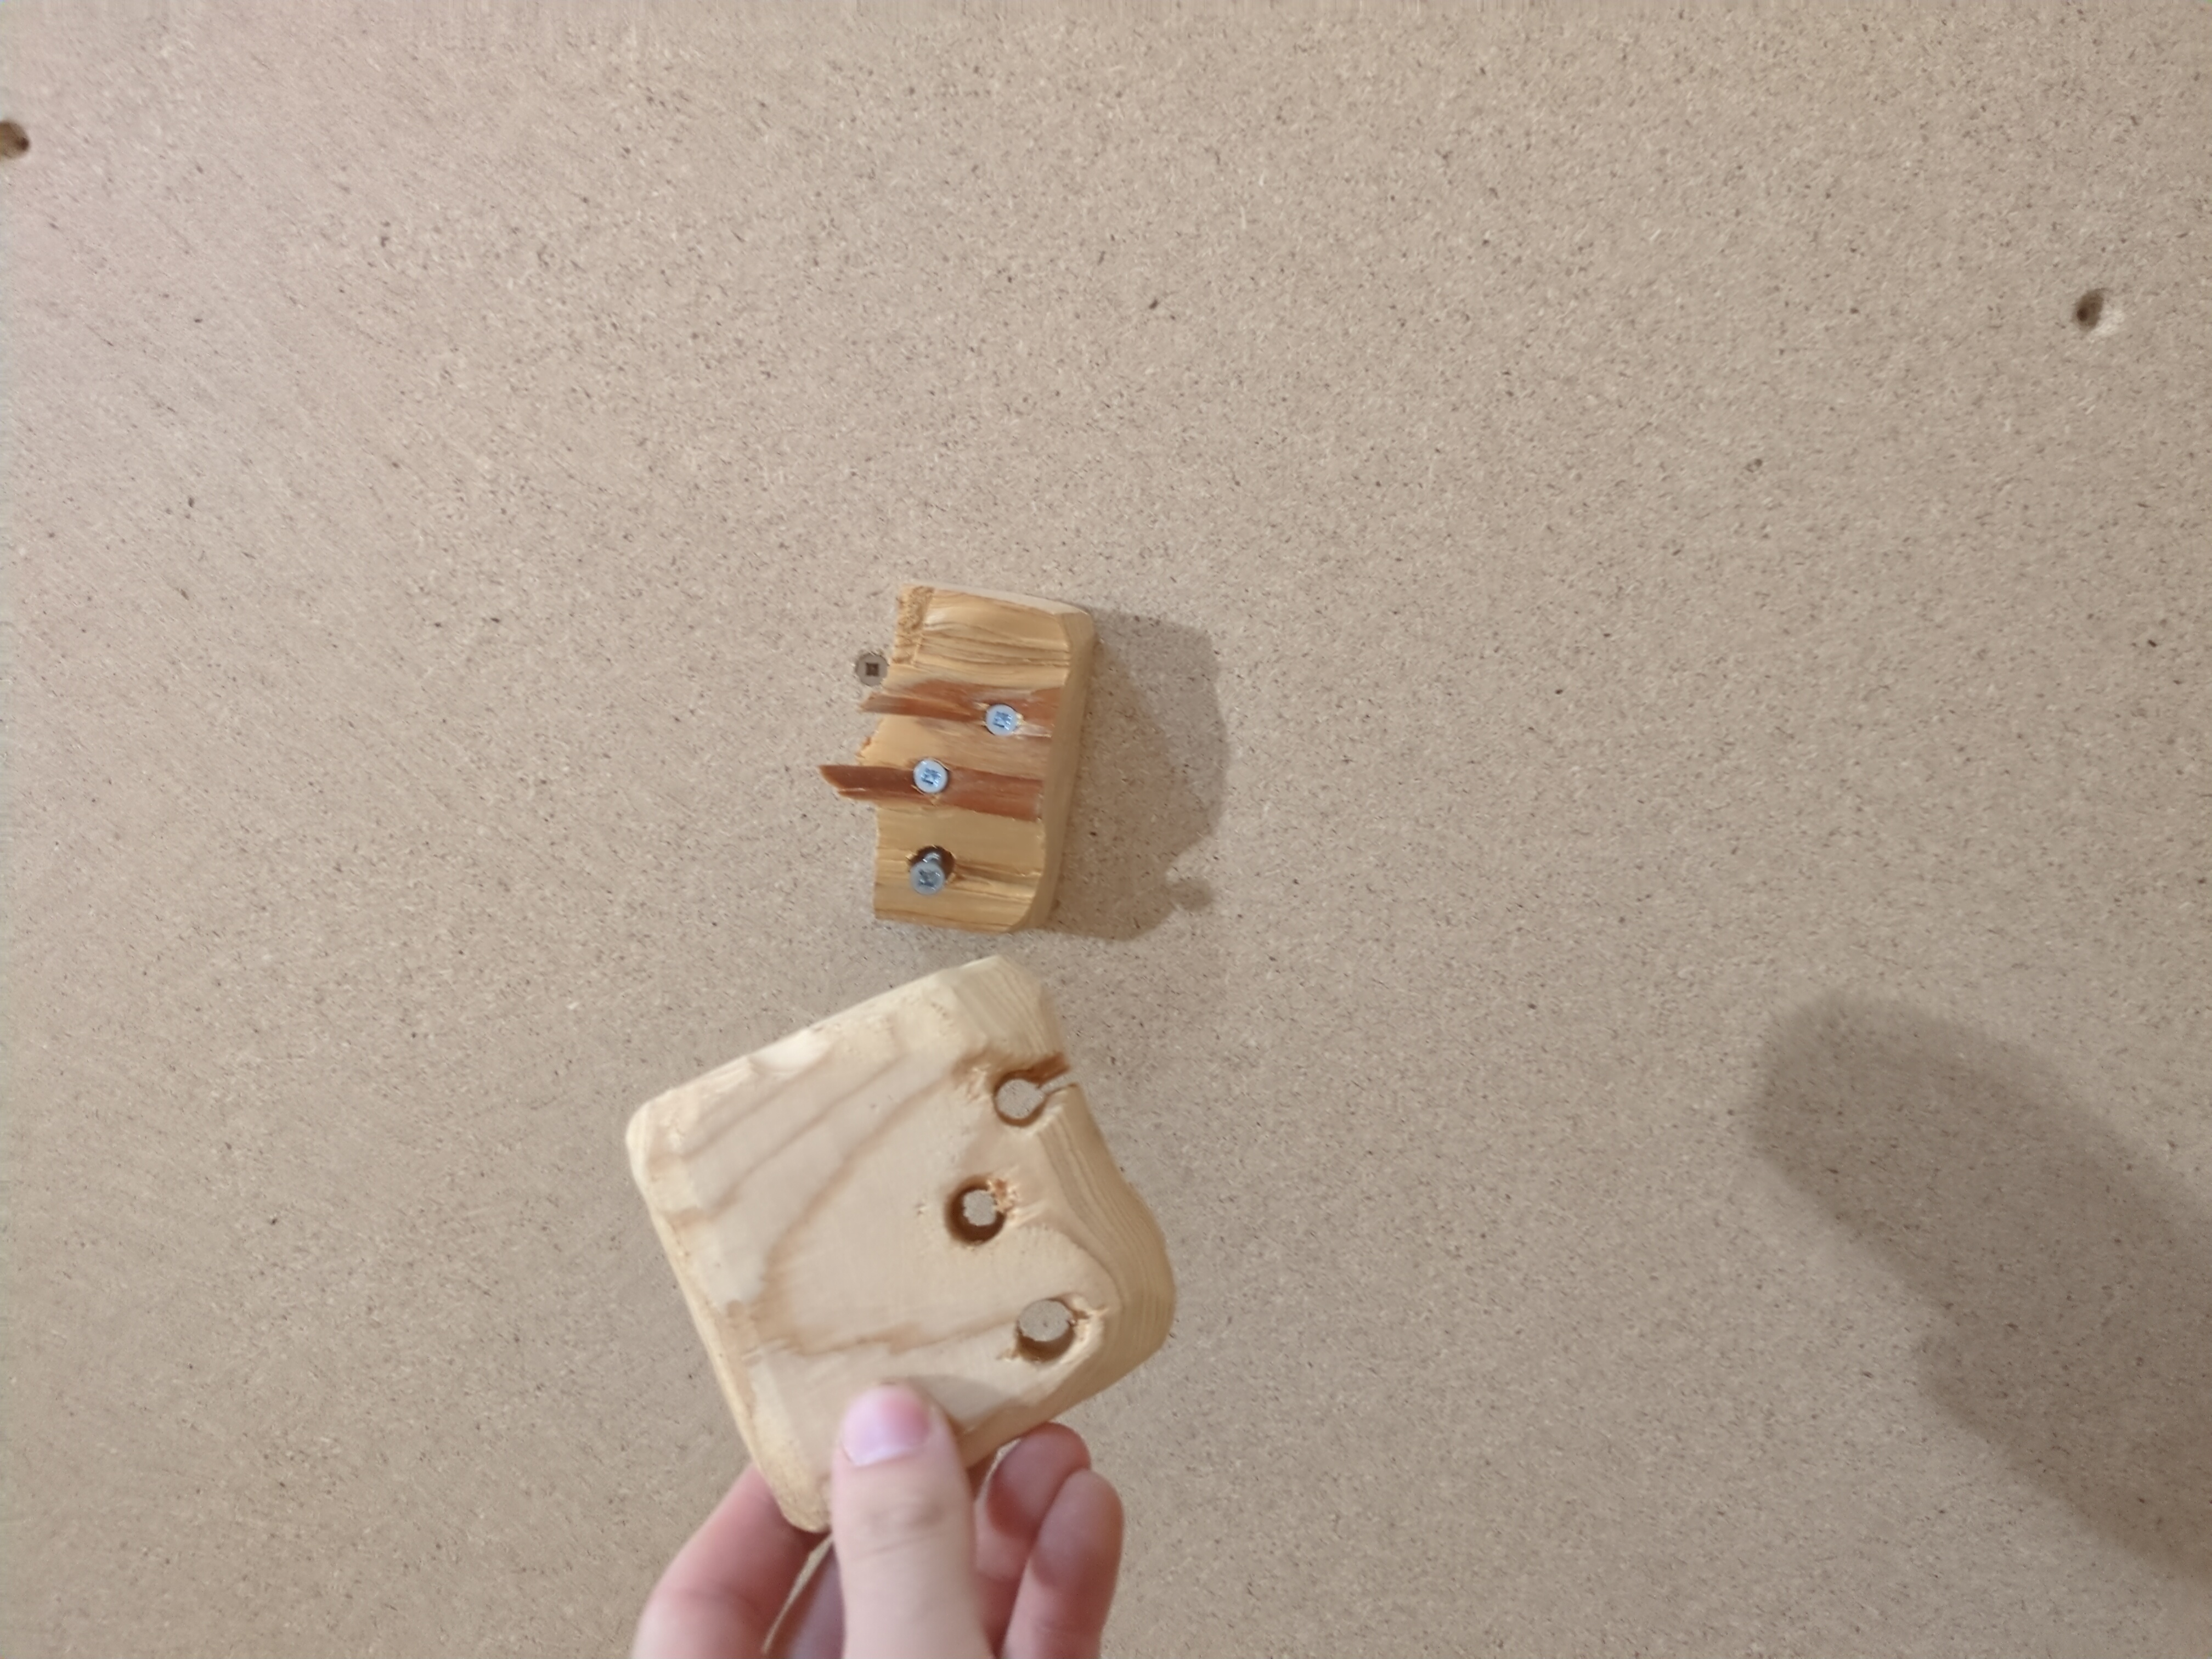
The main deficiency with this specific hold, I think, was that I just cut a spot for my hand at a 90° angle. I’ve been smoothing out my holds more, and it makes a world of difference.
Glad to see the plywood can take my weight and some bouncing with no problem, though.
If I choose to move holds around, one other thing I want to watch over time is how well the plywood holds up after repeated hold changes. I still have many holds to make before I get to moving any around, though.
Landing Zone
The landing zone is arguably one of the most important parts of the whole project. Landing on the hard basement floor is out of the question. Initially, I just took the cushions from the sofa that was down there to test things out.
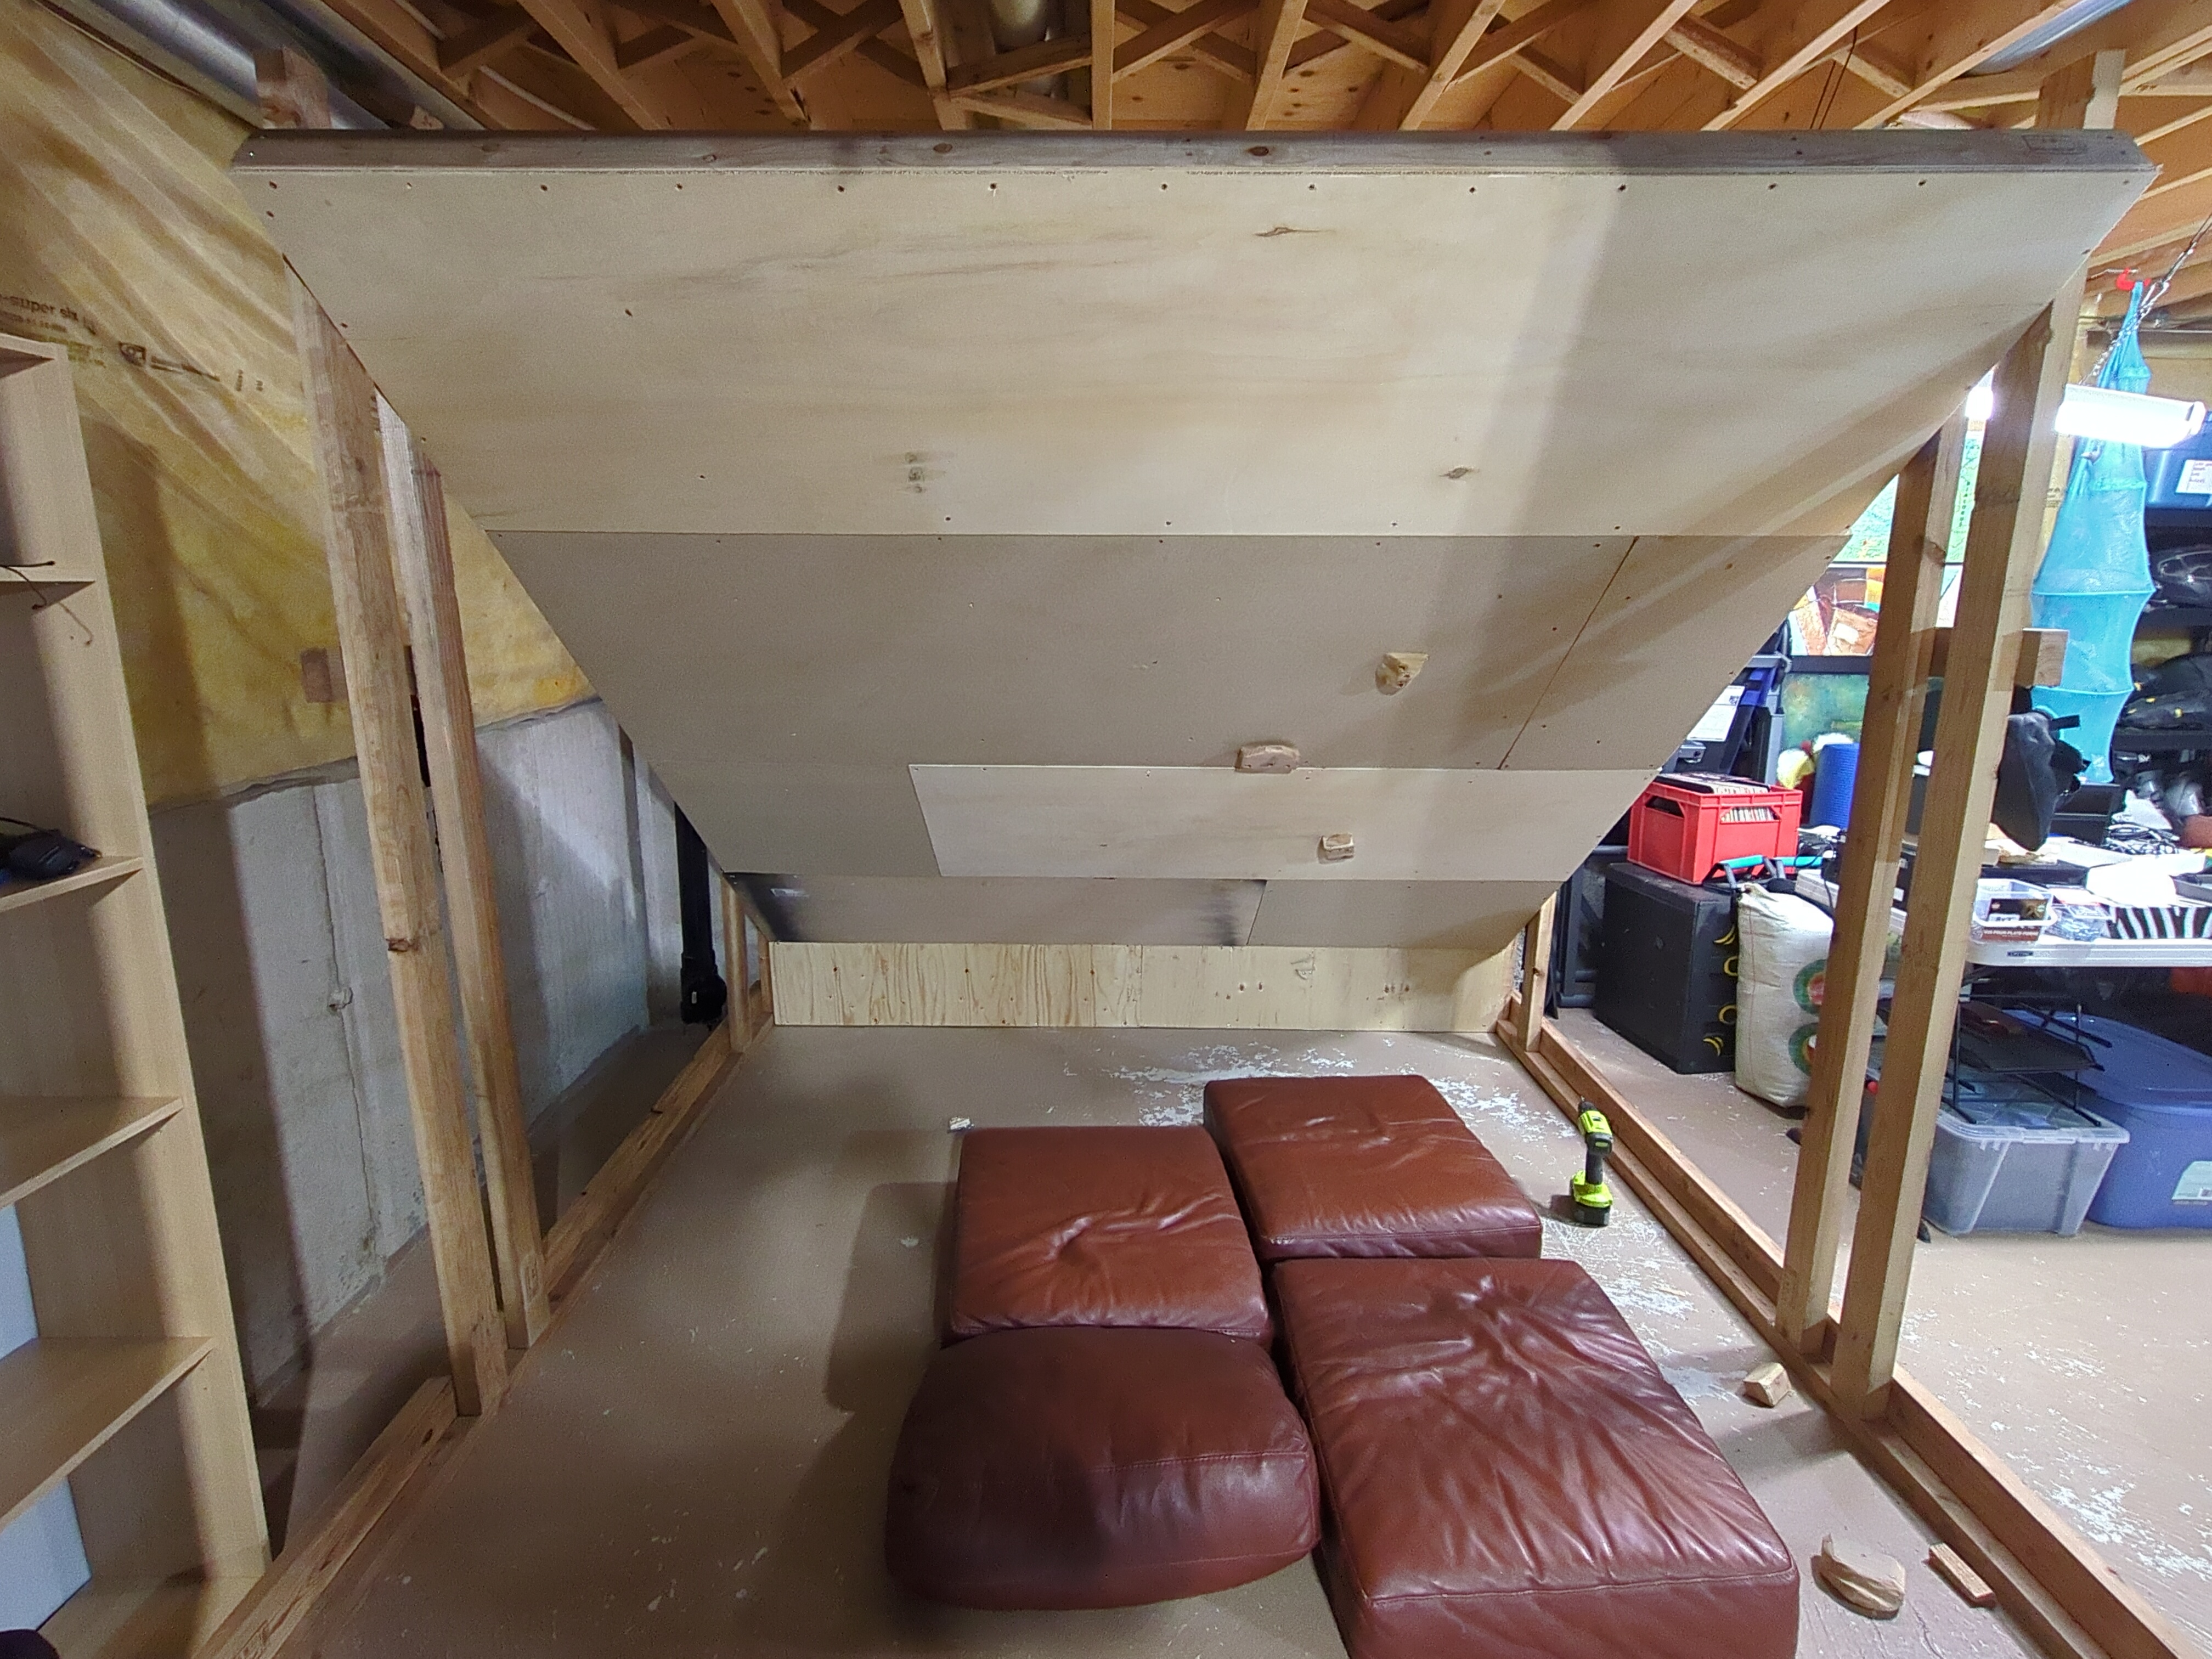
I’ve since upgraded and put a single crash pad there. I plan on getting another.
Materials & Tools
Materials
Here is the rough materials list.
| Item | Quantity | Notes |
|---|---|---|
| 2x4 lumber | ~24 pieces | There are 11 main 2x4s for the frame and kickboard, plus 2 at the bottom of each side and 2 holding up the frame on each side. I also cut about 5 or 6 shorter pieces to fit between the longer pieces. |
| Plywood | ~72 sq ft | Most of it is 3/4" plywood, with a few slightly thinner pieces used to fill gaps. I would not recommend going thinner than 3/4" for the main climbing surface. Get a partner to help put it up. |
| Hinges | 6 hinges | Used for the kickboard-to-main-board connection. The hinges allow rotation, but the bracing carries the actual climbing loads. |
| Screws | lots | I used 3" deck screws for most of the frame assembly and general construction. |
| Crash pads | 2 crash pads | Used for the landing surface. Falling directly onto concrete is obviously out of the question, and I plan to add more padding. |
| Misc. hardware | ~6 bolts + washers | Used for reinforcing and connecting parts of the support structure. |
Tools Used
The tools I used were:
- drill
- circular saw
- belt sander
- hand saw
- clamps
- measuring tape
- workbench
- safety glasses
- hearing protection
Final Thoughts
This project changed a lot from the initial plan, but I think that was probably inevitable. A home climbing wall is constrained by the actual room, the actual budget, the actual materials available, and the amount of complexity one is willing to tolerate.
In the end, I wanted something that was:
- climbable
- freestanding
- compact enough for the basement
- steep enough to be useful
- almost free
- simple enough to actually finish
The result is a freestanding pseudo-adjustable board: a hinged wall fixed at one main angle, with a 1 ft kickboard, an approximately 8 ft × 8 ft main climbing surface, and screw-on holds instead of T-nuts.
It is not the perfect board. But it’s my board, and it does the job.
Things I Would Do Differently
Things I would reconsider:
- Use consistent plywood. 3/4" is fine.
- Use T-nuts after all.
- Make the angle adjustment easier.
- Use better lumber.
- Pre-drill more carefully.
- Make the kickboard a lot thicker. The ground isn’t quite flat in my basement, so sometimes you feel something move and it can feel a little funny.
Future Board
In the future, when my life is more stable and certain, I would like to make another board. For that board, in addition to the above, I would do the following:
- add volumes
- paint or seal the wall
- add LED problem lighting (e.g., create or use something like https://github.com/PegorK/PeggyBoard)
- add a benchmark circuit list
- add a coordinate system
- add better padding
- make the angle easier to change
- make it bigger